80-0067-00-MO-RevF 2017-10-03 SunTech CT40 User Manual | 16
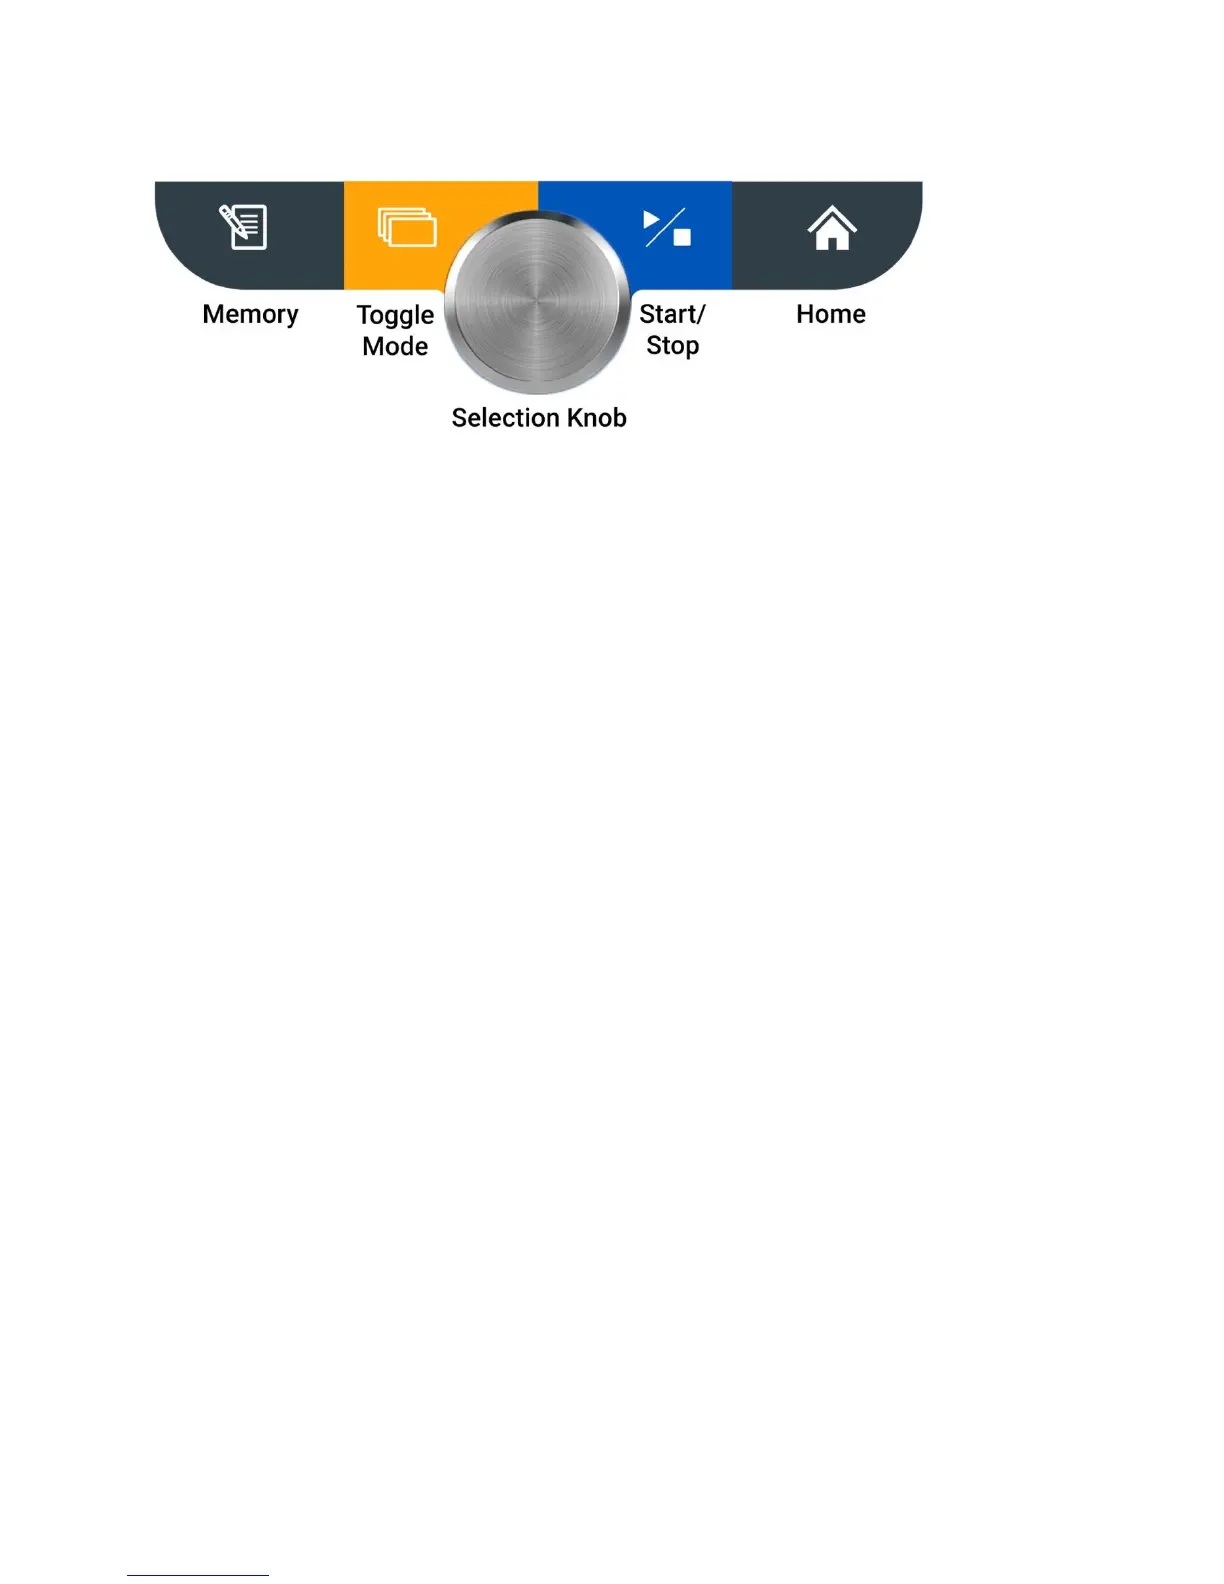
Control Panel
Memory Button
Press this button to enter Memory Mode and to store, view or delete saved measurements.
Save Current Reading: A quick press gives the user an option to save the patients reading, suggested to be done after
each reading.
Access Previous Reading: A long press (holding the button down for 4 seconds) gives the user the option to access
the bank of prior readings. Please see Section 4 to read more about the saving and accessing saved readings.
Toggle Mode Button
Press this button to toggle between three different BP measurement modes: Single Measurement, Averaging
Measurement and Auscultatory SphygMode.
A quick press gives the user an option to switch between BP measurements modes.
A long press (holding the button down for four seconds) gives the user the option to switch between pediatric or
adult mode. More information on switching from adult to pediatric mode can be found in Section 5.
Selection Knob
This round knob rotates clockwise and counterclockwise and can be pressed in to select different options on the
SunTech CT40. This button can be used to change parameters and to set the intended parameter.
Start/Stop Button
Press this button to start or stop a BP measurement.
Home Button
Pressing this button returns you to the single measurement mode.
Monitor Setup
Press the power button to start Initial Power-up. The display will gradually illuminate over a 3-second period. If this is
the first time the device has been turned on since it left the factory or since the device was set to factory defaults, the
user will be prompted to set the time and date in the following format: MM.DD.YYYY HH:MM:SS. The “MM” portion
of the field will flash first, prompting you to set the month. Turn the Select Knob to select the appropriate month and
press the Selection Knob. Then the next field, “DD” will flash, prompting you to select the day, and so on and so forth,
until you have set “SS” for seconds.
After setting the date and time, the device is ready to use! It is possible to make additional configuration changes to
the SunTech CT40 using the Advanced Configuration Application.