WIT.RU
WIT Company – поставка серверов, СХД,
сетевого оборудования, лицензионного ПО
Chapter 5: Advanced Serverboard Setup
5-35-2
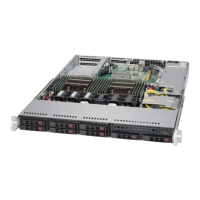
SUPERSERVER 1028R-TDW User's Manual
5-2 Processor and Heatsink Installation
Notes
• Always connect the power cord last and always remove it before adding, re-
moving or changing any hardware components. Make sure that you install the
processor into the CPU socket before you install the CPU heatsink.
• If you buy a CPU separately, make sure that you use an Intel-certied multi-
directional heatsink only.
• Make sure to install the serverboard into the chassis before you install the CPU
heatsinks.
• When receiving a serverboard without a processor pre-installed, make sure that
the plastic CPU socket cap is in place and none of the socket pins are bent;
otherwise, contact your retailer immediately.
• Refer to the Supermicro web site for updates on CPU support.
Release
the lever labeled "Open 1st"
Installing a CPU
1. There are two levers on the LGA
2011 socket. First press and release
the load lever labeled "Open 1st".
OPEN 1st
OPEN 1st
Release
the lever labeled "Close 1st"
2. Press the second load lever labeled
"Close 1st" to release the load plate
from its locked position.
3. With the second lever fully
retracted, gently push down on
the "Open 1st" lever to loosen
the load plate. Lift the load
plate with your ngers to open it
completely.
4. Pop the plastic cap marked
"Warning" out of the load plate.
5. Holding the CPU carefully above
the socket, orient the CPU so
that all keys and edges will t
the socket.
OPEN 1st
IMPORTANT!
Caution: You can only install the CPU into the socket in one direction. Make sure
that the CPU is properly inserted into the socket before closing the load plate. If it
does not close properly, do not force it as it may damage your CPU. Instead, open
the load plate again and double-check that the CPU is aligned properly.
6. Carefully lower the CPU straight
down into the socket. Do not
move the CPU horizontally, and
do not rub the pins of the socket.
This may damage the CPU or
the socket.
Open the
load plate.
 Loading...