WIT.RU
WIT Company – поставка серверов, СХД,
сетевого оборудования, лицензионного ПО
Chapter 5: Advanced Serverboard Setup
5-215-20
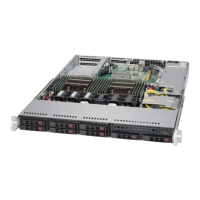
SUPERSERVER 1028R-TDW User's Manual
IPMB I
2
C
A System Management Bus header
for the IPMI slot is located at JIPMB.
Connect the appropriate cable here
to use the IPMB I
2
C connection on
your system.
IPMB I
2
C
Pin Denitions (IPMB)
Pin# Denition
1 Data
2 Ground
3 Clock
4 No Connection
Serial Link SGPIO
Pin Denitions
Pin# Denition Pin Denition
1 NC 2 NC
3 Ground 4 DATA Out
5 Load 6 Ground
7 Clock 8 NC
T-SGPIO 1/2 & 3-SGPIO 1/2
Headers
A SGPIO (Serial Link General Pur-
pose Input/Output) header is provided
on the serverboard. to support the
onboard SATA ports. See the table on
the right for pin denitions.
Note: NC indicates no connection.
Unit Identier Switch/UID LED
Indicators
A rear Unit Identifier (UID) button
(JUIDB1) and a rear LED (LE1) are
located near the LAN 2 port on the
rear of the serverboard. The front
UID switch is located at pin 13 of JF1,
while the front UID LED is located
on pin 7 of JF1. When you press
the front or the rear UID switch, both
front and rear UID LEDs will turn on.
Press the UID button again to turn off
the LED indicator. The UID Indicators
provide easy identication of a system
installed in a rack.
Note: UID can also be triggered via
IPMI on the serverboard. For more
information on IPMI, please refer to
the IPMI User's Guide posted on our
website at http://www.supermicro.
com.
UID Switch
Pin# Denition
1 Ground
2 Ground
3 Button In
4 Button In
UID LED
Status
Color/State Status
Blue: On Unit Identied
5-10 Jumper Settings
Explanation of Jumpers
To modify the operation of the
serverboard, jumpers can be used
to choose between optional settings.
Jumpers create shorts between two
pins to change the function of the
connector. Pin 1 is identied with a
square solder pad on the printed cir-
cuit board. See the diagram at right for
an example of jumping pins 1 and 2.
Refer to the serverboard layout page
for jumper locations.
Note: On two-pin jumpers, "Closed"
means the jumper is on and "Open"
means the jumper is off the pins.
CMOS Clear
JBT1 is used to clear CMOS and will also clear any passwords. Instead of pins,
this jumper consists of contact pads to prevent accidentally clearing the contents
of CMOS.
To clear CMOS
1. First power down the system and unplug the power cord(s).
2. With the power disconnected, short the CMOS pads with a metal object such
as a small screwdriver.
3. Remove the screwdriver (or shorting device).
4. Reconnect the power cord(s) and power on the system.
Note: Do not use the PW_ON connector to clear CMOS.
Connector
Pins
Jumper
Setting
3 2 1
3 2 1
VGA Enable/Disable
JPG1 allows you to enable or disable
the VGA port. The default position
is on pins 1 and 2 to enable VGA.
See the table on the right for jumper
settings.
VGA Enable/Disable
Jumper Settings (JPG1)
Jumper Setting Denition
Pins 1-2 Enabled
Pins 2-3 Disabled
 Loading...