WIT.RU
WIT Company – поставка серверов, СХД,
сетевого оборудования, лицензионного ПО
Chapter 5: Advanced Serverboard Setup
5-195-18
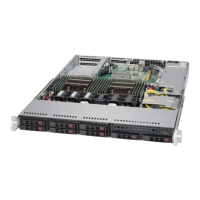
SUPERSERVER 1028R-TDW User's Manual
Fan Headers
The X10DDW-i has eight fan headers,
designated Fan1 through Fan8. Pins
1-3 of the fan headers are backward
compatible with traditional 3-pin fans,
but will only run at full speed. Use
4-pin fans to allow IPMI to automati-
cally set fan speed based on the sys-
tem temperature. See the table on the
right for pin denitions.
Serial Port
The serial port (COM) is located on
the I/O backplane. See the table on
the right for pin denitions.
Note: NC indicates no connection.
Serial Port Pin Denitions
Pin # Denition Pin # Denition
1 DCD 6 DSR
2 RXD 7 RTS
3 TXD 8 CTS
4 DTR 9 RI
5 Ground 10 NC
Fan Header
Pin Denitions
Pin# Denition
1 Ground
2 +12V
3 Tachometer
4 PWM Control
TPM Header/Port 80
A Trusted Platform Module/Port 80
header is located at JTPM1 to provide
TPM support and a Port 80 connec-
tion. Use this header to enhance
system performance and data secu-
rity. See the table on the right for pin
denitions.
TPM/Port 80 Header
Pin Denitions
Pin # Denition Pin # Denition
1 LCLK 2 GND
3 LFRAME# 4 <(KEY)>
5 LRESET# 6 +5V (X)
7 LAD 3 8 LAD 2
9 +3.3V 10 LAD1
11 LAD0 12 GND
13 SMB_CLK4 14 SMB_DAT4
15 +3V_DUAL 16 SERIRQ
17 GND 18 CLKRUN# (X)
19 LPCPD# 20 LDRQ# (X)
Internal Speaker
The Internal Speaker (SP1) can be
used to provide audible indications for
various beep codes. See the table on
the right for pin denitions.
Internal Buzzer
Pin Denition
Pin# Denitions
Pin 1 Pos. (+) Beep In
Pin 2 Neg. (-) Alarm Speaker
Ethernet Ports
Two Ethernet ports (LAN1/LAN2) are
located next to the VGA port.A dedi-
cated IPMI LAN port is also located
above the USB 0/1 ports to provide
a dedicated network connection for
IPMI 2.0. These ports accept RJ45
type cables. Please refer to Section
5-11 for LAN LED information.
Power SMB (I
2
C) Connector
The Power System Management Bus
(I
2
C) header (JPI
2
C) is used to moni-
tor the power supply, fan and system
temperatures. See the table on the
right for pin denitions.
PWR SMB
Pin Denitions
Pin# Denition
1 Clock
2 Data
3 PWR Fail
4 Ground
5 +3.3V
LAN Ports
Pin Denition
Pin# Denition Pin# Denition
1 P2V5SB 10 SGND
2 TD0+ 11 Act LED
3 TD0- 12 P3V3SB
4 TD1+ 13 Link 100 LED
(Yellow, +3V3SB)
5 TD1- 14 Link 1000 LED
(Yellow, +3V3SB)
6 TD2+ 15 Ground
7 TD2- 16 Ground
8 TD3+ 17 Ground
9 TD3- 18 Ground
Power LED/Speaker
Pins 1-3 of JD1 are used for power
LED indication, and pins 4-7 are for
the speaker. See the tables on the
right for pin denitions. Please note
that the speaker connector pins (4-7)
are used with an external speaker.
To use the onboard speaker, please
close pins 6-7 with a jumper.
Speaker Connector
Pin Settings
Pin Setting Denition
Pin 4 P5V
Pin 5 Key
Pin 6 R_SPKPIN_N
Pin 7 R_SPKPIN
PWR LED Connector
Pin Denitions
Pin Setting Denition
Pin 1 JD1_PIN1
Pin 2 FP_PWR_LED
Pin 3 FP_PWR_LED
Chassis Intrusion
A Chassis Intrusion header is located
at JL1. Attach the appropriate cable
to inform you of a chassis intrusion.
Chassis Intrusion
Pin Denitions
Pin# Denition
1 Intrusion Input
2 Ground
 Loading...