WIT.RU
WIT Company – поставка серверов, СХД,
сетевого оборудования, лицензионного ПО
Chapter 5: Advanced Serverboard Setup
5-175-16
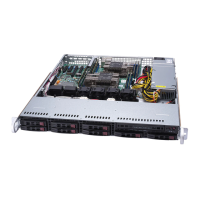
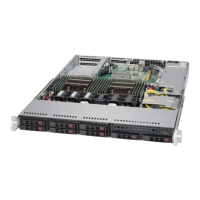
SUPERSERVER 1028R-TDW User's Manual
NIC1/NIC2 LED Indicators
The NIC (Network Interface Control-
ler) LED connections for LAN ports 1
and 2 are located on pins 11 and 12
and 9 and 10 of JF1, respectively. At-
tach NIC LED cables here to display
network activity. Refer to the table on
the right for pin denitions.
NIC1/2 LED
Pin Denitions (JF1)
Pin# Denition
9 NIC2 Activity LED
10 NIC2 Link LED
11 NIC1 Activity LED
12 NIC1 Link LED
Overheat (OH)/Fan Fail/PWR Fail/
UID LED
Connect an LED cable to pins 7 and
8 of Front Control Panel to use the
Overheat/Fan Fail/Power Fail and
UID LED connections. The red LED
on pin 8 provides warnings of over-
heat, fan failure or power failure. The
blue LED on pin 7 works as the front
panel UID LED indicator. Refer to the
table on the right for pin denitions.
OH/Fan Fail/ PWR Fail/Blue
UID LED Pin Denitions (JF1)
Pin# Denition
7 Blue UID LED
8 OH/Fan Fail/Power Fail
OH/Fan Fail/PWR Fail
LED Status (Red LED)
State Denition
Off Normal
On Overheat
Flashing Fan Fail
Power Fail LED
The Power Fail LED connection is
located on pins 5 and 6 of JF1. Re-
fer to the table on the right for pin
denitions.
PWR Fail LED
Pin Denitions (JF1)
Pin# Denition
5 3.3V
6 PWR Supply Fail
Reset Button
The Reset Button connection is lo-
cated on pins 3 and 4 of JF1. Attach
it to the hardware reset switch on the
computer case. Refer to the table on
the right for pin denitions.
Reset Button
Pin Denitions (JF1)
Pin# Denition
3 Reset
4 Ground
Power Button
The Power Button connection is
located on pins 1 and 2 of JF1. Mo-
mentarily contacting both pins will
power on/off the system. To turn off
the power when set to suspend mode,
depress the button for at least 4 sec-
onds. Refer to the table on the right
for pin denitions.
Power Button
Pin Denitions (JF1)
Pin# Denition
1 Signal
2 Ground
Universal Serial Bus (USB)
Two USB 2.0 ports (USB 0/1) and two
USB 3.0 ports (USB 4/5) are located
on the I/O back panel. In addition,
an internal USB header provides two
USB 2.0 connections (USB 2/3) for
front panel support. A Type A con-
nector (USB 6) is also located on
the serverboard to provide USB 3.0
support.(cables not included). See the
tables on the right for pin denitions.
Standby Power Header
The +5V Standby Power header is lo-
cated at JSTBY1 on the serverboard.
See the table on the right for pin de-
nitions. (You must also have a card
with a Standby Power connector and
a cable to use this feature.)
Standby PWR
Pin Denitions
Pin# Denition
1 +5V Standby
2 Ground
3 Not Connected
Back Panel USB (2.0) 0/1
Pin Denitions
Pin# Denition Pin# Denition
1 +5V 5 +5V
2 USB_PN1 6 USB_PN0
3 USB_PP1 7 USB_PP0
4 Ground 8 Ground
Front Panel USB (2.0) 2/3
Pin Denitions
Pin # Denition Pin # Denition
1 +5V 2 +5V
3 USB_PN2 4 USB_PN3
5 USB_PP2 6 USB_PP3
7 Ground 8 Ground
9 Key 10 Ground
BP USB 4/5 (3.0) Type A USB 6 (3.0)
Pin Denitions
Pin # Denition Pin # Denition
1 VBUS 2 SSRX-
3 SSRX+ 4 Ground
5 SSTX- 6 SSTX+
7 GND_
DRAIN
8 D-
9 D+
 Loading...