SureTouch Refrigerated Liquid Dispensers • SureShot Technical Assistance Center: 1-888-777-9990 or 902-865-9602
15
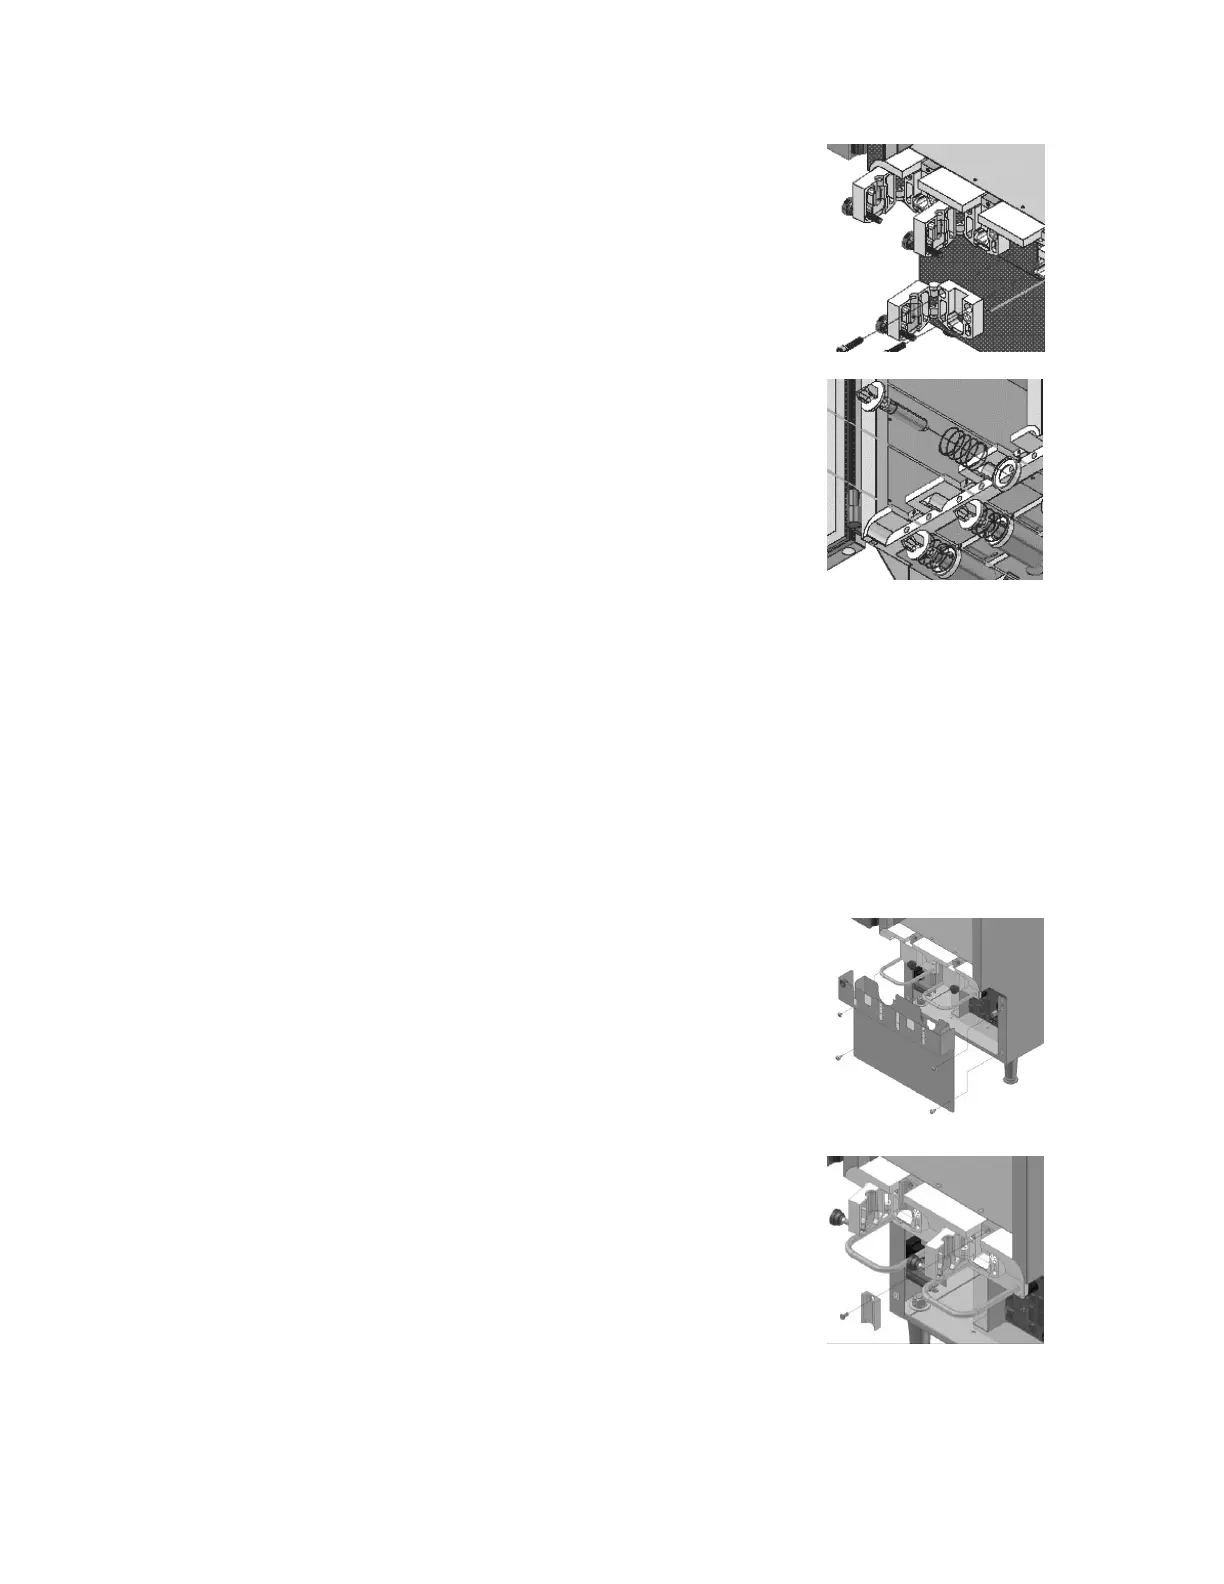
8. Remove the two (2) screws at the upper corners of the
valve. Clean screws and keep for reuse.
9. Gently remove the white valve body using an even force.
Hold the valve carefully with one hand so that the attached
wires will not be broken or damaged. Do not allow the
valve to dangle freely.
Note: The valve body can only be moved the length of the
attached wires, which are located in the left valve only of
multi-valve dispensers.
10. Remove the plunger and spring.
11. Clean, rinse and sanitize the valve door, valve body,
plunger and spring. Air dry thoroughly.
12. Reassemble the spring, plunger, and valve body.
a. Align the plunger with the valve body.
b. Place spring over plunger ensuring a flush fit to the
back of the plunger.
c. Align the assembly onto the dispenser. Pull wires
straight through the spring retainer eyelet ensuring
wires are not pinched or caught under the spring.
d. Replace the two (2) screws into the valve. Tighten until
snug. Do not over-tighten.
e. Replace the screw at the top of the metal valve insert. Screw must fit snugly to
ensure proper operation of the refrigeration system. Do not over-tighten.
13. Close the valve door. While holding the valve door closed with one hand, tighten the
thumbscrew clockwise until the door is snug. Do not over-tighten.
14. Replace splash panel. Reinstall four (4) screws to secure the splash panel in place.
15. Close the refrigerated product compartment door.
16. Plug the dispenser in.
17. Turn the dispenser ON.
18. Prior to loading product, perform the Dispensing Product procedure on page 7. Listen
for the solenoid to open and close to ensure that the valve is operating properly.
19. Load product. See page 4.
FlexoShot (Manual Lever Operated) Dispensers
1. Turn the power to the dispenser OFF.
2. Unplug the dispenser.
3. Follow instructions to Remove an Empty Product Bag,
Bag-In-Box or Tank on page 7.
a. These may be stored in a refrigerator until the valve
cleaning procedure is complete.
4. Remove the catch tray and screen (if applicable) by lifting it
up and off.
5. Remove splash panel by removing the four (4) screws that
secure it in place. Carefully remove the splash panel.
6. Clean the splash panel.
a. Wash thoroughly.
If a dishwasher is available, it may be cleaned on the
full wash cycle.
b. Rinse well with warm, clean water.
c. Wipe dry with a soft cloth to prevent water spotting.
7. Remove the screw at the top of the metal valve insert.
Wipe screw and valve insert clean and keep for reuse.
 Loading...