15
If you change propellers, be sure to perform the
above check again, to confirm that the engine
speed under full throttle is within the specified
range.
PROPELLER INSTALLATION
To install a propeller on your outboard motor,
use the following procedure:
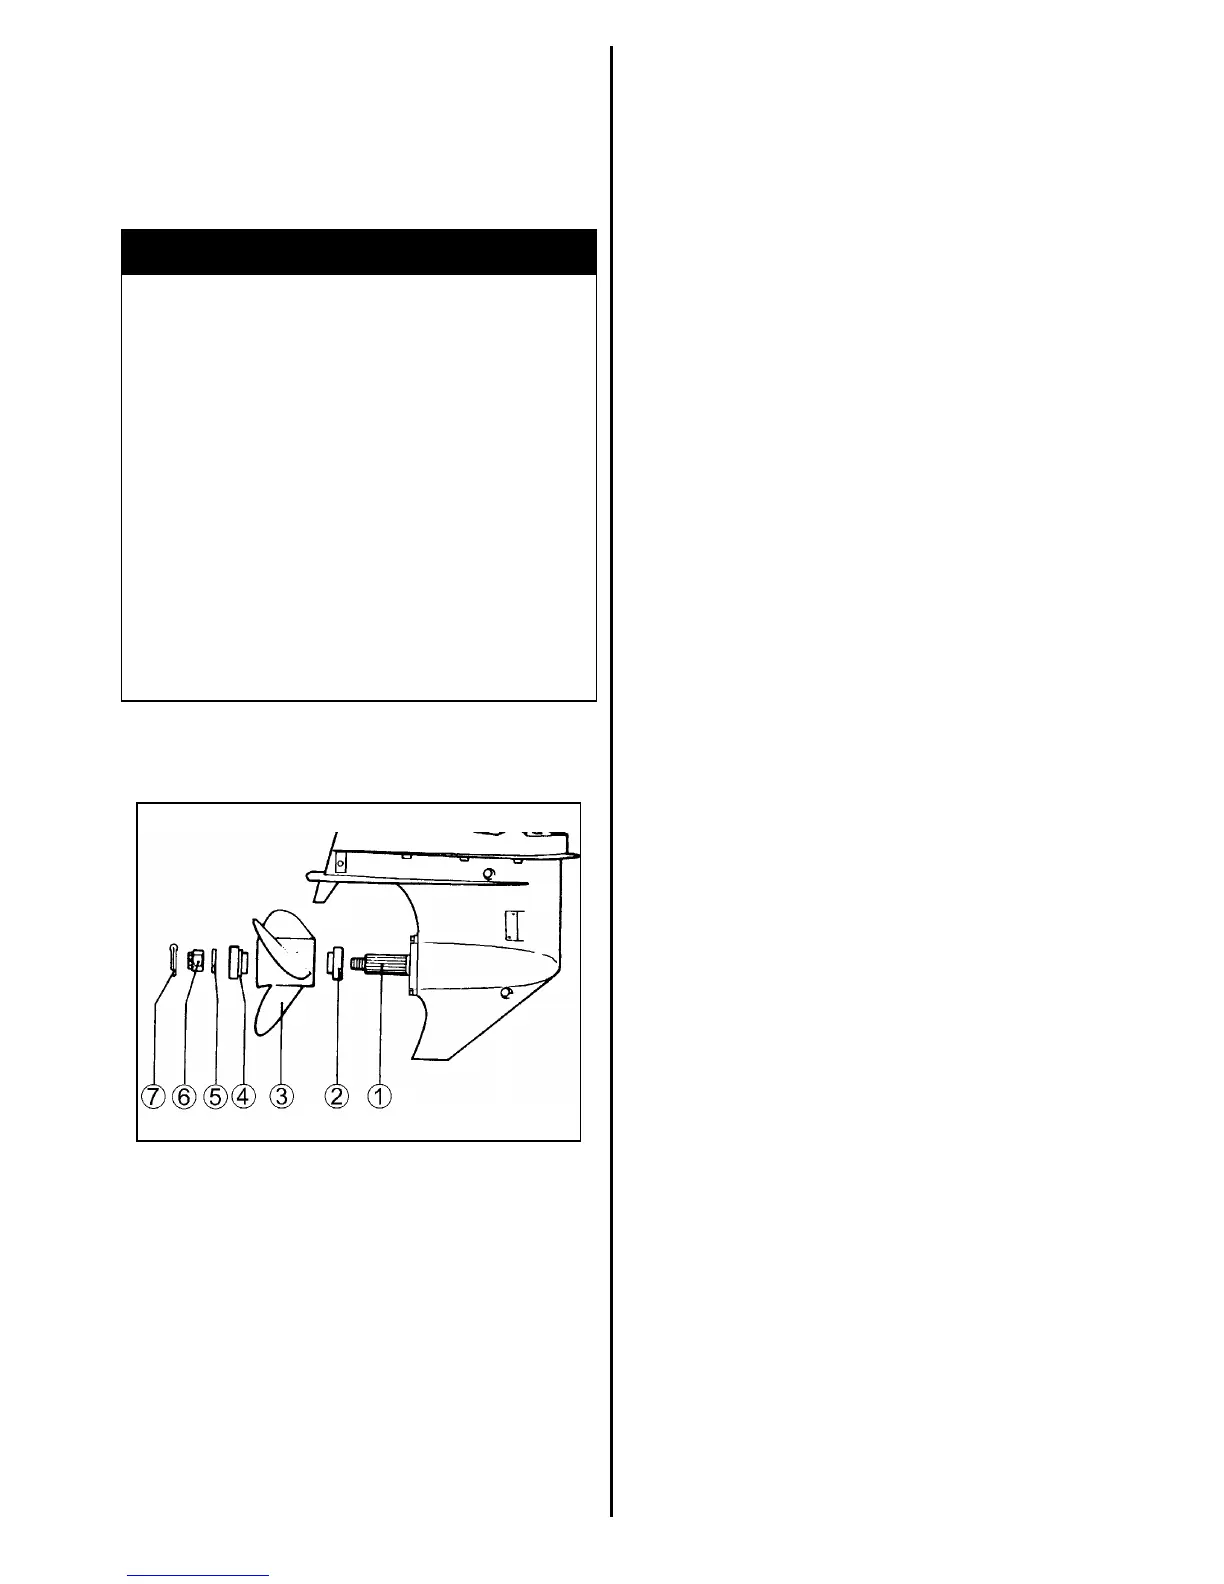
1. Coat the propeller shaft splines 1 liberally
with Suzuki water resistant grease to help
prevent corrosion.
2. Place the stopper 2 on the shaft.
3. Align the propeller 3 with the propeller shaft
splines and slide the propeller onto the shaft.
4. Place the spacer 4 and washer 5 on the
shaft.
5. Install the propeller nut 6 and tighten it with
a torque wrench to 50 – 60 N·m (5.0 – 6.0
kg-m/36.0 – 43.5 lb-ft).
WARNING
Failure to take proper precautions when
installing or removing the propeller can
result in severe personal injury.
When installing or removing the propeller:
• Always shift into “Neutral” and remove
the emergency stop switch lock plate
so that the motor cannot be started
accidentally.
• Wear gloves to protect hands, and
“lock” the propeller by placing a block
of wood between the blades and the
anti-cavitation plate.
6. Align the grooves in the propeller nut with
the hole in the shaft, then insert the cotter
pin 7 and bend the pin ends over to lock it in
place.
To remove the propeller, reverse the above pro-
cedure.