User’s manual TAC6 + MODBUS TCP/IP
12
- For each register to be modified:
o Write its number in the box « Register to edit» (1)
o Write the new value in the box « new register value » (2)
o Press the button « Write register» (3)
- Once that the parameters have been modified, do a “read” verification:
o Write 41500 in the box « Start register» (4)
o Write 13 in the box « number of registers» (5)
o Press the button « Read register» (6)
- Check that the returned values correspond to the desired configuration and re-modify if necessary. The
modifications will be active after the reset of the control board
3.1.2.2 IP Address Modification via TACtouch
If the default settings of the SAT ETHERNET have been changed, the IP address of SAT ETHERNET has to be
configured with the same static IP address of the computer less 1 withdrawn at the last part, so, if figure 12 example is
considered, it would be 192.168.1.1.
The net mask will be the same as the one of the PC, with same example, it would be: 255.255.255.0.
The gateway is not used so 0.0.0.0.
The setup is done through the advanced setup with the TACtouch:
Select MANUAL to enter a static IP address
Enter the static IP address in 4 steps (1/4, 2/4, 3/4, 4/4). Example of figure 12: IP address is
192.168.1.3, enter at step 1:192, step 2:168, step 3:001 and step 4:003.
Enter the netmask in 4 steps (1/4, 2/4, 3/4, 4/4). Example of figure 12: netmask is 255.255.255.0, enter
at step 1:255, step 2:255, step 3:255 and step 4:000.
Enter the gateway in 4 steps (1/4, 2/4, 3/4, 4/4). Example of figure 12: gateway is 0.0.0.0, enter at step
1:000, step 2:000, step 3:000 and step 4:000.
3.2 SAT WIFI SETUP
The SAT WIFI configuration is done through web pages provided by the SAT WIFI integrated web server.
The SAT WIFI is by default access point (AP) of a Wi-Fi network and can be directly be used this way without any
configuration.
As AP, no pre-existing network is required because the SAT WIFI automatically creates its own network allowing up to 5
connections.
Alternatively, it can also be configured as station of another existing Wi-Fi network (which can be another SAT WIFI
access point).
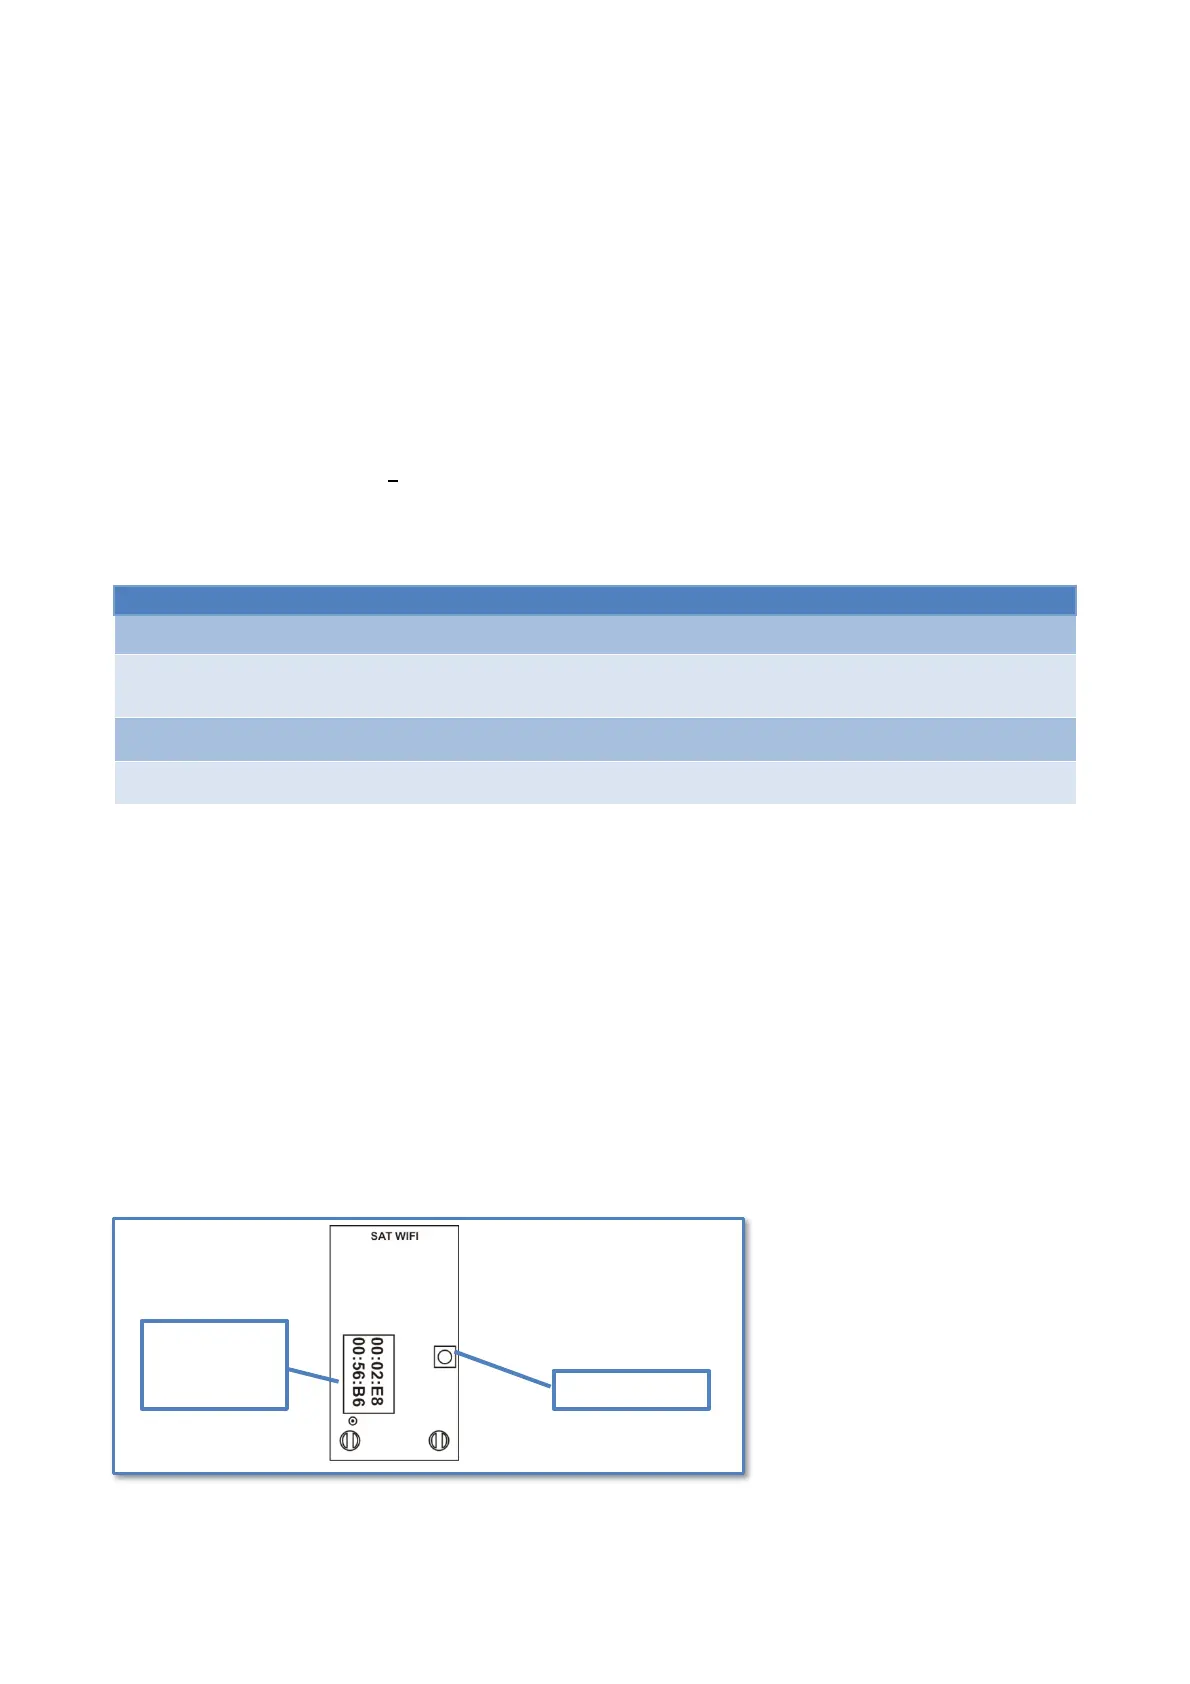
In order to access the web pages to perform the configuration, the reset button of the SAT WIFI must be pressed for 20
seconds. Then, the SAT WIFI will be by default an access point of a Wi-Fi network which SSID (Service Set Identifier) is
composed by the prefix “SatWifi_” and a suffix which is the unique MAC address of the SAT WIFI reported on the sticker
above the component.
Example: The sticker on the SAT WIFI reports “00:02:E8:00:56:B6”, that is its MAC address, so the SAT WIFI will be the
access point of the Wi-Fi network which SSID is “SatWifi_0002E80056B6”. See figure 13:
Figure 11 – Default SSID of SAT WIFI as access point
Sticker with
unique MAC
ADDRESS