Pg. 5 1/2018
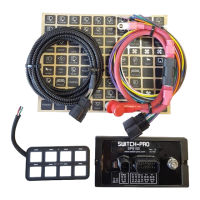
The control wire connections can be connected using the supplied Fuse-Tap or Tapa-Circuits:
When using the Fuse-Tap, it will come with a pre-installed fuse for the tap. Remove the fuse from the fuse box
that needs to be tapped into, and insert it into the empty slot of the Fuse-Tap. Then insert the Fuse-Tap into the
fuse slot. Crimp the desired input wire to the blue butt splice.
Fuse-Tap Fuse-Tap with fuse inserted.
1. Place wire in t-tap 2. Crimp 3. Plug in blade connector
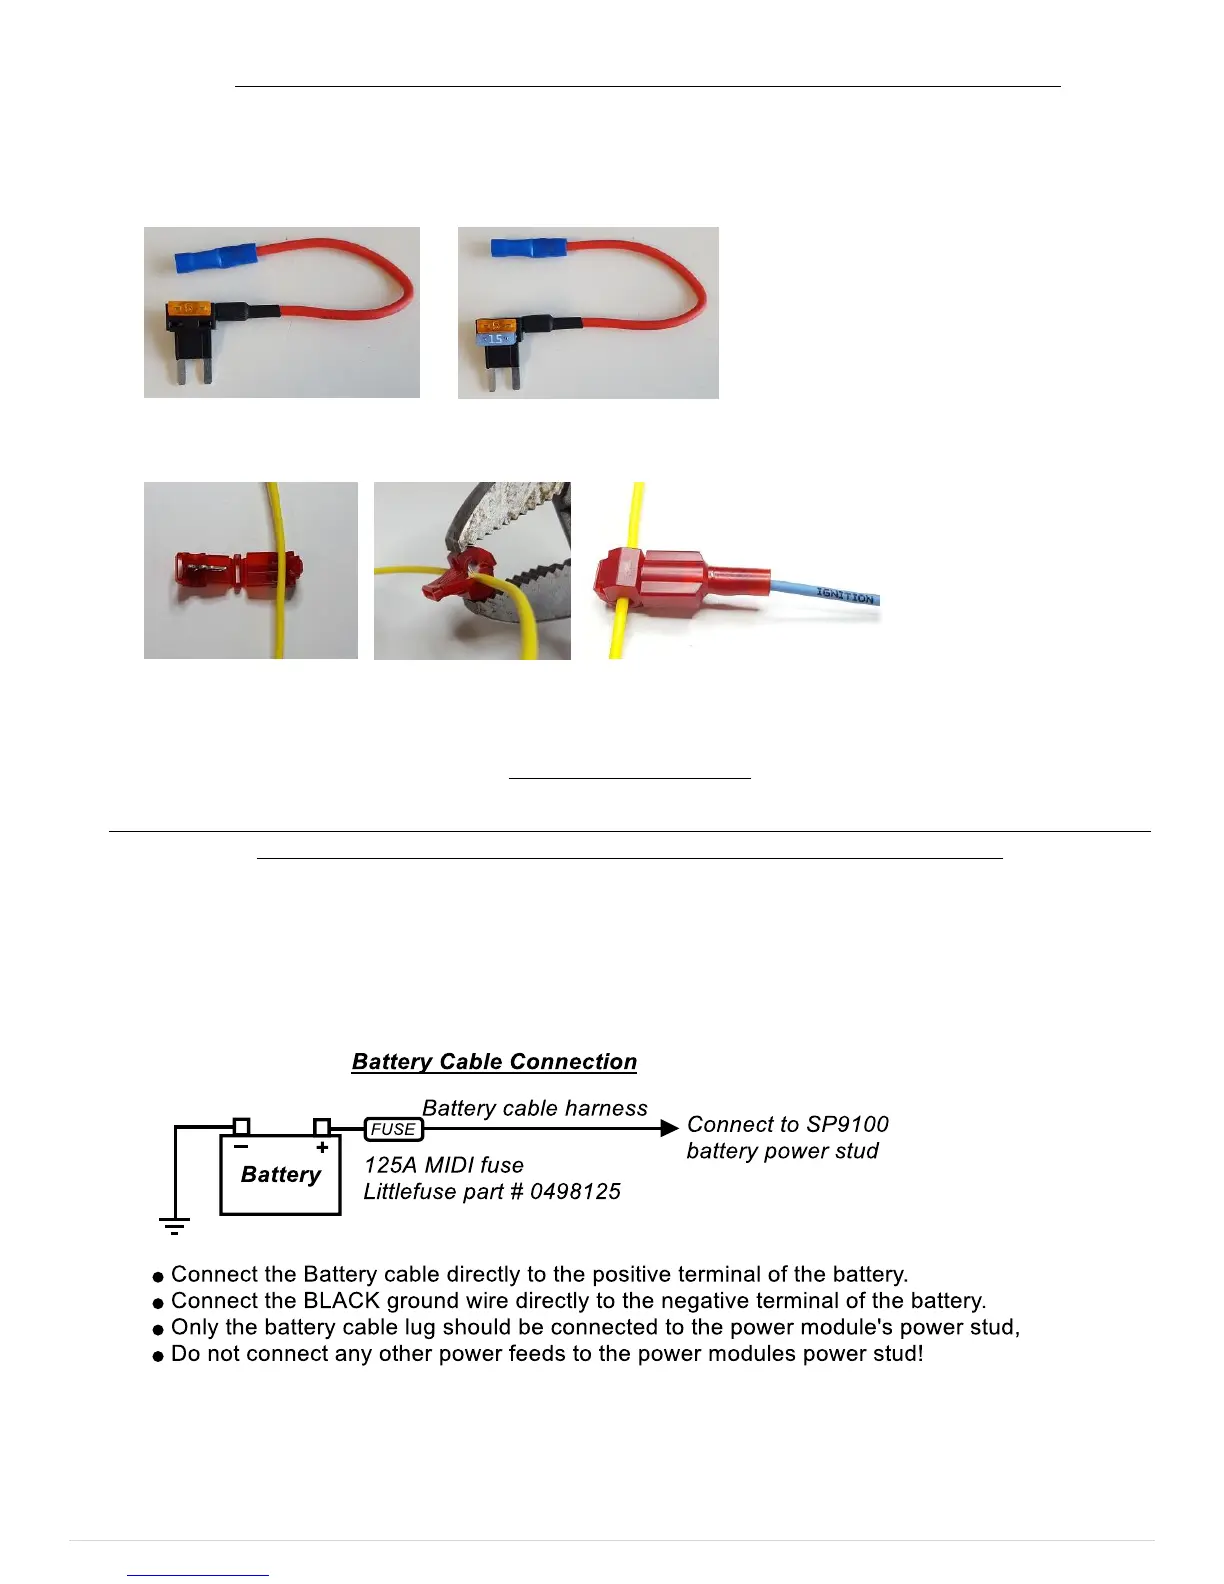
5. Installing the Battery Cable
***Make sure the 16-pin connector is plugged into the power module with the Black ground wire connected
to the negative terminal of the battery before connecting the battery cable.***
Install the battery cable once the power module is secured, the switch panel communications harness is plugged in and
connected to the switch panel, and the 16-pin power module harness Black ground wire is connected directly to the
negative terminal of the battery, and the Ignition and Lights wires are connected.
Connect the battery cable to the power module first, then connect the fuse holder side directly to the positive terminal
of the battery.
 Loading...