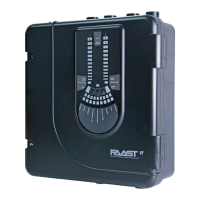
Preparing to Congure or Monitor a FAAST LT Device
To connect and communicate with a FAAST LT device via the
PC USB port, PipeIQ™ must be running a project (.mdf le) that
matches the type of FAAST LT device being used. If no project
exists on the PC, one will have to be created prior to connecting
(See Creating a Project section).
To communicate with a FAAST LT Device.
Ensure that the FAAST LT unit is in Maintenance mode, PipeIQ™
is running on the PC, and a USB cable is connected from the
internal socket to the PC.
In PipeIQ™, open the project le associated with the FAAST LT
device to be monitored. The Left pane in PipeIQ™ will show the
aspirating system tree (loading the le may take a little while).
Click on the FAAST LT Device to highlight it.
Select Connect Device from the Tool menu.
Follow the on-screen instructions to make the connection.
The device is connected when a Green Tick is indicated by the
device. A Red Cross indicates that the device is not connected.
Select the Monitoring/Conguration tab as required.
Monitoring a FAAST LT Device
Once connected to a FAAST LT device, PipeIQ™ can be used to
monitor the device; it is possible to check the status (read device
information), review event logs, activate relays, test the fan speed
and reset the device.
Open a relevant project, highlight the FAAST LT device, Select
Connect Device from the Tools menu and make the connection.
Double click the FAAST LT device to open the large pane on the
right side of the screen. View the device status features by clicking
on the Monitoring tab. An additional tab at the top of the pane
provides access to further features.
Ensuring that the FAAST LT device is highlighted in the left pane,
Select Device information from the Tools menu to view further
info.
For more information on using the Monitoring options, see the
PipeIQ™ Help Menu.
IMPORTANT NOTES ON ALTERING FAAST LT SETTINGS
FAAST LT devices are shipped with factory default parameters that
should be adequate for many aspirating applications; a list of these
parameters is shown in Appendix A. If these factory default parameters
are altered, the validity of the new settings must be conrmed.
The FAAST LT device is approved to EN54-20 classes A, B and
C (CPR 305/2011). To ensure adherence to this standard, the
class of any pipe/hole conguration and detector sensitivity
must be determined using the design feature of the PipeIQ™
software (version 2 and higher).
Air Flow Settings
The FAAST LT operating settings can only be changed using the
PipeIQ™ application. Pipe layouts should be veried for EN54:20
compliance by running a PipeIQ™ simulation project (via the Pipe
Design tab) and evaluating the results against the strict approval
criteria in the program. Sensitivities, air ow rates and limits etc are
adjusted and optimised within PipeIQ™; the FAAST LT parameter
values are created in the pipe design project and stored in an
associated conguration le. The resulting air ow rate should
be set as the reference ow into the conguration by pressing
the Apply to Conguration button in the PipeIQ™ Pipe Design
mode, which will automatically set the new airow limits.
Modifying the reference ow arbitrarily from within the Conguration
screen is not recommended. Changing the fan speed using the
manual mode from within the Conguration screen should be
avoided. These change options are available primarily for test
purposes only. Manually setting the fan speed to change the air
ow will not alter the associated hi/lo ow limit settings in the
FAAST LT unit. Therefore this option should not be used to set
or change air ow values in an EN54 compliant pipe system; the
PipeIQ™ Pipe Design facility should always be used.
Delay Settings
The default values for ow fault delay, general fault delay, pre-
alarm and alarm delay, and remote output alarm time that are
pre-set into the FAAST LT unit are critical for compliance to the
EN54:20 standard.
Within the Conguration options it is possible to increase delay
times for these actions, but any changes should be made with
extreme caution. Increasing any of these delays should not be
done without a clear understanding of the consequences to the
requirements of the EN54:20 standard.
An increase/decrease in ow above/below the Flow High / Flow
Low limits will result in a Flow Fault after a factory default delay of
60 seconds. Once the ow is returned to a normal level, the fault
condition will be cleared immediately.
In environments where the sampled airow may be affected by
sudden temperature/pressure changes due to air handling units,
doors opening/closing etc. or there is a risk of physical interference
with the sampling point, it may be necessary to increase the delay
between the ow going out of limits and signalling a Flow Fault
condition. Delay values of up to 240 seconds before signalling a
fault are available when setting up the detector. This is to allow
time for the air pressures to stabilise after the temporary event.
Conguring a FAAST LT Device
The PipeIQ™ conguration interface provides a method for
viewing and editing the device congurations. Once connected to
a FAAST LT device, PipeIQ™ can be used to congure the device;
it is possible to set up relay actions, fan speed, critical times and
dates, event log requirements and other operational parameters.
For the Stand Alone versions it is also possible to congure the
alarm thresholds.
With the Conguration options selected, the General tab displays
in the right pane, with further options available using the Advanced
button (details such as passwords, time-outs and external input
information). If a new project was created, the initial screen display
will show the factory default settings for the device type selected.
Select the Alarms and Relays tab to show details such as relay
latching, alarm mode settings and delays.
Select the Channels and Sensors tab to show details such as fan
speed settings and sensor or channel disablement.
Note: There are some differences between the graphic screens
for the FAAST LT stand alone and loop based units, owing to the
variation in control and operation between the two.
For more information on using the Conguration options, see the
PipeIQ™ Help Menu.
Follow the steps below to congure a FAAST LT device.
1) Open a relevant project, highlight the FAAST LT device, Select
Connect Device from the Tools menu and make the connection.
Double click the FAAST LT device to open the large pane on
the right side of the screen. View the device settings by clicking
on the Conguration tab. At this point, the screen will show the
conguration from the current project le, NOT the actual
device conguration.
2) Ensuring that the FAAST LT device is highlighted in the left
pane, Select Get Conguration from the Tools menu; the
FAAST LT current conguration parameters will be uploaded
from the device and shown on the PC screen. Note that this
uploaded data from the device will overwrite the conguration
le values in the current project.
 Loading...