98 Replacing Modules TB9100/P25 CG/P25 TAG Installation and Operation Manual
© Tait Limited March 2014
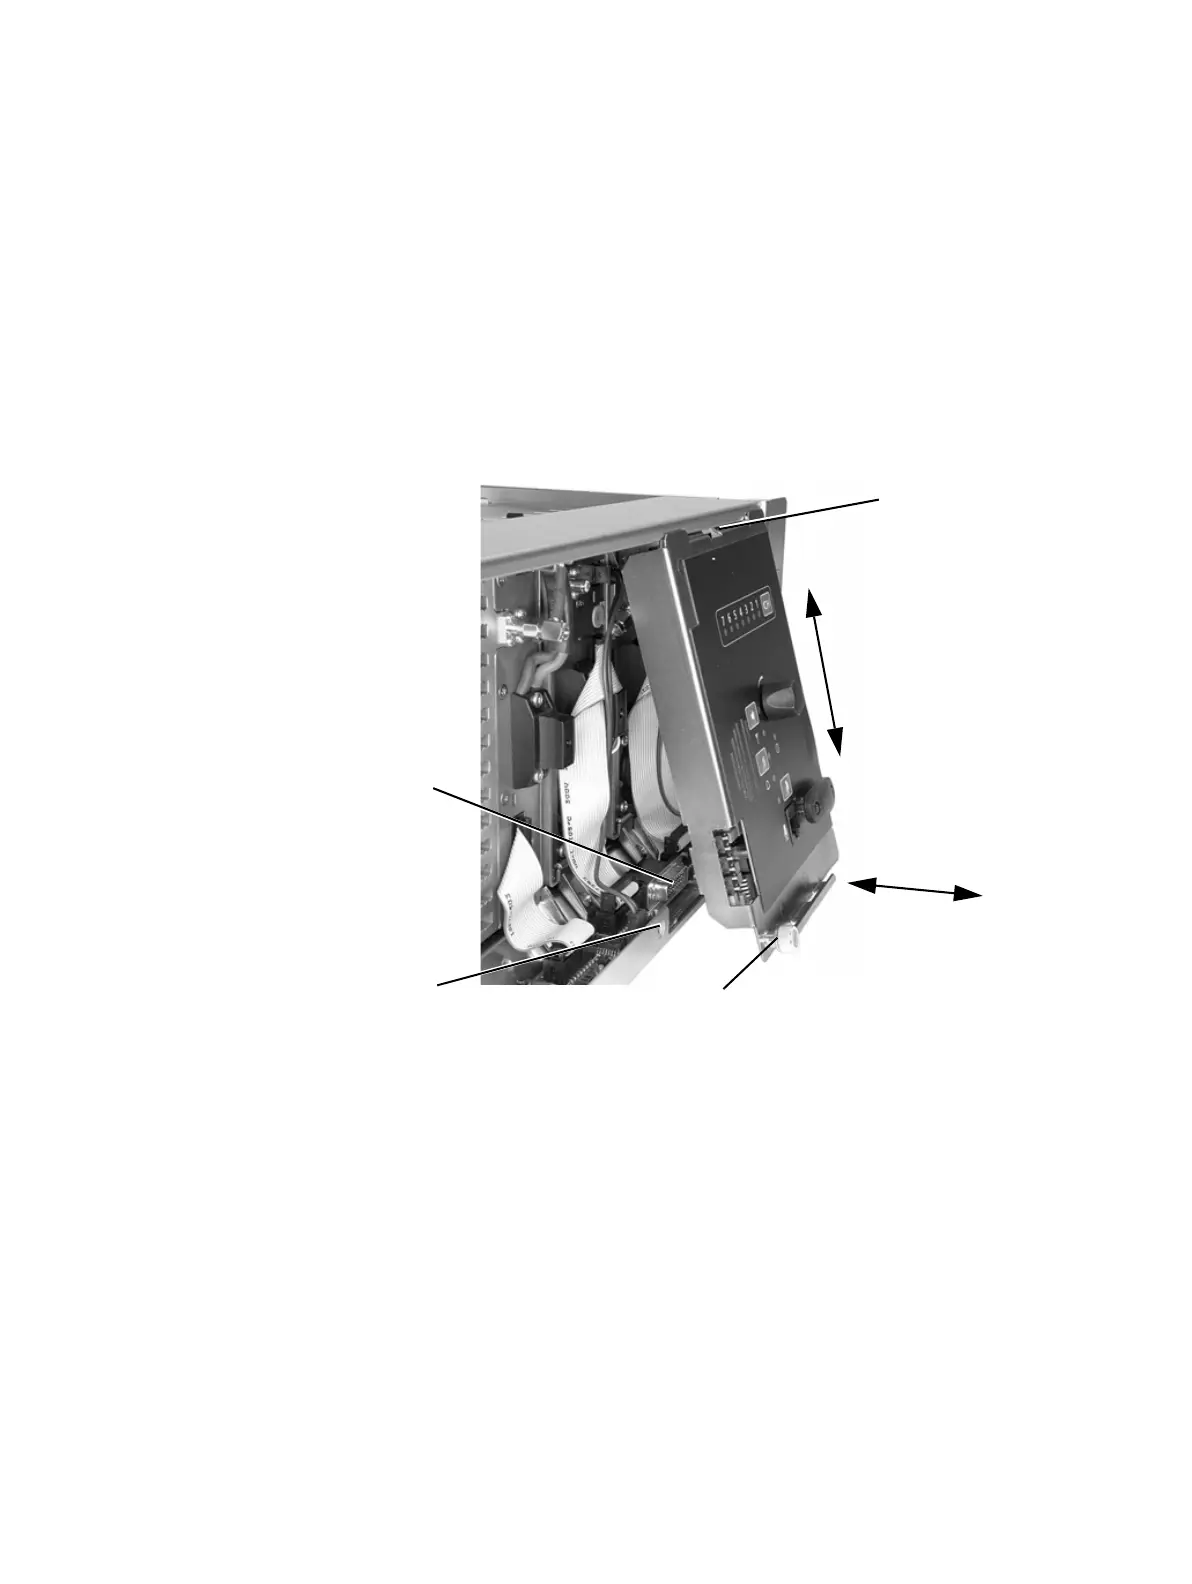
7.3 Replacing the Control Panel
Removal 1. If you have not already done so, carry out the instructions in “Pre-
liminary Disassembly” on page 96.
2. Undo the retaining screw
b. Note that the screw stays attached to the
control panel.
3. Pull the bottom of the control panel away from the subrack
c to
disconnect the D-range socket on the back of the panel from the plug
d on the subrack.
4. Pull the control panel down
e to disengage the center tab f from
the subrack.
Refitting Before fitting the new control, make sure that it has been configured
according to your requirements. See “Configuring the Control Panel
Board” on page 99.
1. Fit the top of the control panel to the subrack so that the center tab
is behind the lip of the subrack and between the two locating tabs
formed in the lip. Push the control panel firmly upwards
g.
2. Align the D-range socket on the back of the control panel with the
plug on the subrack. Gently push the bottom of the panel home
against the subrack
h to engage the plug into the socket.
b
d
e
f
g
c
h
i
 Loading...


