76 Installing a Remote Kit TM8100/TM8200 Accessories Manual
© Tait Electronics Limited August 2005
10.1.1 Overview
Installing the control head remotely is done in six steps:
1. Remove the control head from the radio body, if necessary.
2. Install the torso interface
b
onto the radio body.
3. Mount the remote U-bracket
d
in the required position.
4. Install the control-head interface
c
onto the control head and install
the remote control-head assembly in the remote U-bracket.
5. Mount the U-bracket in the required position and install the radio
body in the U-bracket.
6. Route the remote cable
e
between the remote control-head
assembly and the radio body.
10.1.2 Parts Required
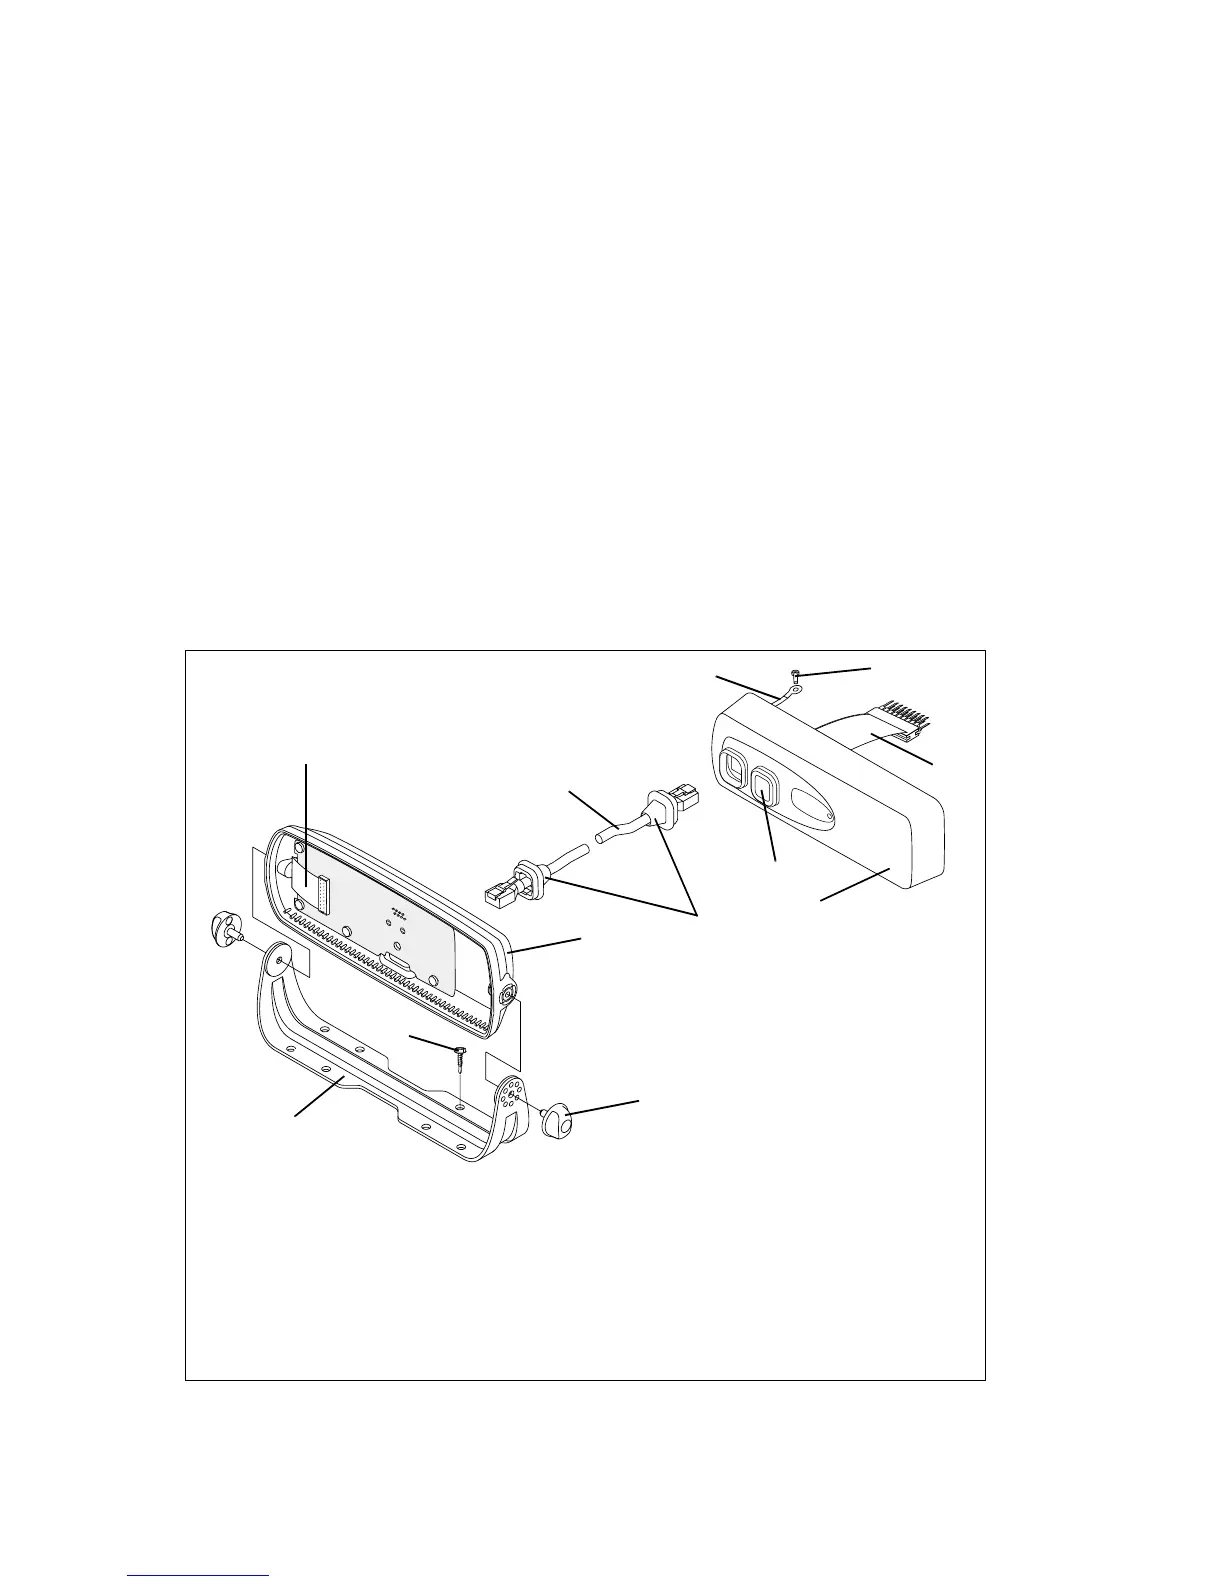
The following diagram identifies the parts for remote control-
head installation and shows how they fit together.
Figure 10.1 Parts for remote control-head installation
b
torso interface
h
RJ45 bung
c
control-head interface
i
control-head interface loom
d
remote U-bracket
j
torso-interface loom
e
remote cable
1)
earthing tag
f
self-drilling screw
1!
earthing-tag screw
g
thumb screw
1@
remote cable grommets
c
b
f
g
d
e
i
1)
j
1!
1@
h

 Loading...


