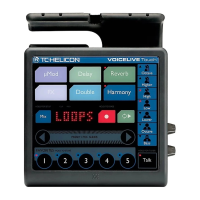
The Loop Menu
46
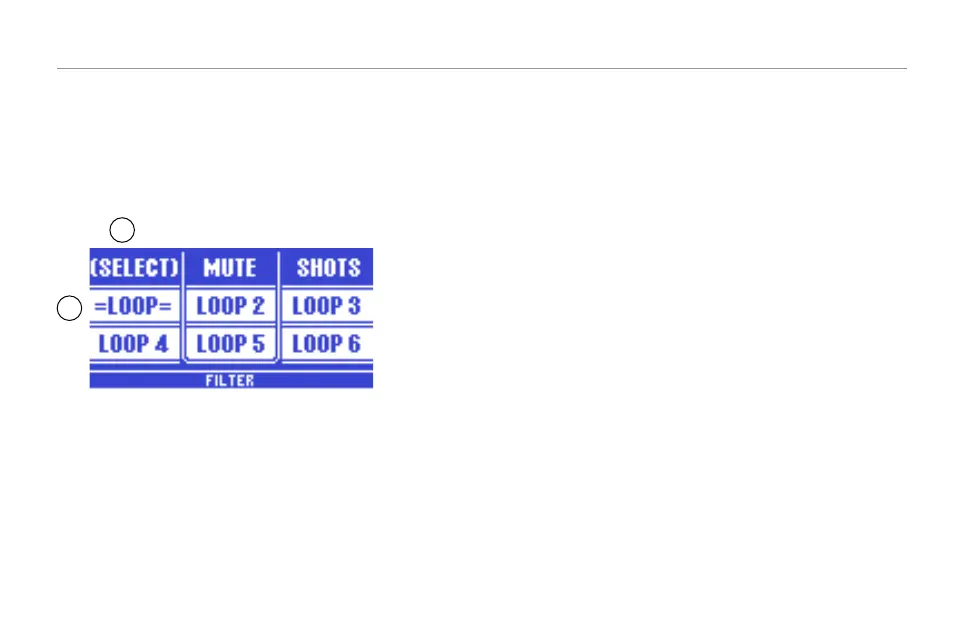
The Label “Select” will be surrounded by brackets, indicating
that you are now in Select mode.
The currently selected loop slot is shown as “=Loop=” By
default, the first loop you recorded (the base layer) is stored
in loop slot 1. This means that at this point, the display will
look like this:
1
2
1. Loop Layers page set to Select mode
(indicated by the brackets around the word “Select”).
2. Loop slot one selected as the current loop slot
(shown as “=Loop=”).
Let’s move to another loop slot and record something else.
Note that you can remain recording or stop and start recording
with each new loop layer.
– Tap Loop 2.
– Record another part on Loop 2.
– You can repeat this process until you have filled up all six
available loop slots.
In Select mode, you can select any recorded layer. You can then
overdub upon, reverse, clear or mute the selected layer.
 Loading...