ENGLISH FRANÇAIS
Basic Recording 1
1
Enregistrement de base 1
48
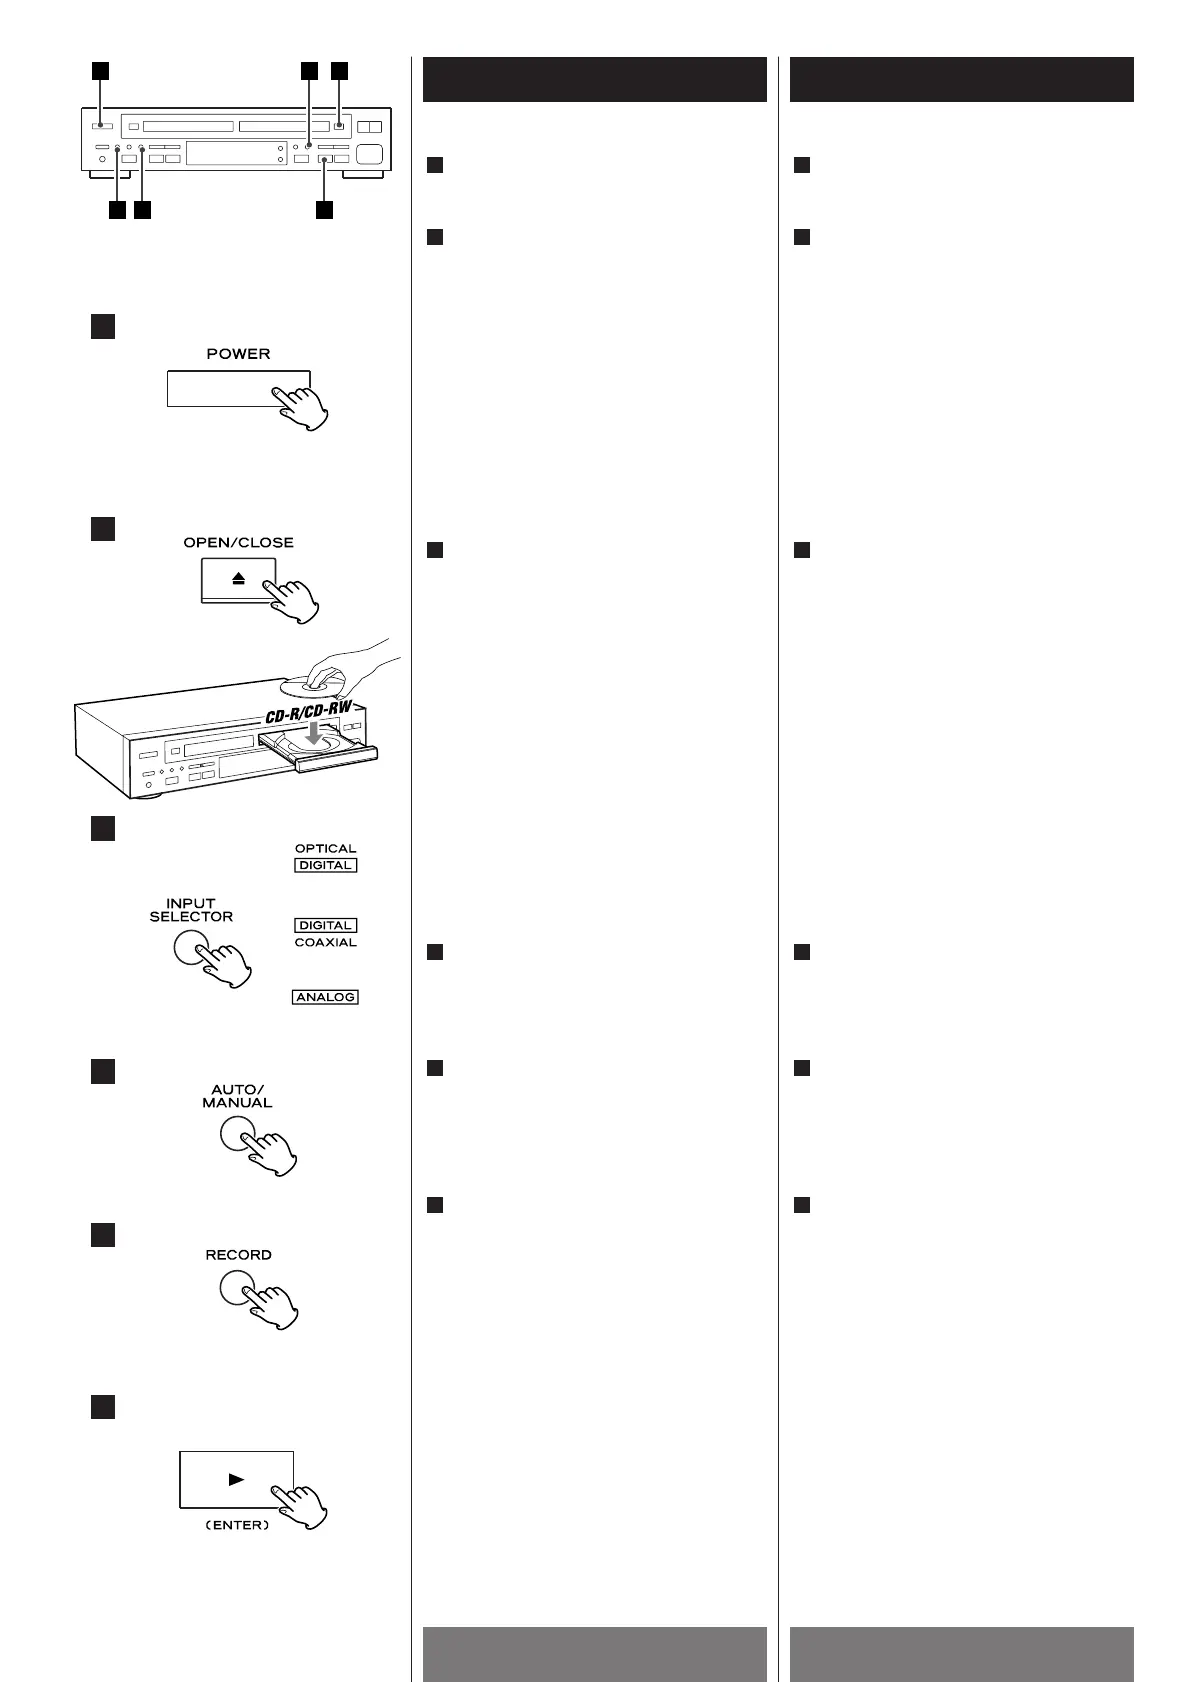
Press the POWER switch to turn the unit
ON.
Set a recordable CD-R/RW disc in TRAY
@.
Press the OPEN/CLOSE button (L), place
a disc on the disc tray with the label side
facing up, and then press the
OPEN/CLOSE button (L
) to close the disc
tray.
When a blank disc is set in TRAY
@, the
display will show "BLANK".
Select the source to be recorded.
Every time the INPUT SELECTOR button is
pressed, the input is changed as follows:
DIGITAL OPTICAL:
To record a source connected to the
DIGITAL IN (OPTICAL) terminal.
DIGITAL COAXIAL:
To record a source connected to the
DIGITAL IN (COAXIAL) terminal.
ANALOG:
To record a source connected to LINE IN
jacks.
Select the mode of track number
assignment by pressing the
AUTO/MANUAL button. (Auto Track)
Press the record button.
The unit enters record pause mode.
J
and "REC" blinks on the display.
Press the PLAY button (y) of TRAY @ to
start recording.
Play the source to be recorded.
During digital recording, if the input
signal stops for 5 seconds, recording will
stop.
During analog recording, if the input
signal stops for 20 seconds, recording
will stop.
If the unit detects copy-prohibit signals
during recording, "CAN'T COPY" appears
on the display and recording is stopped.
6
5
4
3
2
1
4
3
2
6
5
Appuyer sur le commutateur
d’alimentation (POWER) pour allumer
l’appareil.
Déposer un disque enregistrable CD-
R/RW dans le TRAY
@.
Appuyer sur la touche OPEN/CLOSE (L),
déposer un disque dans le tirroir avec
l’étiquette vers le haut et appuyer sur la
touche OPEN/CLOSE (L
) pour fermer le
tirroir.
Si un disque vierge est déposé dans le
TRAY
@, “BLANK” est affiché.
Choisir la source à être enregister.
Chaque fois que la touche INPUT
SELECTOR est appuyé, l’entrée change
tel que ci-dessous:
DIGITAL OPTICAL:
Pour l’enregistrement d’une source
branchée à l’entrée DIGITAL IN
(OPTICAL).
DIGITAL COAXIAL:
Pour l’enregistrement d’une source
branchée à l’entrée DIGITAL IN
(COAXIAL).
ANALOG:
Pour l’enregistrement d’une source
branchée à l’entrée LINE IN.
Choisir le mode d’assignation de numéro
de piste en appuyant sur la touche
AUTO/MANUAL. (Auto Track).
Appuyer sur la touche “record”
L’appareil se place en mode
enregistrement pause.
J
et “REC” clignotent sur l’afficheur
Appuyer sur la touche PLAY (y) du TRAY
@ pour commencer l’enregistrement.
Jouer la source à être enregistrer.
During l’enregistrement numérique, si le
signal d’entrée est interrompu pour 5
secondes, l’enregistrement s’arrête.
Durant l’enregistrement analogique, si le
signal d’enrée est interrompu pour 20
secondes, l’enregistrement s’arrête.
Si l’appareil détecte des signaux de
prévention de copiage durant
l’enregistrement, “CAN'T COPY” est
affiché et l’enregistrement s’arrête.
6
5
4
3
2
1