English
9
BLAST CHILLER ISTRUCTION
5. PARAMETERS
5.1 PARAMETER MODIFICATION ACCESS
The parameters can be accessed only when the machine is
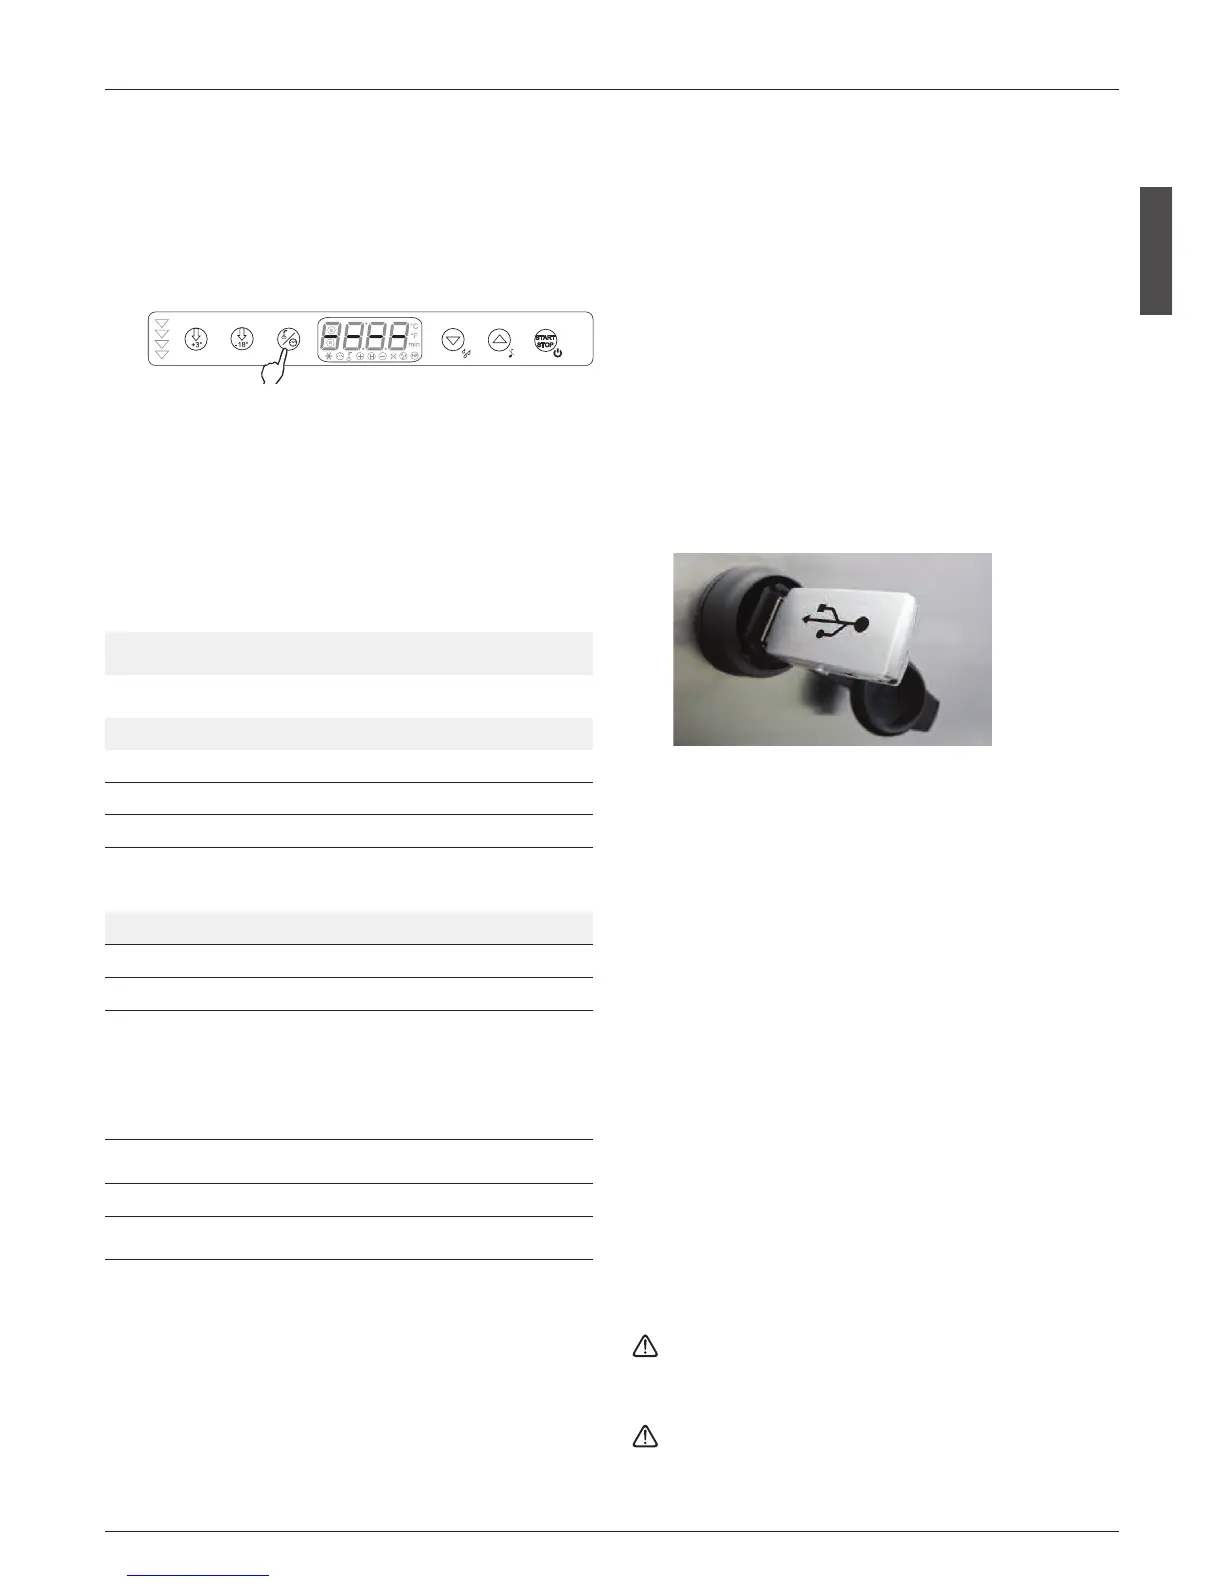
off. Just press the blast chilling button
t
for three seconds,
PASS will appear on the display and the up
u
, down
y
and blast chilling mode buttons
t
will light up.
Pressing only the up
u
and down
y
buttons accesses only
the user parameters.
To scroll through the parameters, press the up
u
and down
y
buttons. To make changes, once the parameter has been
selected, press the blast chilling mode button
t
and
change the parameter value using the up
u
and down
y
buttons. To confirm the value and exit modification mode,
press the blast chilling mode button
t
.
5.2 LIST OF PARAMETERS
Following is the list of available parameters
5.3 DEFROSTING MANAGEMENT (only in certain models)
Manual defrosting is started by pressing the Defrost button
y
for 3 seconds when the panel is in standby. Manual de-
frosting is shut off by pressing the on/off button
q
for 3 se-
conds
5.4 USB DATA RECORDER (OPTIONAL)
• The USB data recorder will register into a .txt file all the data
during the cycles of the machine: Blast Chilling or Freezing
and also during conservation phase.
• The data is registered every minute and will include:
- Date and time
- Cabinet Temperature
- Core probe Temperature
- Type of Cycle
- Start and Stop of Cycle
- Door openings
- Alarms
• The data is constantly stored on the internal recorder, and
can be downloaded anytime from the internal recorder in-
troducing a USB pen drive into the plug on the machine.
Instructions to download the data
1. Find on the machine the USB plug and insert the USB pen
drive
2. IMPORTANT: wait until the led of the pen drive stops fla-
shing, which means that all the data is recorded on the pen
drive.
3. Extract the pen drive
4. On the pen drive you will find a file named log00n000001.txt
which is a text file, delimited with “;” (semicolon).
• The best way to see the data on the file is using Microsoft
Excel, following this sequence:
- Launch Microsoft Excel
- Go to “open file”
- Select “text file” on the type of file
- Open the file registered on the pen drive
- Select “Delimited” file
- Select as delimitator the semicolon “;”
• As an alternative you can open the file with a normal text edi-
tor
• Every time you insert the pen drive, a new log file will be ge-
nerated, with a progressive number (log00n000002.txt,
log00n000003.txt, log00n000004.txt, etc).
• Every file generated will contain the complete historical data
recorded, up to the moment of insertion of the pen drive. So
every time the file is bigger.
• As a consequence, the time to save the file on the pen drive
(see point 2.) will increase from some seconds to several mi-
nutes, depending on how much data is stored on the recor-
der. IT’S VERY
WAIT UNTILL ALL THE DATA IS RECORDED ON THE PEN
DRIVE BEFORE REMOVING IT, WAITING UNTIL THE LED ON
THE PEN DRIVE STOPS FLASHING.
When updating data: time, day, and year on the board of
the computer, it’s necessary to remove and then restore the
power supply to allow the change data is also stored in the
USB recorder.
Parameter Min Max U. M. DEF
P0
Choose temperature unit of measure (0 = Fahren-
heit, 1 = Celsius)
0 1 1
Fla
g
Adjustment set point
Pr1 Blast chilling cell set point -20 30 -5 °C
Pr2 Positive storage cell set point -20 30 +3 °C
Pr3 Freezing cell set point -50 20 -40 °C
Pr4 Negative storage cell set point -50 20 -25 °C
Pr6 End blast chilling product temperature -20 30 +3 °C
Cycle times
Pt0 Max blast chilling temperature cycle duration 1 200 90 min
Pt1 Max freezing temperature cycle duration 1 400 240 min
Pt2
Cycle proposed for startup/after cycle stop:
0 = startup from off, 1 = startup from standby wi-
thout cycle selected,
2 = positive timed, 3 = positive hard timed, 4 = ne-
gative timed, 5 = positive temperature,
6 = positive hard temperature, 7 = negative tem-
perature,
0 7 0 flag
Pt3
After stop cycle offers: 0 = last cycle, 1 = cycle defi-
ned by Pt2, 2 = no cycle
0 2 2 flag
Pt4 Ice cream hardening timer time 1 20 10 min
Pt5 Duration hard time phase (blast chilling cycle %) 1 99 66 min



 To Next Page