EasyManua.ls Logo

TECO E510 User Manual

TECO E510
9 pages
To Next Page IconTo Next Page
Page #1 background imageLoading...
Page #1 background image
Downloaded from https://acdriveshop.co.uk
Page 1 of 9 08/08/14
TECO E510 Inverter
Quick Start Guide
1) Ensure that the Inverter & the motor have the correct
KW power and voltage ratings.
Motor full load amps must not exceed the Inverter rating.
2) Ensure that the supply & Motor cables are connected
correctly prior to power up.
3) For single phase supply, use L1(L) & L3(N) on units which
have 3 supply terminals.
4) Connect motor cable to terminals T1, T2 &T3.
(Swap two leads if motor runs in reverse direction).
5) Connect supply Earth and the motor Earth to the drive Earth
terminal.
Note:-
I ) For detailed installation
and wiring refer to the
Instruction manual.
This guide is to assist you in installing and running the inverter and verify that it is
functioning correctly for it’s main and basic features.
For detailed information and if there are any doubts please refer to the instruction manual.
Step 1
Supply & Motor connection
Question and Answer IconNeed help?

Do you have a question about the TECO E510 and is the answer not in the manual?

TECO E510 Specifications

General IconGeneral
ModelTECO E510
CategoryInverter
Frequency50/60 Hz
Control MethodV/F Control, Sensorless Vector Control
Overload Capacity150% for 60 seconds
Cooling MethodForced Air Cooling
Operating Temperature-10°C to 50°C
AltitudeUp to 1000m without derating
Input Voltage3-phase 380-480V AC
Output Voltage0-480V
Rated Power0.4 kW to 15 kW
Protection FeaturesOvervoltage, Undervoltage, Overheat, Short circuit
Communication InterfaceRS485, Modbus RTU
Storage Temperature-20°C to 60°C
Humidity5% to 95% (non-condensing)

Summary

Quick Start Guide for TECO E510 Inverter

Step 1 Supply & Motor Connection

Connect power supply and motor to the inverter, ensuring correct ratings and earthing.

Step 2 Apply Power to Drive

Apply power to the drive and observe initial display for voltage and frequency.

Step 3 Test Run from Keypad

Test run the inverter using the RUN key and stop it using the STOP key.

Step 4 Alter Frequency from Keypad

Learn to change the operating frequency using the keypad's arrow keys.

Remote Speed Reference and Run Configuration

Step 1 Remote Mode Wiring

Wire for analogue signals (voltage/current) and set jumpers for potentiometer/current input.

Step 2 Remote Mode Run

Configure remote run signal type (PNP/NPN) and connect remote start switches.

Step 3 Check/Verify Parameters

Verify and alter parameters for remote start and frequency settings (00-02 & 00-05).

Step 4 RUN using Remote Speed Reference

Activate remote run switches and set frequency via keypad, potentiometer, or analog input.
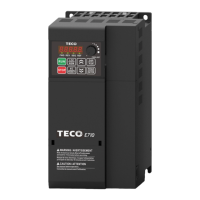
Keypad Parameter Alteration Procedure

Basic Quick Start Parameter List

Control Modes and Auto Tune Functionality

Single Phase Standard Wiring Diagram

Three Phase Wiring Diagram

Related product manuals