Challenger Series Installation and Quick Programming Manual 39
2. We recommend that you disconnect the panel’s existing Ethernet and/or
serial connections to the management software computer for the duration of
this process.
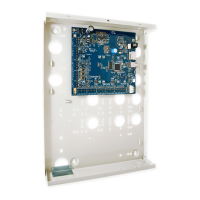
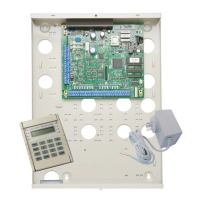
3. Fit test links 1 and 2 (Figure 7 on page 15, item 22 or Figure 9 on page 18
item 20).
4. Reconnect power to the panel. LED L1 will blink rapidly (Figure 7 on page 15,
item 23 or Figure 9 on page 18, item 19).
5. Use the USB cable to connect the computer to the Challenger panel’s USB
port at J18 (Figure 7 on page 15, item 18 or Figure 9 on page 18, item 14).
The first time you connect a Challenger panel to the computer’s USB port, the
Found New Hardware Wizard may display. If the Found New Hardware
Wizard does not display, go directly to step 9.
6. If the wizard asks “Can Windows connect to Windows Update to search for
software?”, click to select the “No, not this time” radio button, and then click
Next.
7. If the wizard asks “What do you want the wizard to do?”, click to select the
“Install from a list or specific location” radio button, and then click Next.
8. Click to select the “Search for the best driver in these locations” radio button,
and then browse to include the location of the Tecom Firmware Loader
application in the search (for example, C:\Program Files\Tecom Firmware
Loader\inf_driver).
9. Run Tecom Firmware Loader (for example, double-click the file C:\Program
Files\Tecom Firmware Loader\tecom-fw-loader_Vn.n.exe).
When you run it will tell you if the device is ready, otherwise you can’t select a
file.
10. Click Select File… and then browse to the location of the firmware upgrade
file on your computer. Select the file and then click Open.
11. Click Program File… to update the panel firmware. The process will take
several minutes. The percentage completion displays at the bottom of the
window. When finished, a “Programming is complete” message displays.
12. Remove the USB cable from the Challenger panel.
13. Remove power to the Challenger panel and wait for all LEDs to turn off.
Note: If the panel has a TS1084 Memory Expansion Module fitted, do not
repower the panel for 10 seconds (or more) after the LEDs on the TS1084
module turn off.
14. Remove test links 1 and 2.
15. If applicable, reconnect the panel’s Ethernet and/or serial connections to the
management software computer.
16. Reconnect power to the panel. The panel should reboot and connect with
RAS 1 on LAN 1. If the panel does not reboot, repeat the process from step 9.