Click the Add button to open the Relay mapping dialog to add a new relay
mapping.
Click the Edit button to open the Relay mapping dialog to edit the selected
relay mapping in the Relay mapping list.
Click the Remove button to remove the selected relay mapping from the
Relay mapping list.
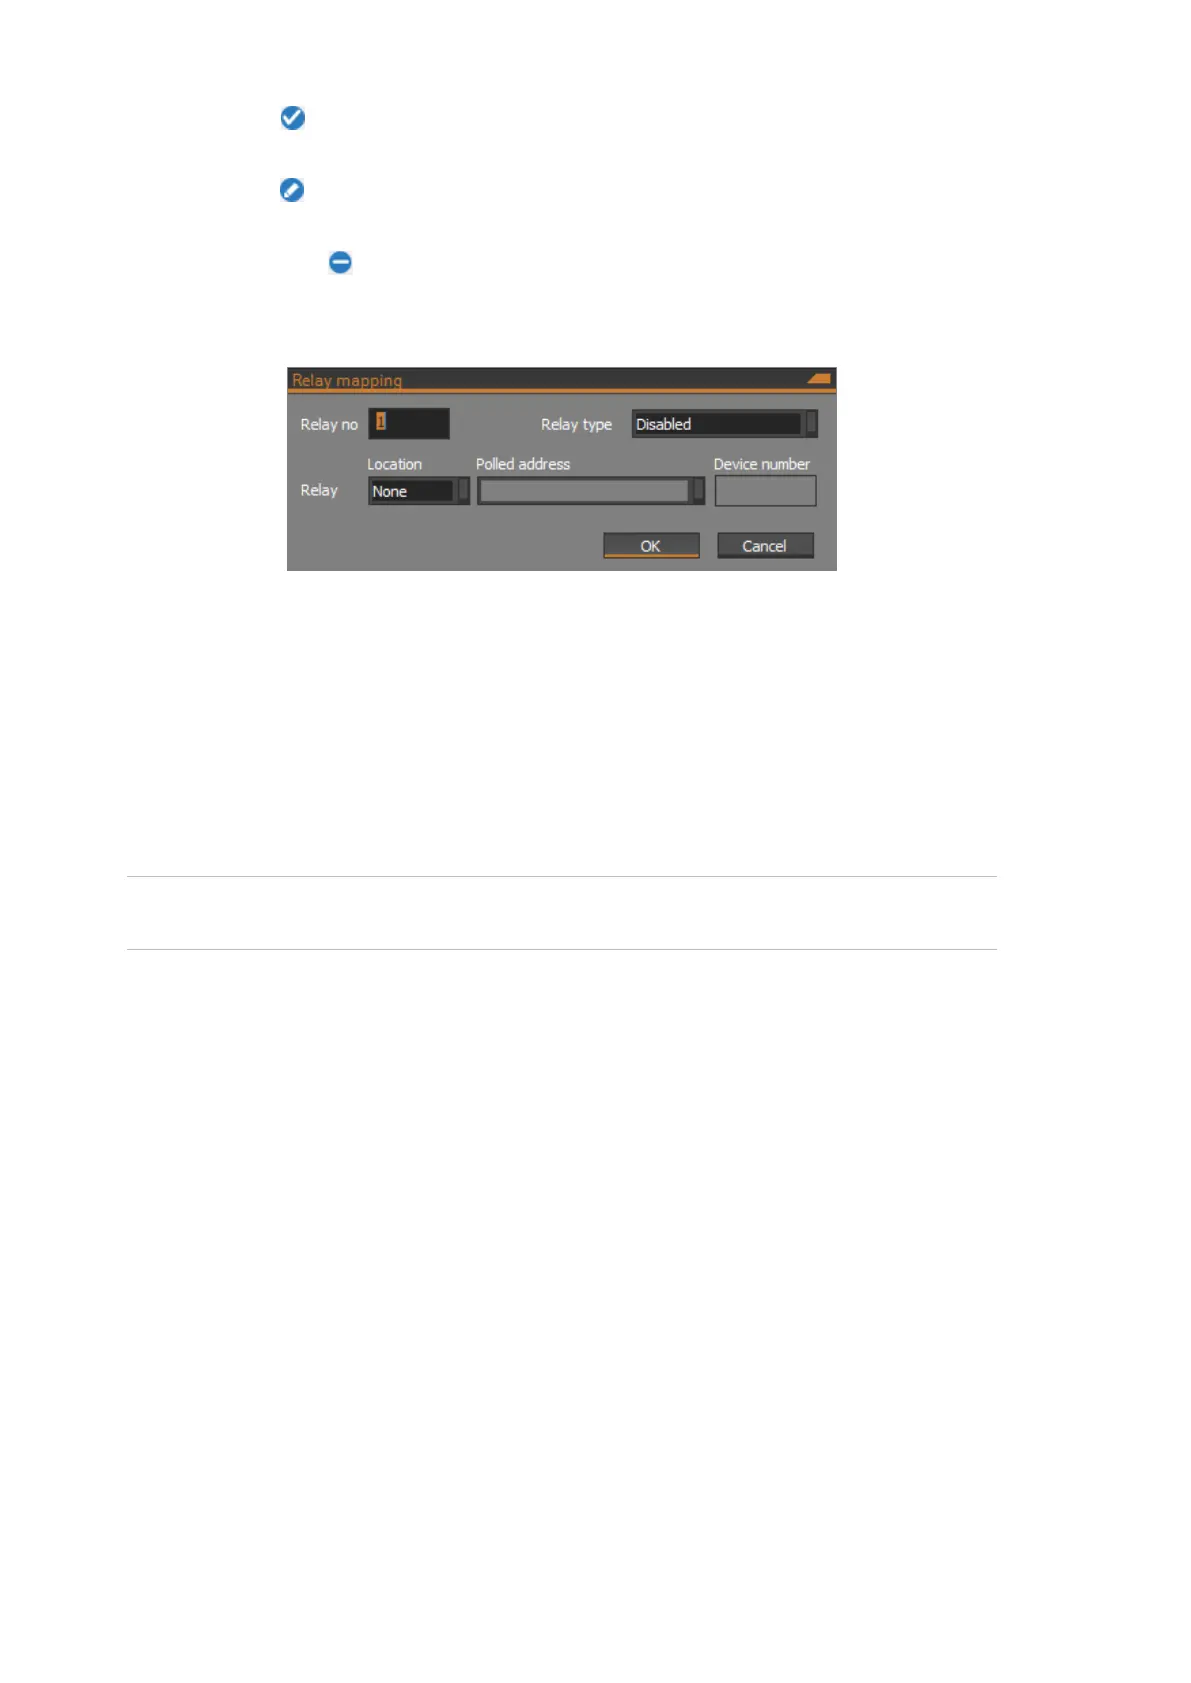
The following figure shows the Relay mapping dialog:
Relay no
Enter a number in the range 1 to 16. The mapped relay number is an index into
the ChallengerPlus relay numbering scheme. Thus, for the NAC with address 1
on the ChallengerPlus panel’s LAN1, mapped relay numbers 1 to 16 correspond
to ChallengerPlus relay numbers 17 to 32. See the “Input and relay mapping”
section on page 21 for information on relay mapping.
Activating the ChallengerPlus relay will activate the specified relay device
attached to the NAC.
Note: Relays that are not mapped to a device may be used as an input to a
macro.
Relay type
Specify the relay type for the relay mapping. The relay types are:
Disabled – The relay is disabled.
Direct map – The relay is directly mapped from the ChallengerPlus to the
relay specified in the Relay field.
Relay
The relay location must be specified using the scheme described in the “Flexible
device locations” section on page 18.
Programming mapped inputs and relays
On the attached ChallengerPlus, program the mapped inputs and relays as
required.