3-6
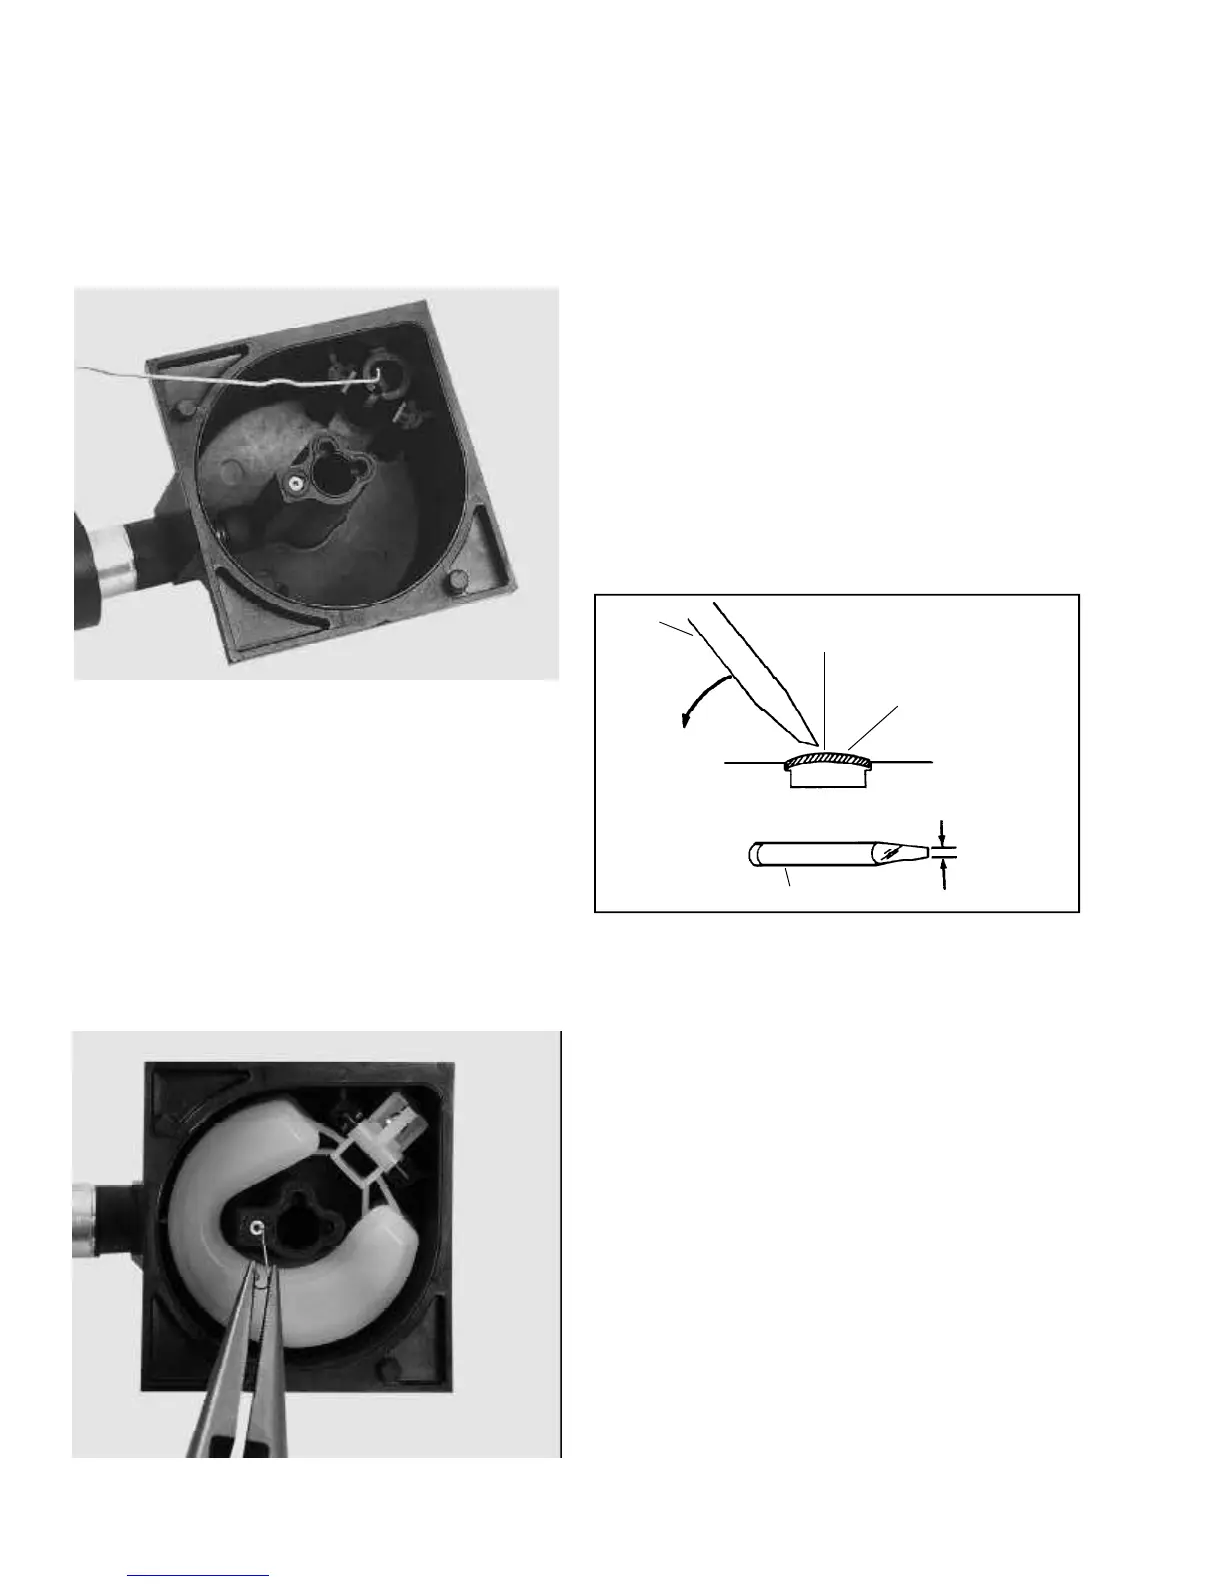
5. Remove the inlet needle seat using a No. 4 crochet
hook or a paper clip with a 3/32" (2.38 mm) hook
end. Push the hook through the hole in the center of
the seat and pull out to remove it. NOTE: A metal
retaining ring may be present on top of the seat to
aid in its retention, this will come out with the seat. If
a ring is present or comes with the new seat reinstall
it. (Illust. 3-13)
3-13
3-14
6. Idle Restrictor: The idle restrictor is located to the
side of the center leg in the fuel bowl. (Illust. 3-14)
Clean the passage using a piece of wire (maximum
.015, .0006 mm), carburetor spray and compressed
air, verify it is open. If the restrictor remains plugged
it can be serviced by replacement of the float bowl
assembly only.
NOTE: New service fuel bowls come with the
restrictor installed.
NOTE: Before removing the main carburetor body,
mark or sketch the choke and throttle linkage
connection points. Also MARK THE EDGES OF THE
THROTTLE AND CHOKE SHUTTERS. THE
SHUTTERS HAVE BEVELED EDGES AND MUST
BE INSTALLED IN THE ORIGINAL POSITION.
7. Use a Torx T-10 to remove the choke and throttle
shutters. Remove the throttle shaft, choke shaft and
return springs.
8. Welch plug Removal: Secure the carburetor in a vise
equipped with protective jaws. Use a small chisel
sharpened to a 1/8" (3.175 mm) wide wedge point .
Drive the chisel into the plug to pierce the metal and
push down on the chisel prying the plug out of the
hole. (Illust. 3-15)
NOTE: Be careful not to drive the chisel through the
plug damaging the metering holes underneath.
3-15
SMALL
CHISEL
PRY OUT
PLUG
DO NOT ALLOW
CHISEL POINT
TO STRIKE
CARBURETOR
BODY OR
CHANNEL
REDUCER
PIERCE PLUG
WITH TIP
WELCH PLUG TO
BE REMOVED
ABOUT 1/8”
(3.175 mm)
WIDE
SMALL CHISEL