To use
■
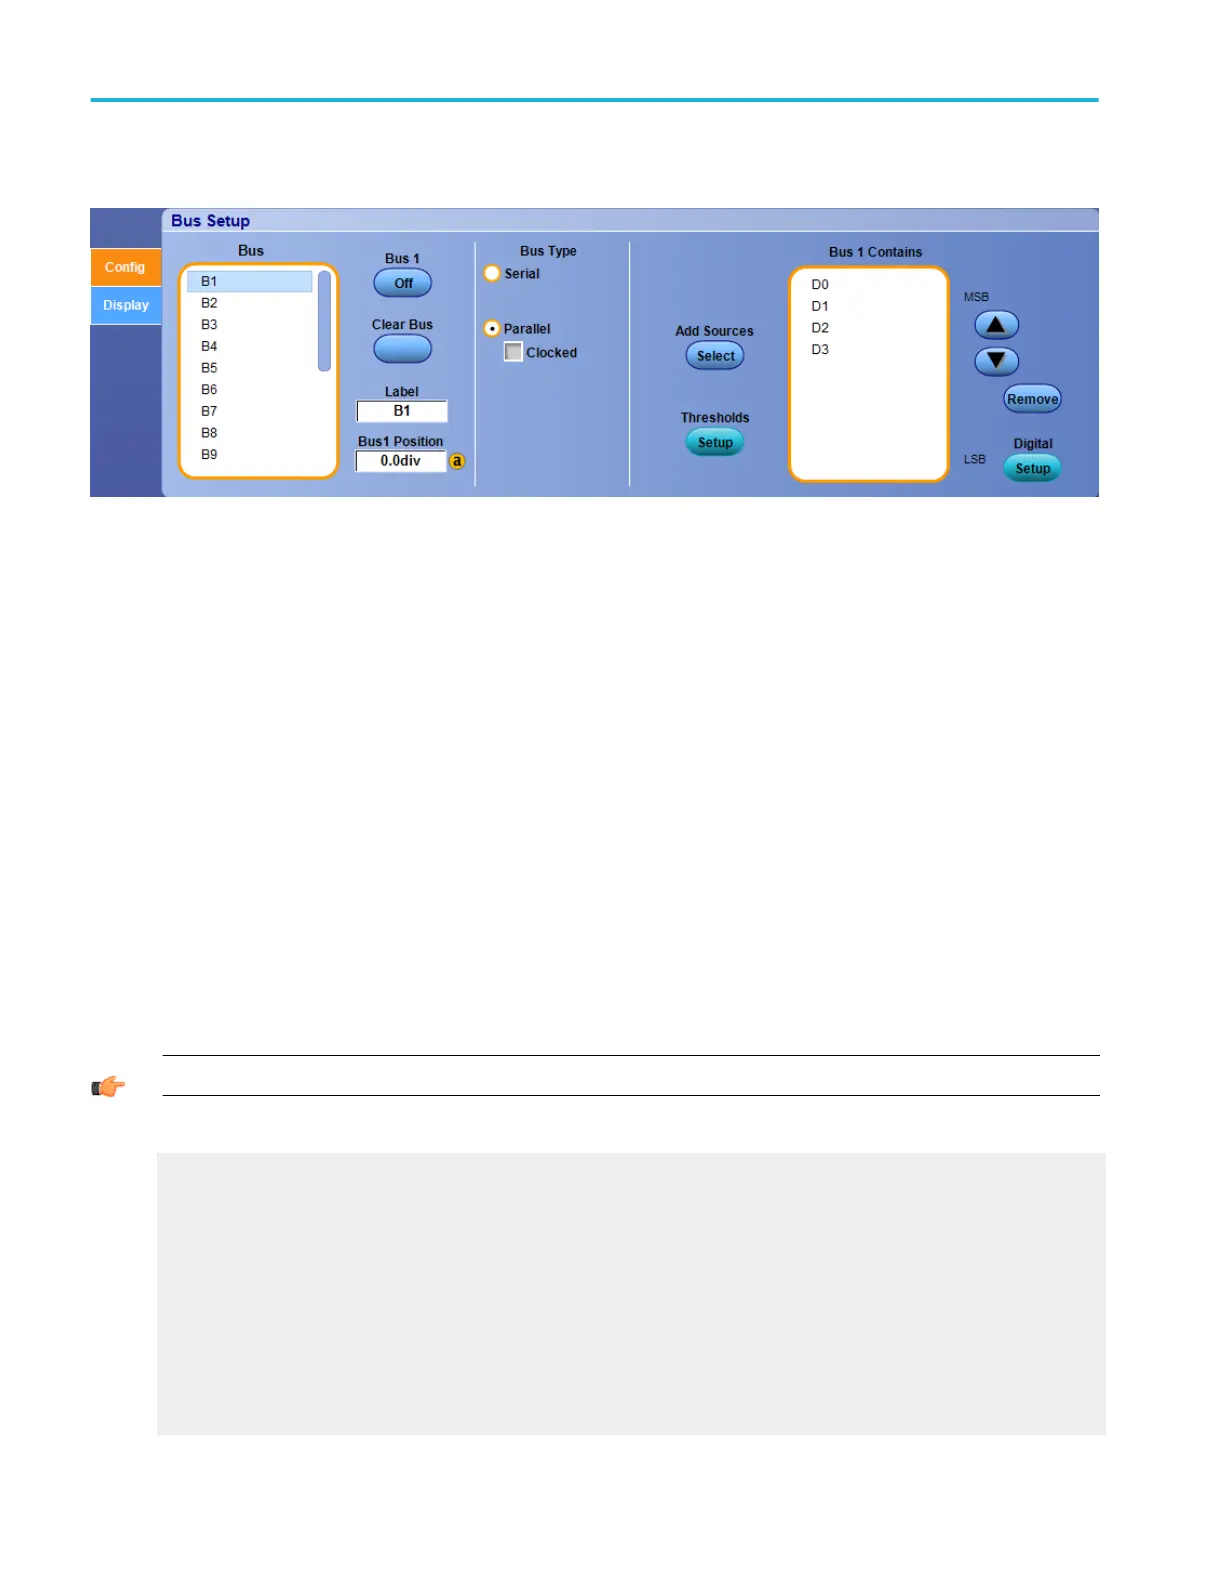
Click and drag the scroll bar until the desired Bus number <B1-B16> or name is visible
■
Click on a Bus number or name
■
Click the corresponding Bus number Off/On button
■
To name the bus, click the Label entry box and enter a name with the keyboard
■
To change the vertical position of the bus on the display, click the Bus Position entry box and use the keypad or the
multipurpose knob to move the bus
■
Click a Bus Type: Serial or Parallel
■
For Parallel buses, click the Add Sources button and build your bus with any combination of D15-D0, Ch1-Ch4, and M1-M4
channels
■
For Serial buses, select one of the available options from the drop-down list; the instrument provides additional parameters
to set up for each standard
Behavior
Click the Clear Bus button to clear all the channels from the selected bus and remove the bus from the display.
TIP. Click the Digital Setup button to quickly access the Digital Setup control window for the parallel bus type.
What do you want to do next?
Learn about bus configuration.
Learn about digital setups.
Learn how to set up digital waveforms.
Learn how to view analog characteristics of a digital waveform.
Learn how to set up a bus.
Learn how to trigger on a bus.
Learn how to track down serial bus anomalies.
Learn how to troubleshoot circuits using a parallel bus.
Bus setups
108 DPO70000SX, MSO/DPO70000DX, MSO/DPO70000C, DPO7000C, and MSO/DPO5000B Series
 Loading...