To use
■
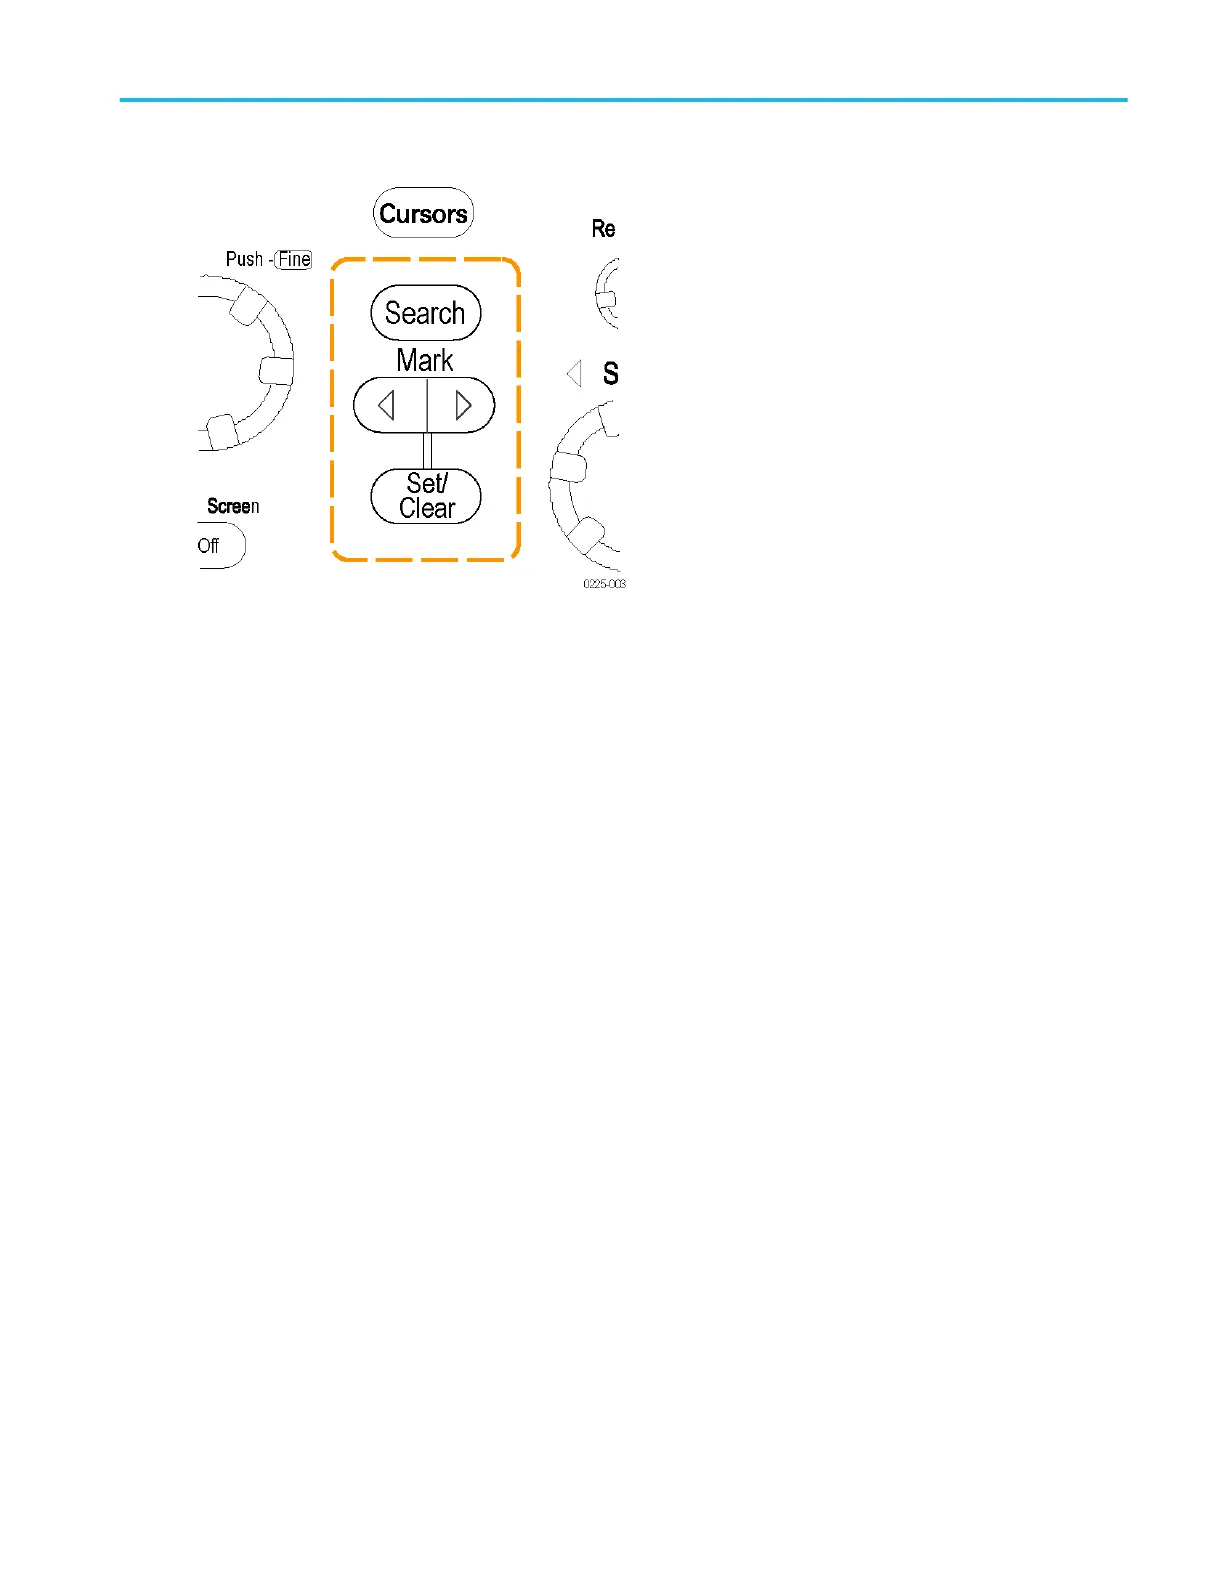
Search. Click this button to turn the Search and Mark feature On or Off. Use the corresponding Search button on the front
panel to also turn the feature On or Off.
■
Prev /Next. Click this button to advance from one mark to another along the waveform. Use the corresponding Mark ◄ and
► buttons on the front panel to also move from mark to mark.
■
Set /Clr. Click this button to add or delete a user mark. User marks are placed on the waveform at center screen. Use the
corresponding Mark Set/Clr button on the front panel to also add or delete a user mark.
■
Cursor 1/Cursor 2. Click one of these buttons to position a cursor at the active mark.
■
Zoom 2 / Zoom 3. Click one of these buttons to zoom the area around the active mark. Zoom 1 is the default used by the
Search and Mark feature.
Behavior
Use the Search and Mark controls to set a mark on a waveform at a point of interest. You can return to a mark and analyze the
waveform at a later time.
Marks appear as either green or white triangles on-screen. White triangles represent locations placed manually by the user.
Other triangles represent locations placed automatically by the instrument; the color of the triangles depend on the selected
search index.
Analyzing waveforms
DPO70000SX, MSO/DPO70000DX, MSO/DPO70000C, DPO7000C, and MSO/DPO5000B Series 309
 Loading...


