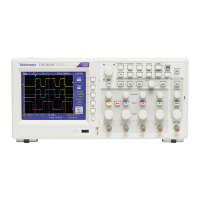
Interior cleaning
You can only clean the interior of the rear chassis assembly. To access the rear
chassis assembly, see the Removal and Installation Procedures topics.
Do not disassemble or clean the front chassis assembly (other than cleaning the
front panel display and removing panel knobs). Disassembling the front chassis
assembly requires that the instrument be returned to your nearest Tektronix
Service Center for calibration.
WARNING. To avoid electric shock or damage to the instrument, remove
instrument power. Before performing any procedure that follows, power down
the instrument and disconnect it from line voltage.
■
Blow off dust with dry, low-pressure (approximately 9 psi), deionized air.
■
Use a soft-bristle, non-static-producing brush for cleaning around
components.
■
Remove any remaining dust with a lint-free cloth dampened in isopropyl
alcohol (75% solution). (A cotton-tipped applicator is useful for cleaning in
narrow spaces and on circuit boards).
■
If you must use a liquid for minor rear chassis interior cleaning, use a clean-
room wipe (such as Wypall Medium Duty Wipes, #05701, available from
Kimberly-Clark Corporation) dampened with a 75% isopropyl alcohol
solution.
■
Inspect the internal portions of the instrument for damage and wear. See
Table 2: Internal inspection checklist on page 13. Defects should be
repaired immediately.
■
If any circuit board is repaired or replaced, you must perform the
Performance Verification procedure in the specifications and performance
verification manual, which was provided with your instrument. This manual
is also available at www.tektronix.com/manuals, by searching for your
product name. If the instrument fails the Performance Verification tests, it
must be returned to a Tektronix Service Center for repair and calibration.
CAUTION.
To prevent damage from electrical arcing, ensure that circuit boards
and components are dry before applying power to the instrument.
Maintenance
12 TBS2000B Series Service Manual
 Loading...


