Removal and Installation Procedures
6-- 30
TDS7104 & TDS7054 Service Manual
1. Locate modules to be removed: Locate the Floppy Disk Drive in the locator
diagram Internal Modules, Figure 6--8, on page 6--19. Additional modules to
be Removed:
H Trim (front panel and top)
H Front Panel assembly
H Display assembly
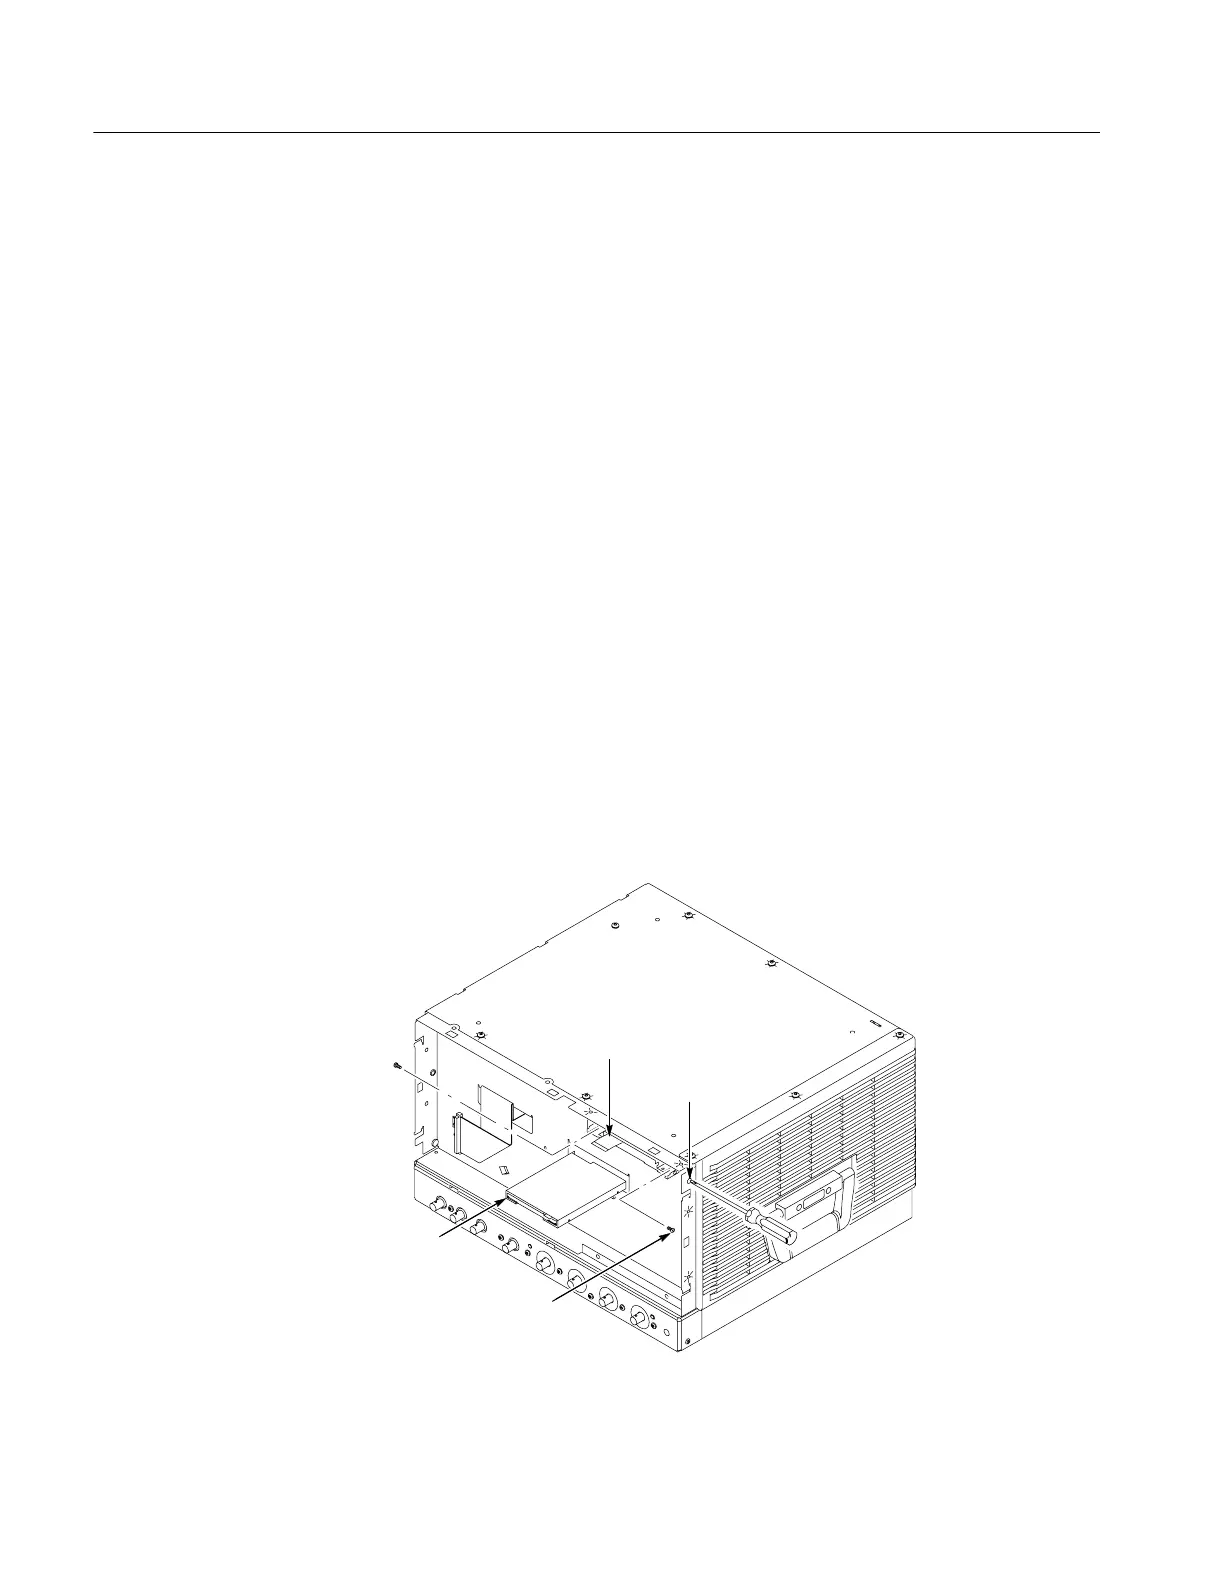
2. Remove the floppy disk drive: Use Figure 6--17 as a guide. A #0 Phillips
screwdriver is required for this procedure.
3. Orient the oscilloscope: Set the oscilloscope so its bottom is down on the
work surface and its front panel is facing you.
a. Remove the two small phillips screws that secure the floppy disk drive
assembly to the bracket. Use the access hole located on the outer chassis
to remove one of the small phillips screws.
b. Slide the floppy drive out toward the front of the oscilloscope far enough
to allow you to disconnect the ribbon cable connector.
c. Remove the floppy drive from the oscilloscope.
4. Reinstallation: Do in reverse steps a through c to reinstall the floppy disk
drive.
Small Phillips
screw (2)
Floppy
drive
Ribbon
cable
Access
hole (2)
Figure 6--17: Floppy disk drive removal
Floppy Disk Drive
 Loading...

