Installation
1. Loosen the front-panel knurled retaining
screw.
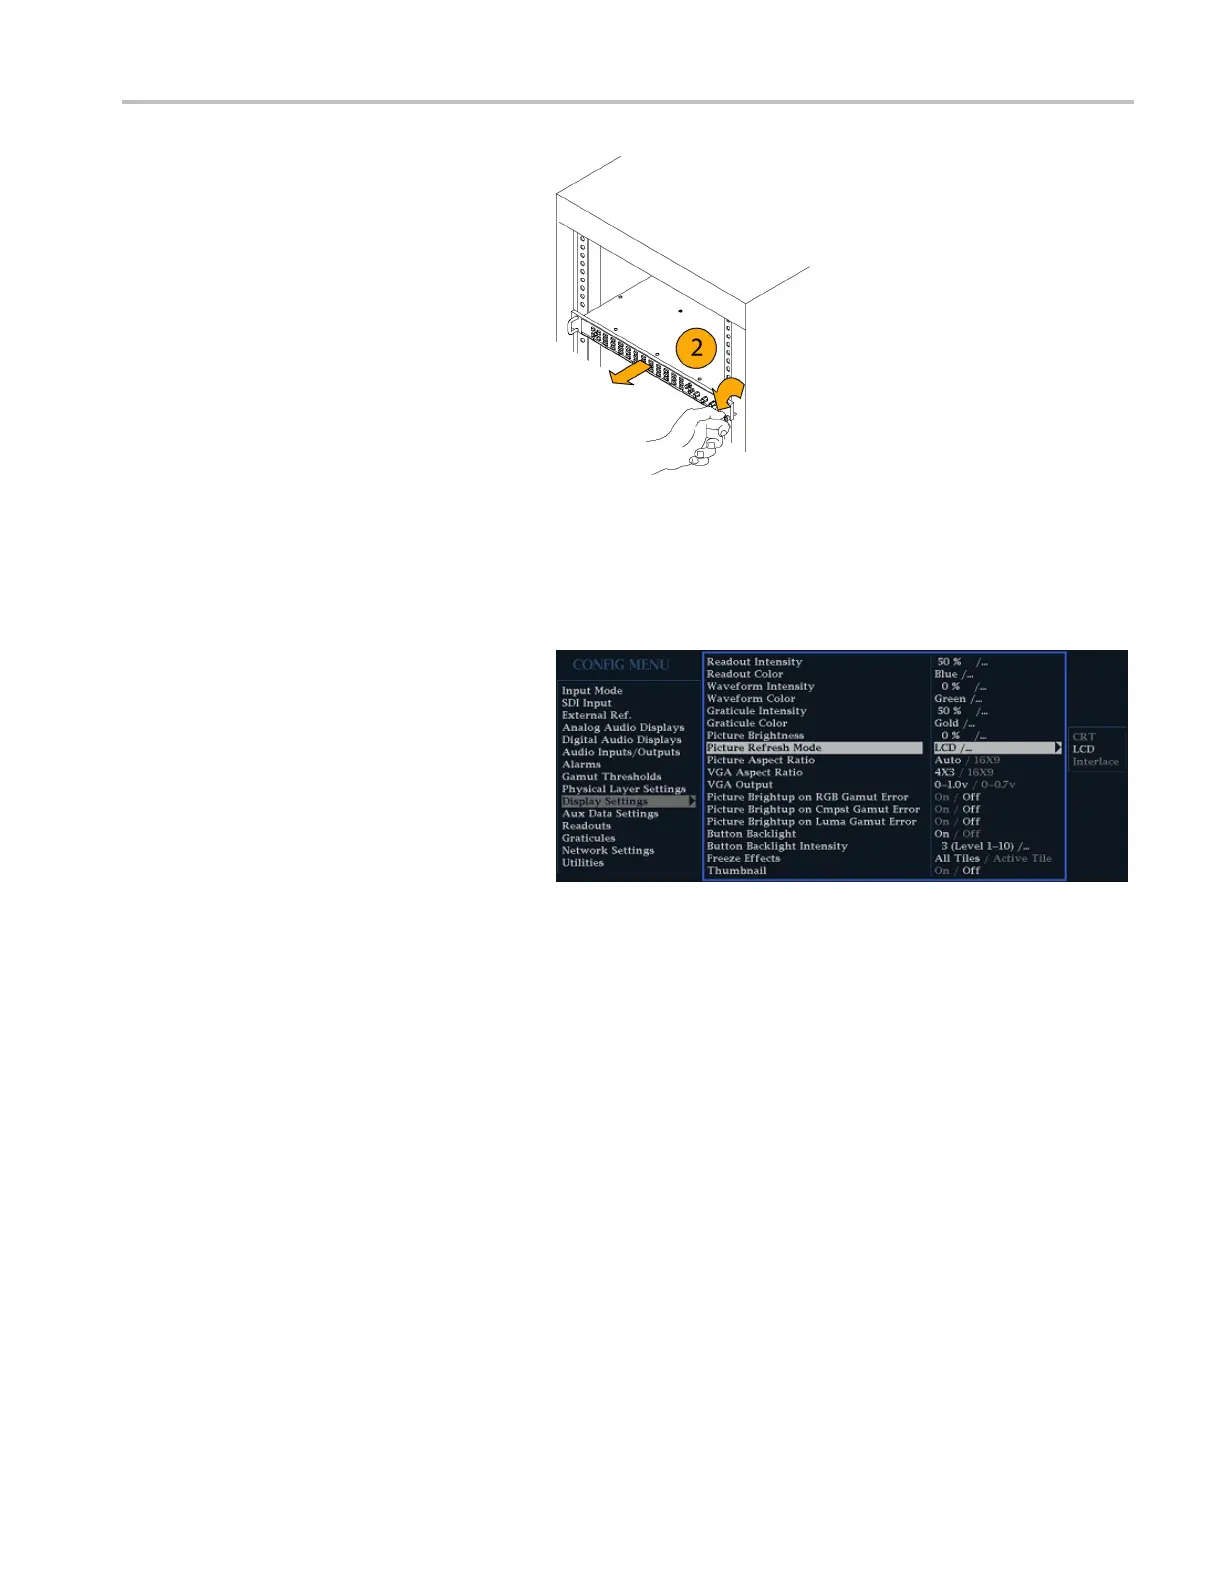
2. G rasp the front handles and pull the
instrument out
until all three slide
sections latch. The instrument is firmly
held in this position and you are now
ready to conne
ct power and signal
cables to the instrument.
3. Connect the external display to the
rear-panel XGA OUTPUT connector.
The XGA output connector is a standard
15-pin D-type connector with socket
contacts.
4. Press the CO NF IG button to display the
Configuration menu.
5. Select Display Settings from the
submenu and then select Picture
Refresh Mode.
6. Select CRT for a CRT monitor, or select
Interlaced or LCD for LC D m onitors.
NOTE. Press the HELP button after
selecting Picture R efresh Mode for more
information about these settings.
Connecting Power and Powering On/Off
This ins
trument operates from a single-phase power source with the neutral conductor at or near earth ground. The line
conductor is fused for over-current protection. A protective ground connection through the grounding conductor in the power
cord is essential for safe operation.
AC Powe
r Requirements
This instrument operates from an AC line frequency of 50 or 6 0 Hz, over the range of 100-240 Volts, without the need for
configuration, except the power cord. (See page 2, International Power Plugs.) The typical power draw is 50 W. Refer to the
Specifications and Performance Verification manual on the User Documentation CD for additional information on power
and environmental requirements.
Connect the supplied power cord to the rear-panel power connector. There is no power switch on this instrument, so
it will turn on as soon as you apply power.
Waveform Rasterizers Quick Start User Manual 7
 Loading...