TCM260904 Rev 0.1
TCM260904 Page 11 of 31
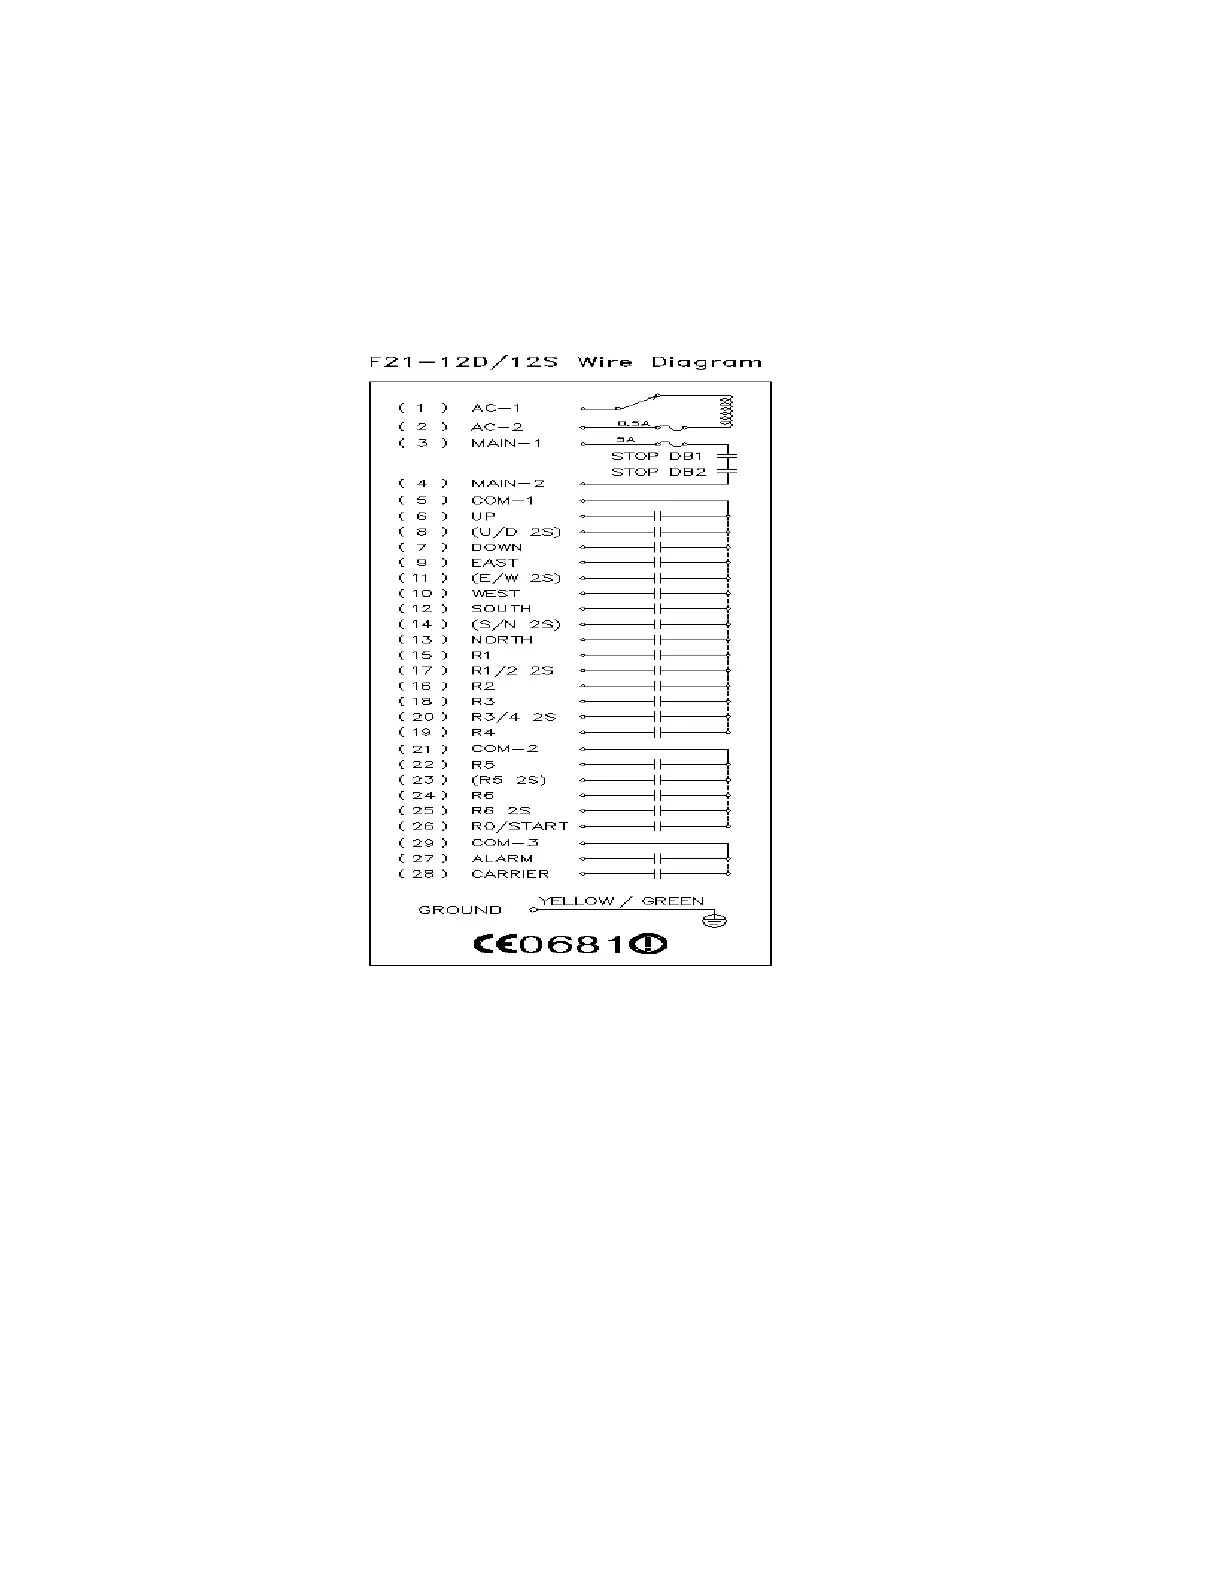
INSTALLATION SEQUENCE
(1) Turn off the main power for the crane.
(2) Attach the template (provided) for the receiver to the proper place.
(3) Drill the holes for the screws, mount receiver, and then secure the receiver with 6mm nuts on the vibration-
resistant feet.
(4) Connect the cables to the control circuit of the crane according to the receiver’s wiring chart and control
contact diagram.
NOTES
(1) Inspect and make sure that all wires are connected correctly.
(2) The earth ground for the remote controller and crane must be properly connected to ensure safety.
(3) Secure the cables between the receiver and crane so that the cable bracket will not wear through due to the
vibration of the crane.
(4) Open the top cover of the receiver and turn the Relay module’s Run/Test switch to the “Test” position.
(5) Turn on the main power for the crane.
(6) Operate the transmitter to test all functions and make sure they all operate correctly as shown by the LED
indicators.
(When the Run/Test switch is set to the “Test’ position, the relays will not function, but the LEDs will
display)
(7) Turn the Run/Test switch to the “Run” position and secure the top cover to the receiver with screws.
(8) This completes the installation of the receiver.
 Loading...