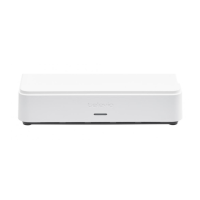
WIRELESS ACCESS POINT (WAP)
Introduction
All communication to and from the Wireless Units is controlled by the WAP.
Installation
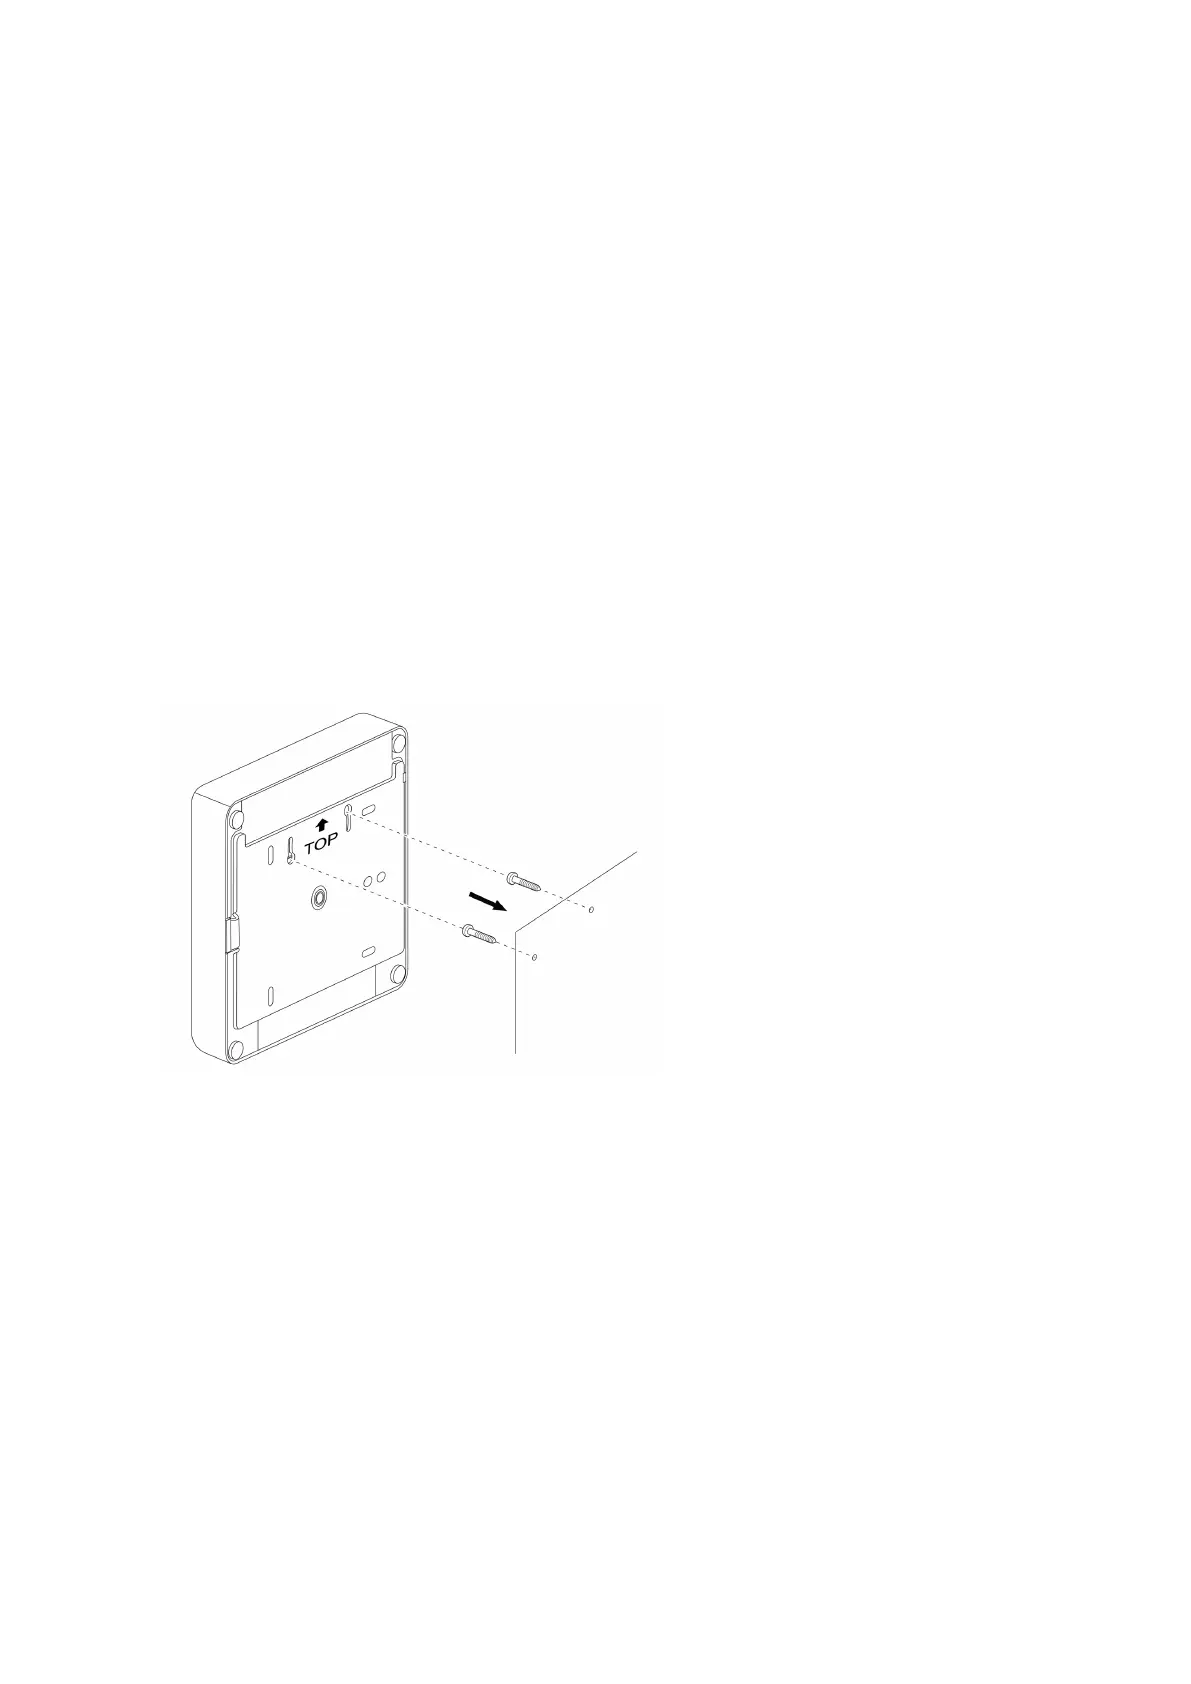
WALL MOUNTING
There are several ways to mount the WAP on the wall.
USING THE HANG-UP FIXING HOLES
The WAP can be mounted on the wall by means of the 2 curved fixing holes on the bottom of the device.
To prevent accidents from happening, attach the device to the wall, taking into account the instructions
in "Mount the Confidea WAP" on page46.
Figure 1-2 How to mount the Confidea FLEX G4 WAP to a wall
FIXING THE BOTTOM PLATE OF THE WAP TO THE WALL
The WAP can be mounted on the wall by means of the 4 fixing holes on the bottom of the device. To
prevent accidents from happening, attach the device to the wall, taking into account the instructions in
"Mount the Confidea WAP" on page46.
To attach the WAP, first slide it in on one side of the bottom plate. The WAPcan then be clicked in place
on the other side
WIRELESS ACCESS POINT (WAP) 21