Section 3 - Step-By-Step Assembly
Temp-Cast 2000 Installation Manual
13
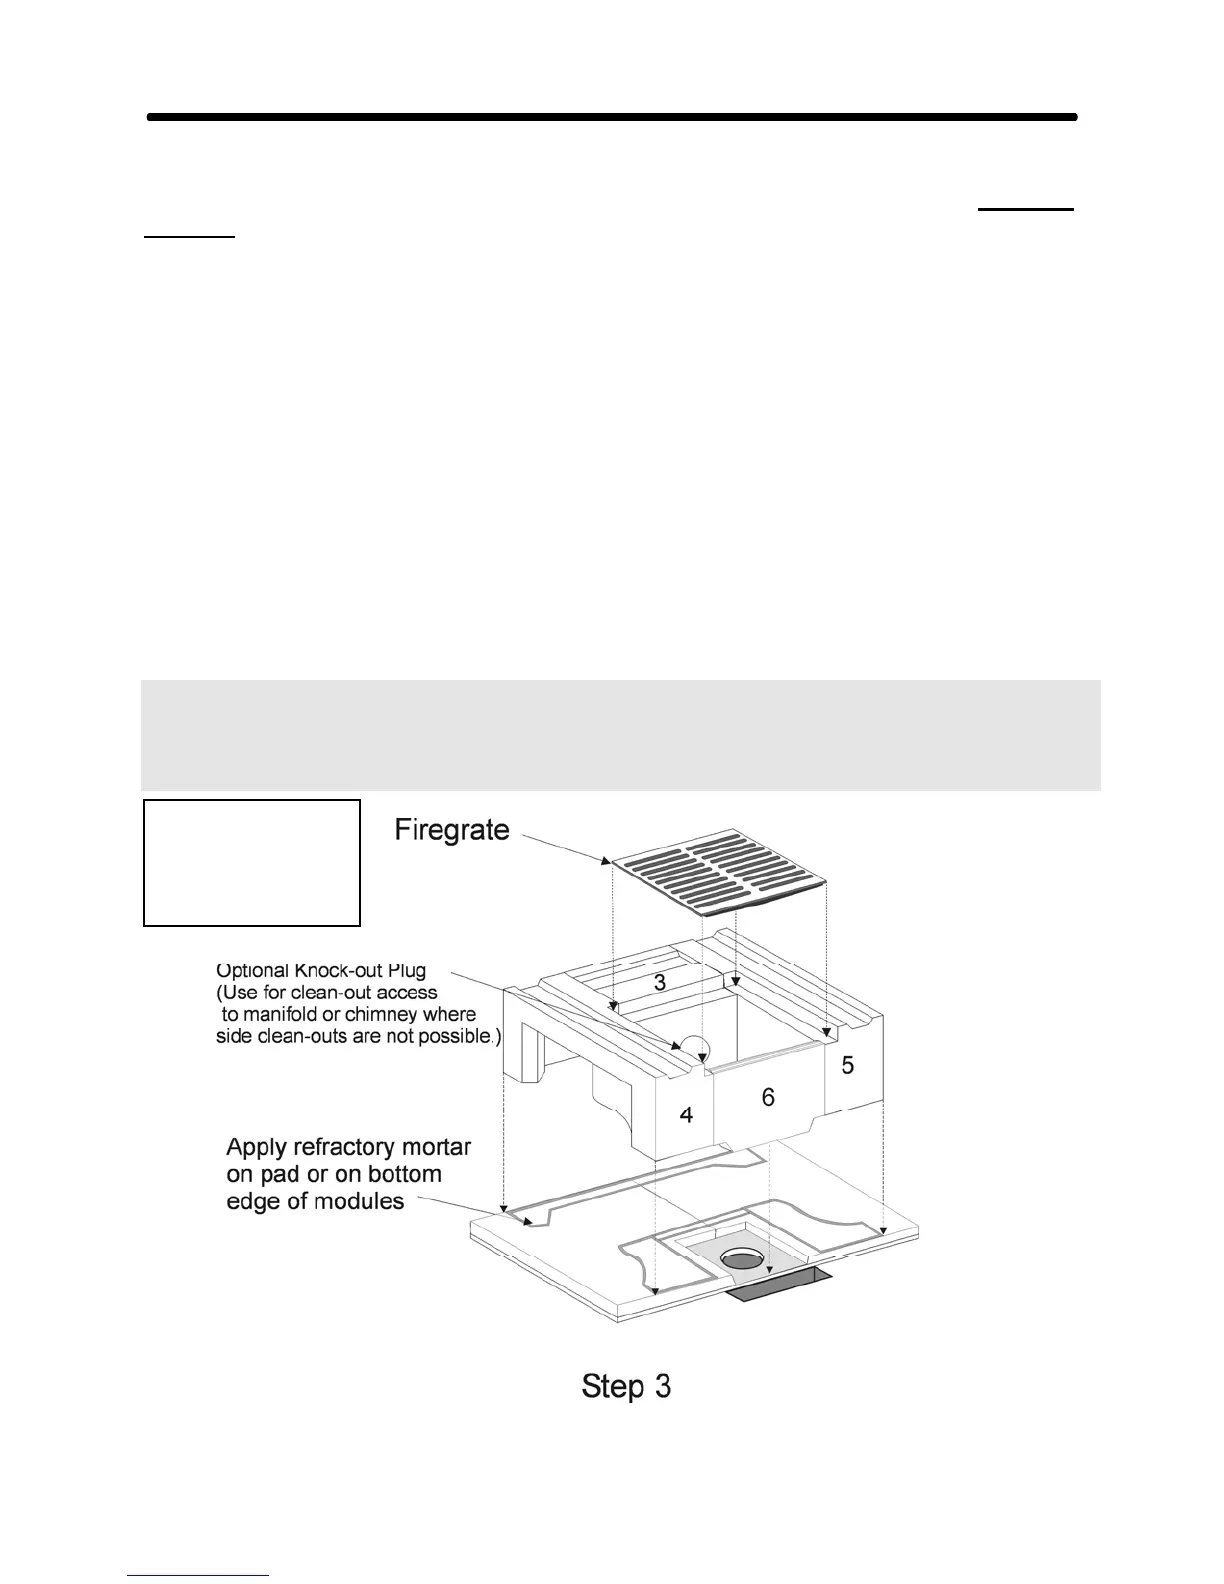
STEP 3:
When the Leveling Pad can support weight, dry assemble the first course of modules, including
the grate, as in the accompanying drawings, to check for proper fit. This course must be centered
on the Leveling Pad, so that equal space is left on both sides for the heat exchange channels - mark
the correct placement with a pencil.
If the chimney is to be connected at the rear of the fireplace, mark the cross manifold (#3) to be
cut for the flue connection. Take this part outdoors and cut a hole for the flue connector being
used. For flue tile or HT chimney, cut the hole the same size as the inside dimensions of the flue
connector. The flue connector or HT adapter will then be mortared or attached to the outside of
the cross manifold - Part #3. (Holes for a side connection are discussed at Step 18.)
Once the layout of fireplace and chimney connection, all dimensions and locations of cleanout
doors have been confirmed, draw a line on the Leveling Pad to mark the outside edges of the base
course. Now remove the modules, (cut the flue hole in #3 if required) and re-assemble, using a
small amount of the refractory mortar provided on the bottom edges and between modules. Seat
the parts with the rubber mallet, then reach inside the cross manifold and wipe off all excess
mortar.
NOTE: once final assembly has been started, the entire core should be assembled in a continuous
operation, so that minor adjustments to previous courses can be made before the refractory mortar
has set. Place the fire-grate in position, which should fit loosely to allow for expansion. Cover it
to keep clean.
Weights
#3 - 61 lbs
#4& #5 - 82 lbs
#6 - 22 lbs