Section 3 - Step-By-Step Assembly 35
Temp-Cast 2000 Installation Manual
STEP 23:
Cut the flue connector to the correct length and with the correct angle, so that it rises up 1"/ft
(25mm/300mm) towards the chimney.
Install the flue connector with refractory mortar to the heat exchange channel and support it in
the correct position.
NOTE: extra care must be taken to be certain that the flue connector does not go beyond the
inner surface of the heat exchange channel. Ideally, the connector should penetrate the heat
exchange channel no more than one inch (25mm). (Refer also to Fig.3.)
Reach inside the flue connector to smooth and round the corners of the connection. Remove
excess refractory mortar from the inside edges of the flue connector.
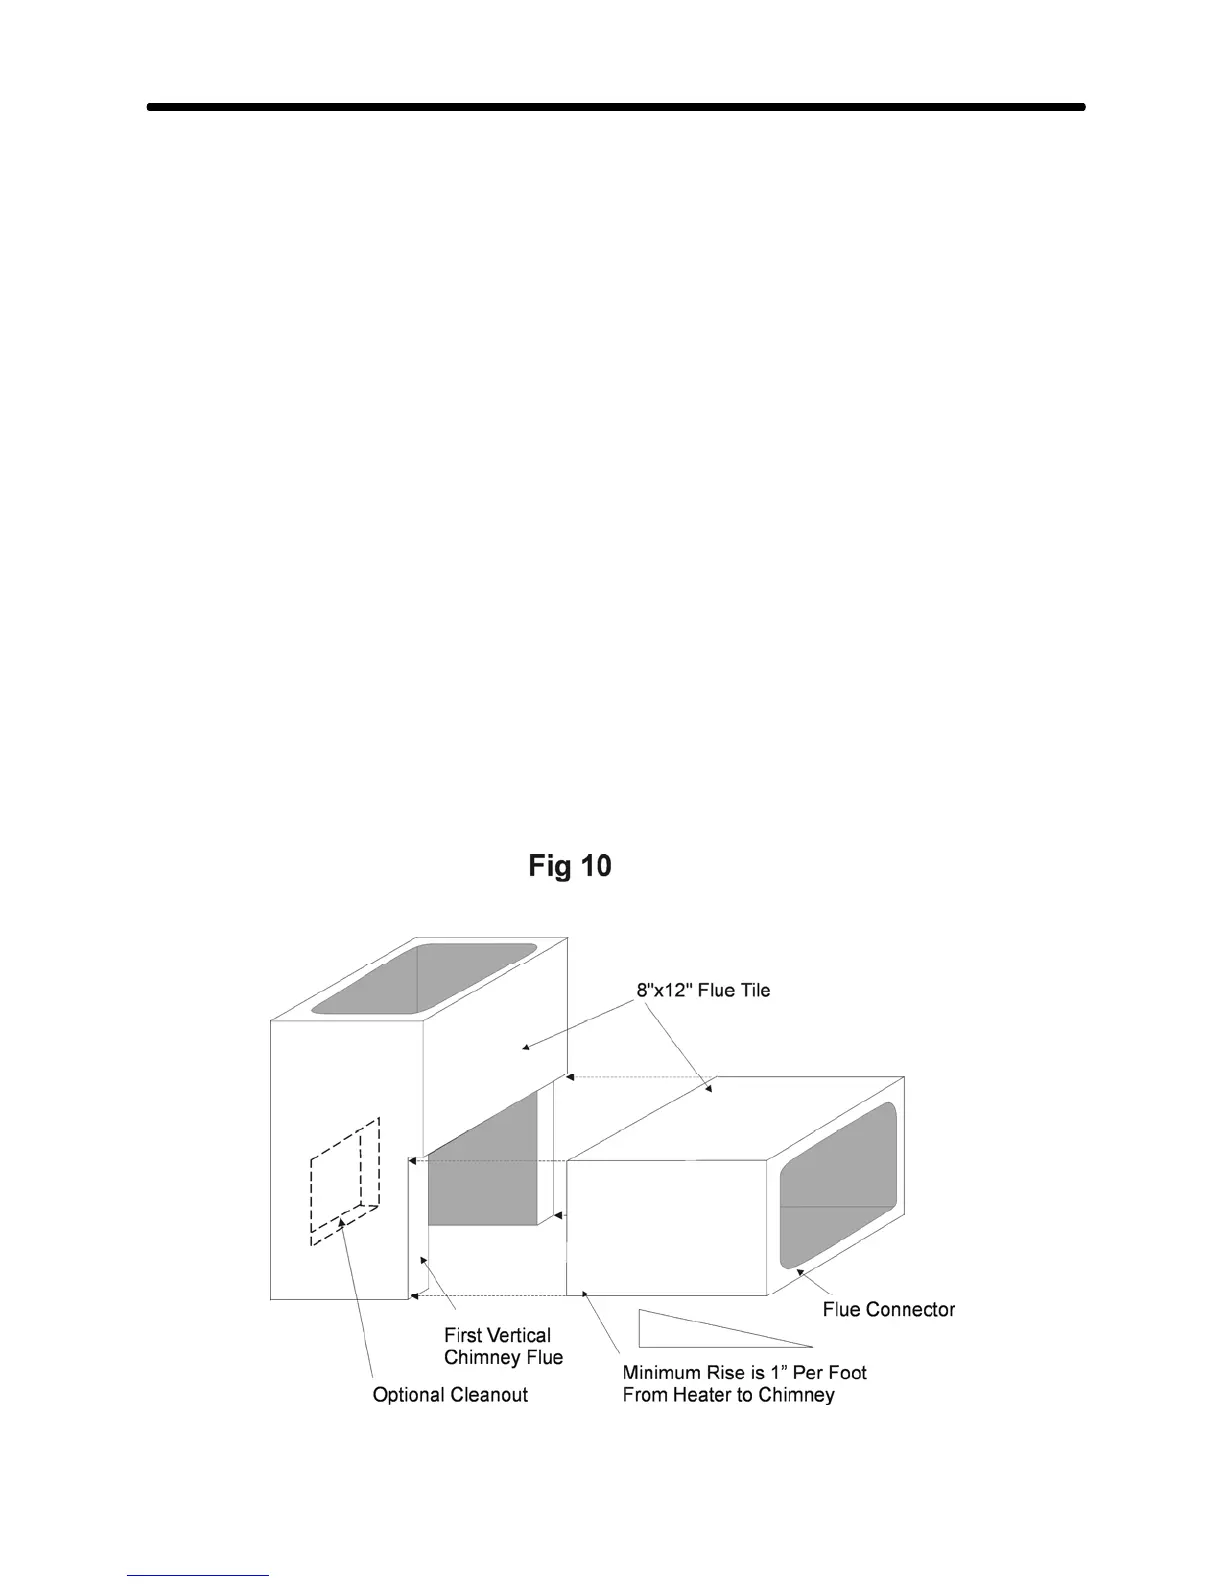
Cut the first vertical flue tile, as shown in Figure # 10. Note that the chimney cleanout is shown
in the preferred position - in-line with the flue connector. If this alignment is not possible, the
cleanout can be on either of the other 2 available sides. (If a chimney clean-out is planned for a
lower level, a soot door should still be installed at the flue connection level, for inspection and
removal of fly ash which will accumulate at the bottom of the heat exchange channels.)
Wrap the flue connector and the first vertical flue tile with extra ceramic wool, "coreflex" or
cardboard spacer and mortar them solidly in position with common mortar.
ALL JOINTS MUST BE SEALED WITH REFRACTORY MORTAR TO BE SMOKE
TIGHT.