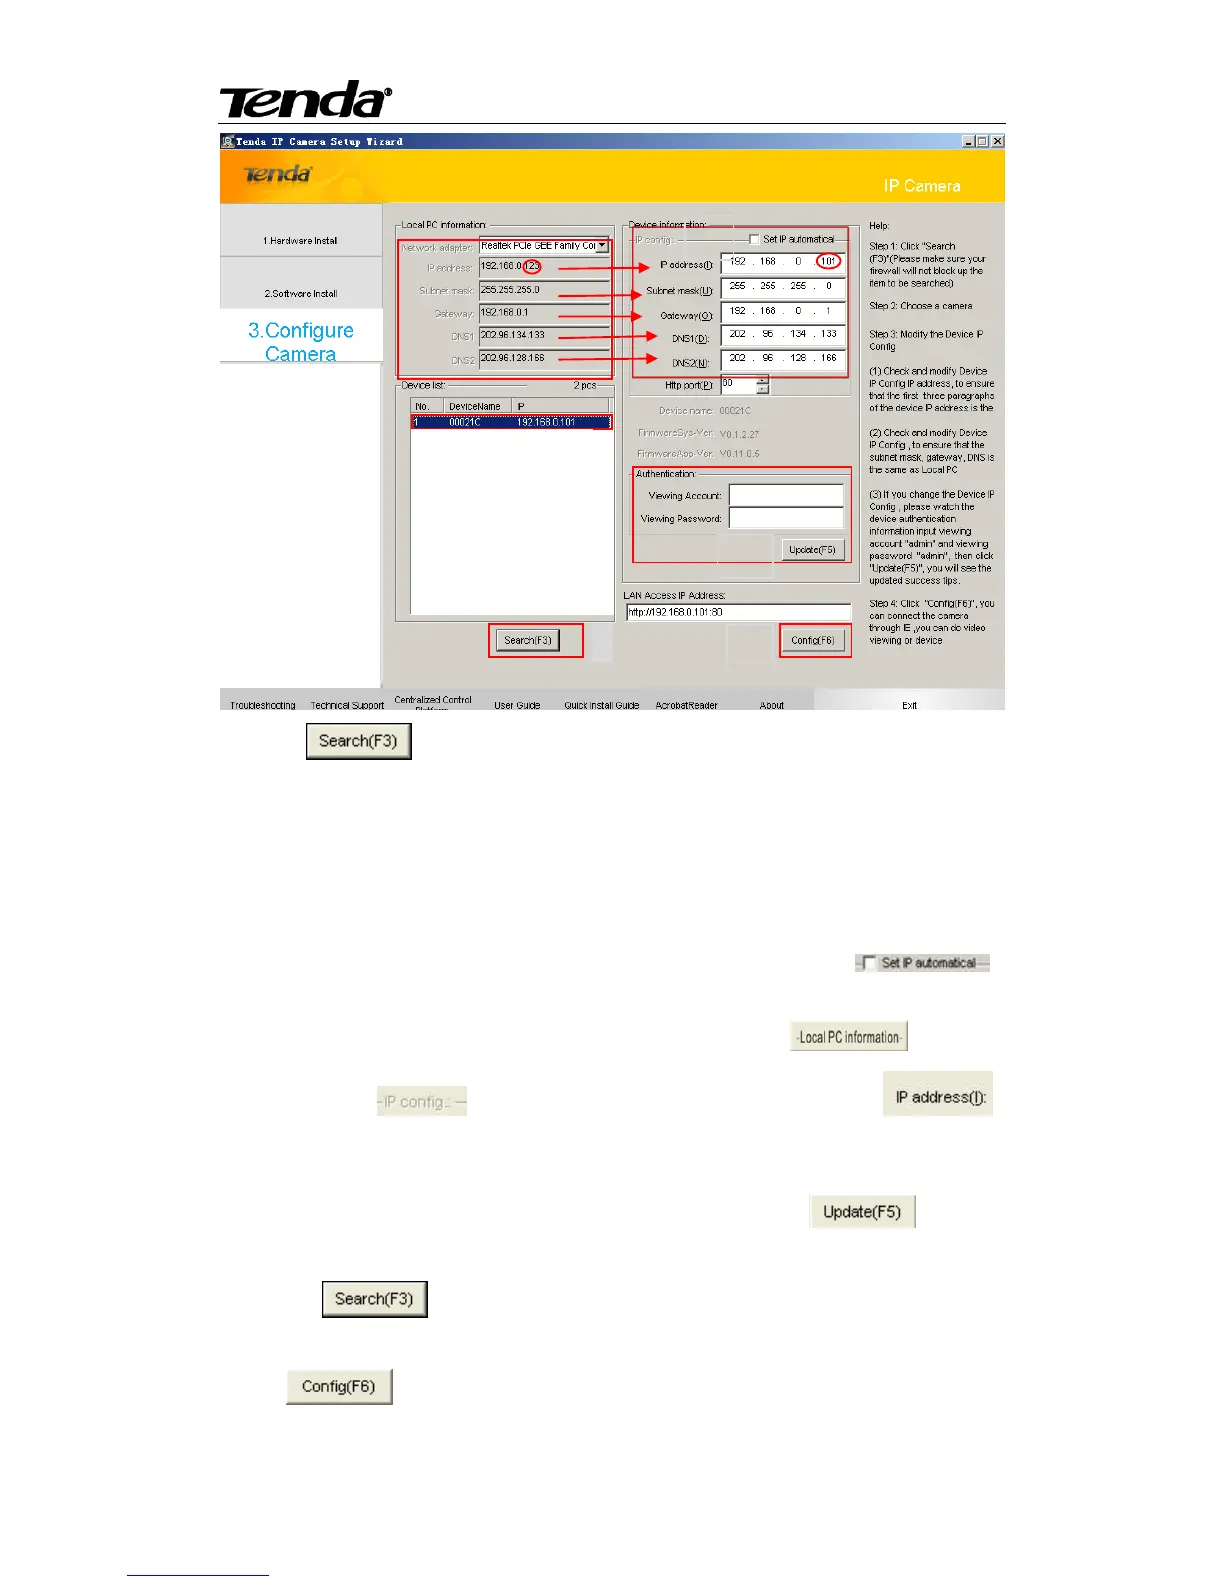
1.Click " ".(If your firewall asks whether to block the utility, select don't block or
directly disable firewall before you start searching.)
Note: If it‟s fail to search the camera , please enter the CD driver: \FAQ\FAQ-en, refer to Question
1 for detail.
2. Choose a camera in “Device list” list box.
3.Set IP address of the camera
You can choose one of way to change the IP address of the camera.
Method One:Set IP address of the camera automatical,you need to check " ".
Note,this need your Router‟s DHCP Server function on.
Method Two:Set IP address of the camera manually.According to " " parameter
items, change " " arrow corresponding parameter items.Note " "
parameter item, that number highlighted in red circles should not be the same.
4.When you complete the settings above, watch the device authentication information input
viewing account "admin" and viewing password "admin", then click“ ”, you will
see the updated success tips.
Then Click " " again, Choose a camera that changed IP address in “Device list” list
box.
5.Click" " ,enter “admin” in both user name and password text boxes on the
appearing login window, and then click “OK” to enter the Web UI. You will then be able to watch
 Loading...