AUSTRALIA 10
Step Five - Connect Wiring
NOTE: For most branch circuits of 50A, use 16
mm
2
, 75°C hard copper wire. Consult with
your electrician to ensure wiring meets local
regulations.
WARNING: Do not connect service
wiring until you have read and fully
understand page 4 in this document
describing the service wiring. If you are
uncertain about the type of power available at
the service panel, consult your local utility, or
contact Tesla for assistance.
1 Turn off the power.
WARNING: RISK OF ELECTRIC
SHOCK! Before connecting the
wiring, use a voltmeter to confirm that NO
POWER is available at the service wiring or
terminals.
2 Pull the service wiring into the Wall
Connector.
3 Strip the three wires 10 mm.
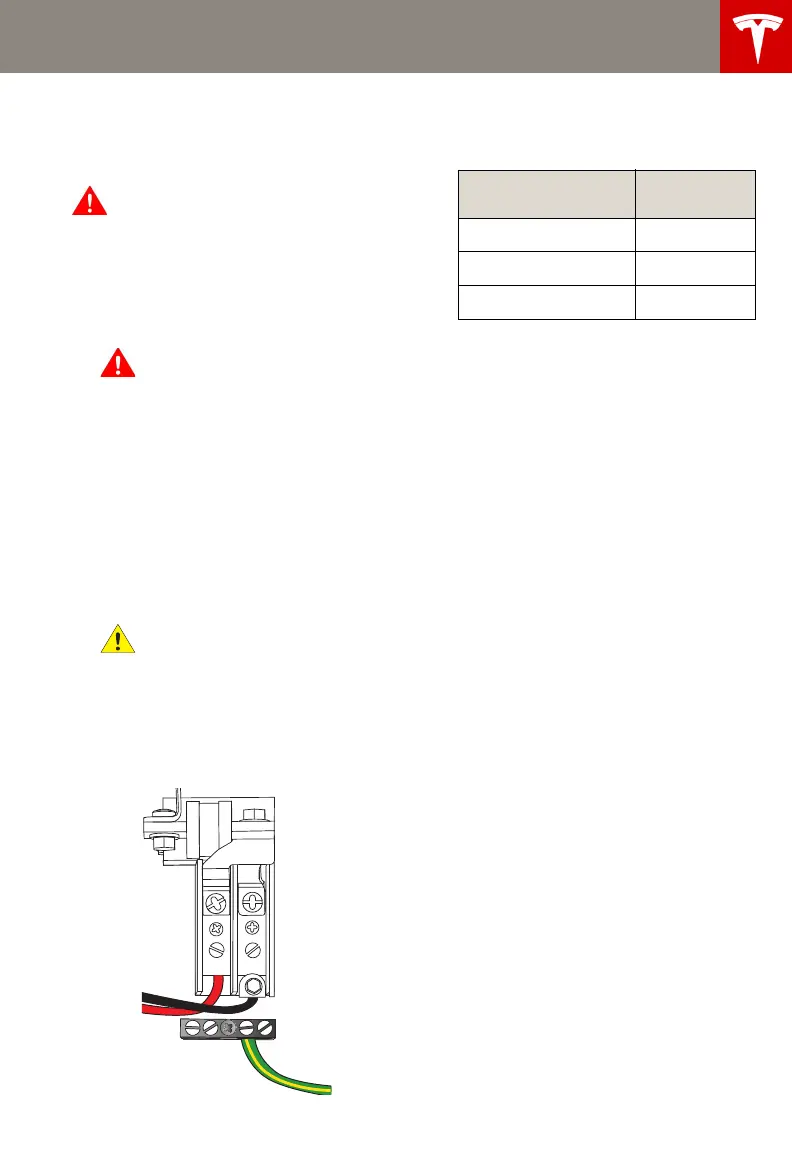
4 Connect wiring to the terminal block.
Connect Active to the L1 position, Neutral
to the L2 position, and the green ground
to one of the two available ground
connectors, as shown.
CAUTION: Cut the wire strands flush
and insert them fully into the
terminal block.
NOTE: The Earth wire should be at least
6 mm. To ensure proper operation, verify
that neutral is connected to the neutral line
inside the circuit breaker box or the main
electrical panel.
5 Tighten the L1 and L2 screws to 3.5 to 5.6
Nm depending on cable size. Tighten the
ground screw as follows:
Cable Size
(hard copper)
Torque Nm
2-5 mm
2
2.3
6-12 mm
2
2.8
13-25 mm
2
3.5
AUS_Contents.fm Page 10 Friday, July 18, 2014 12:28 PM
 Loading...