7 WALL CONNECTOR INSTALLATION GUIDE
Step Two - Install Wall Bracket
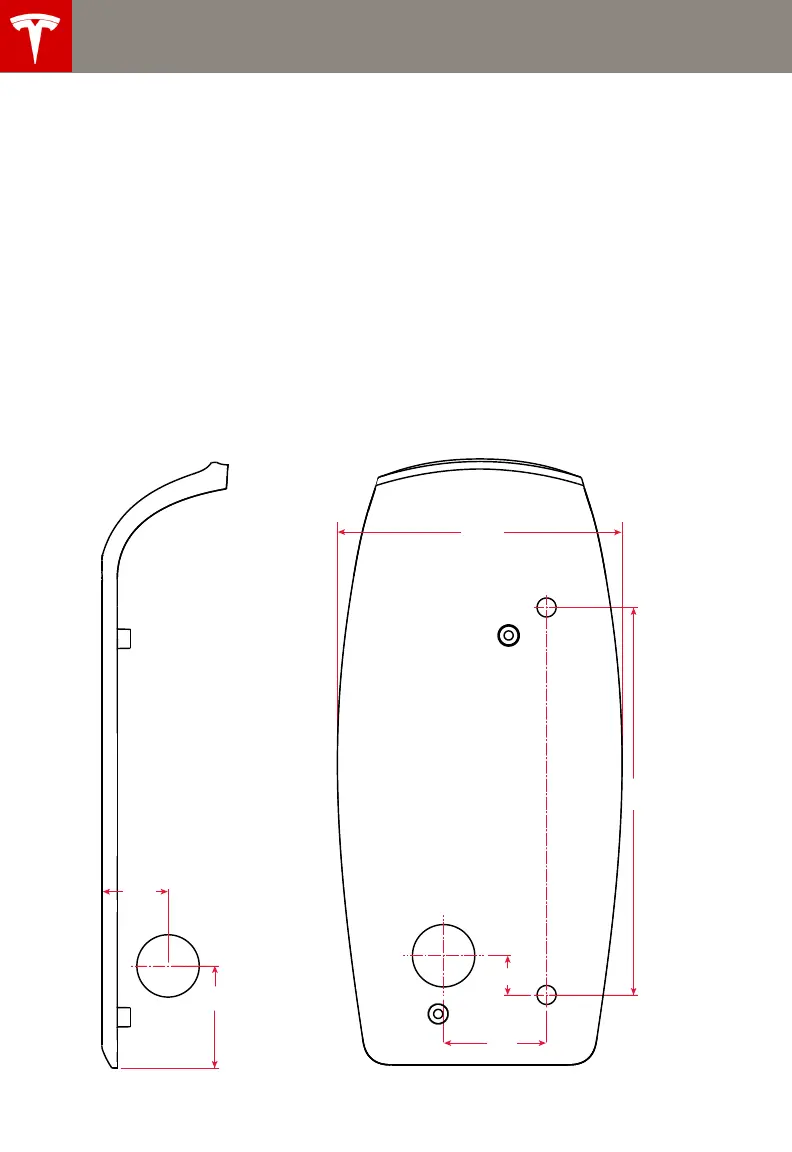
You can run conduit into either the back or the
left side of the Wall Connector’s main
enclosure. Regardless of the conduit opening
you use, always run the conduit on the left side
of a wall stud. Refer to the illustration below
for dimensions.
When determining where to mount the Wall
Connector, keep in mind that its 7.6 m charge
cable should easily reach the vehicle’s
charging port without straining the
connections at either end.
1 Use the mounting bracket as a guide to
mark the location on the wall for the two
mounting screws.
• Space the holes exactly 214 mm apart.
• The height of the bracket should
ensure that the charging connector is
located at a maximum of 1.2 m from
floor level. The minimum height is 46
cm if mounting indoors, and 61cm if
mounting outdoors.
2 Drill two 8 mm holes in the wall.
3 Attach the wall bracket using fasteners
appropriate for the type of wall material.
Use the supplied lag screws and washers
only if mounting to a solid wooden wall
stud. If mounting to another type of wall
(hollow, masonry, etc.), use fasteners that
are long enough to securely anchor the
Wall Connector and that can support at
least 36 kg.
8.43”
214 mm
.87”
2 2 mm
6.18”
WALL CONNECTOR
MOUNTING BRACKET
(not to scale)
NOTE: Provision for 25 mm conduit on
either the back or the left side.
157 mm
37 mm
1.44”
57 mm
2.23”
157 mm
Wall_Connector_Install_Guide_Australia_Section_of_1046345-00-C.book Page 7 Thursday, July 17, 2014 10:47 AM
 Loading...