AUSTRALIA 12
Step Seven - Confirm a Successful Installation
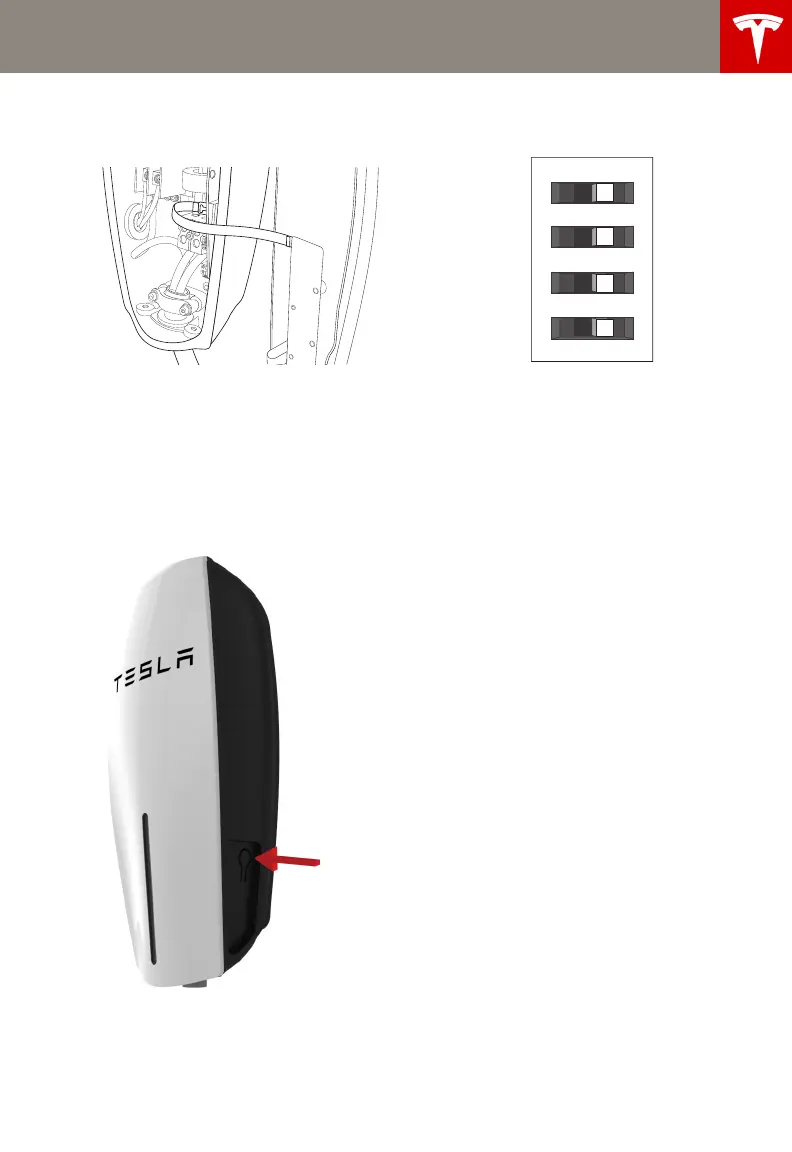
1 While holding the front cover near the
connector, re-connect the ribbon cable.
2 Hang the front cover over the hinge
located at the top of the connector. Do not
secure the front cover yet.
3 Turn on the power.
4 Hold the RESET button for five seconds.
This button is located on the lower right
side of the Wall Connector.
You should hear the contacts close and see
the Wall Connector’s lights sequentially
illuminate green.
RESET
button is
located on
the lower
right side
AUS_Contents.fm Page 12 Friday, July 18, 2014 9:46 AM
 Loading...