AUSTRALIA 14
Step Nine - Install the Cable Hanger
YOU WILL NEED
• Cable Hanger, bracket, two screws and two
wall anchors (included in the shipping box)
• Pencil or marker
• Drill with 5 mm drill bit
• Phillips screwdriver
FOLLOW THESE STEPS
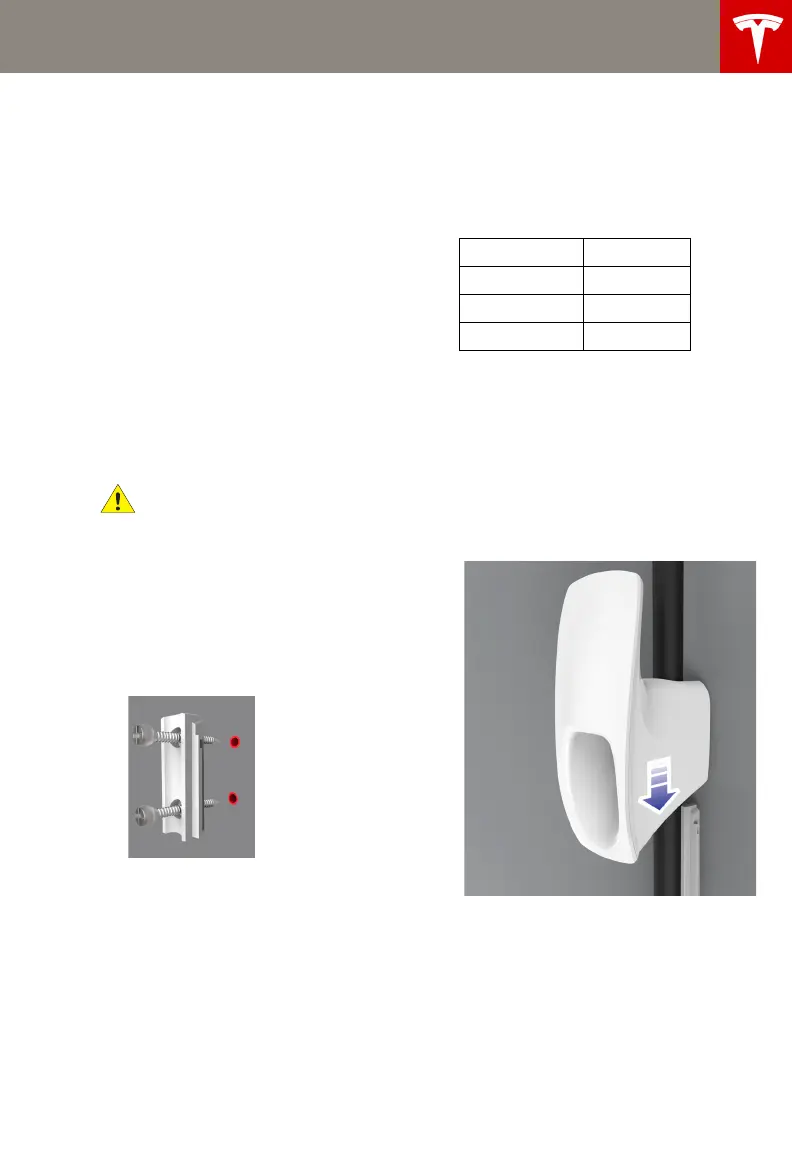
1 Use the Cable Hanger’s bracket as a guide
to mark the location on the wall for the
two mounting screws.
NOTE: The height of the bracket should
ensure that the charging connector is
located at a maximum of 1.2 metres from
floor level. The minimum height is 46 cm if
mounting indoors, and 61cm if mounting
outdoors.
*CAUTION: If installing in a public
location, consider laws and
regulations that accommodate persons
with disabilities.
2 Drill two 5 mm holes in the wall.
3 Insert the two Poly-Set anchors into the
holes until their flanges are flush.
4 Use the supplied Phillips screws to secure
the bracket to the wall.
To ensure the screws are secure, apply
additional turns after the screw head is
against the bracket.
NOTE: For more details on using the
anchors and screws, refer to the Poly-Set
Installation Instructions, included in the
shipping box.
5 Slide the Cable Hanger onto the bracket as
shown. If desired, you can insert the
connector’s cable into the groove between
the bracket and the Cable Hanger, as
shown.
Plasterboard
Thickness
Number of
Additional
Turns
10 mm 7-9
13 mm 5-7
16 mm 3-4
19 mm 1-2
AUS_Contents.fm Page 14 Friday, July 18, 2014 9:46 AM
 Loading...