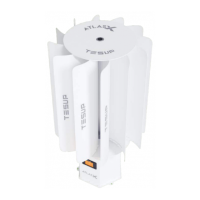
7.5 UNPACKING THE COMPONENTS
• Carefully open the packaging.
• Check the shipment for completeness (refer to the shipping documents).
• Separate the packaging material and dispose of it in an environmentally responsible way.
7.6 ASSEMBLING THE WIND TURBINE
• Carefully take all the components out of the box.
• Complete the mounting base installation to the
turbine’s nal location as instructed,
• Fix the turbine body to the turbine’s mounting
base,
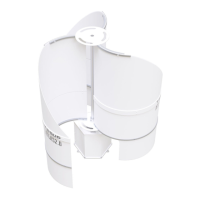
• Now insert the shaft on the rotor shaft (Triple holes
of the shaft should be facing downwards, single
hole upwards), x the upper body to the base using
the grub screws provided,
• Mount the bottom ange to the shaft,
• Mount the top ange to the shaft,
• Fix the blades to the anges with the use of
fasteners provided.
IMPORTANT: If you are using a charge control unit, you must install
a battery-inverter in your charge control unit before proceeding.
IMPORTANT: Make sure the 3-phase AC cable at the wind turbine
output is not short-circuited. If there is a short circuit, the turbine
will brake itself and the blades will be prevented from turning.
21TESUP Electronics Ltd. All rights reserved. ©2023 | www.tesup.com
7. Pre-use
Preperation
HERA WIND PRO USER MANUAL