bq76920 EVM Quick Start Guide
www.ti.com
CAUTION
The circuit module may be damaged by over temperature. To avoid damage,
monitor the temperature during evaluation and provide cooling, as needed, for
your system environment.
CAUTION
Some power supplies can be damaged by application of external voltages. If
using more than 1 power supply, check your equipment requirements and use
blocking diodes or other isolation techniques, as needed, to prevent damage to
your equipment.
CAUTION
The communication interface is not isolated on the EVM. Be sure no ground
potential exists between the computer and the EVM. Also be aware that the
computer is referenced to the Battery- potential of the EVM.
2.2 Quick Start
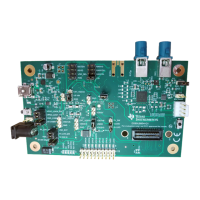
These steps describe quick connection of the bq76920 EVM to demonstrate operation of the AFE portion
of the EVM. For more detailed descriptions, refer to other sections of the user guide.
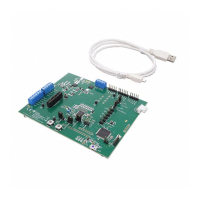
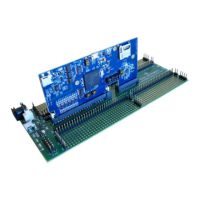
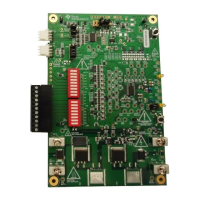
Refer to Figure 1 for the following steps.
1. Install the bq76940/bq76930/bq76920 evaluation software. Software is obtained from www.ti.com.
Install drivers for the EV2300, if necessary.
2. Remove shunts from headers connecting the AFE to the gauge.
3. If the EV2300 is used, install shunts on the SCL and SDA pull-up headers. Remove any pull-up shunts
when using the EV2400.
4. Close all dip switch positions (default is closed).
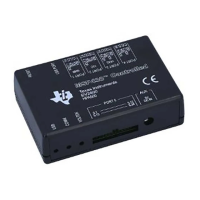
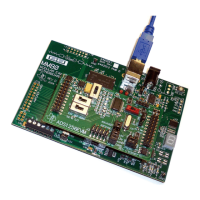
5. Attach the interface board communication adapter to the PC using USB cable. The EV2400 is
recommended, the EV2300 works if it is available and drivers are installed.
6. Attach the interface board I2C connector to the EVM I2C connector using the 4-pin cable.
7. Connect a 0-V DC power supply capable of 250 mA minimum to the “BATT” terminals and adjust to
approximately 18 V.
8. Press and release the BOOT switch.
9. Start the bq769X0 evaluation software. The GUI should display. Click on the Scan box to enable
repeated update of the display. The power supply may be adjusted within range of the part to observe
voltage changes in the GUI display Stack V/T/I section.
10. Set the voltage to approximately 18 V or a mid-range operating level. Clear any faults present by
clicking on the Clear Faults button of the All Read/Write Registers section of the GUI.
11. Click on the Continuous button in the GUI Coulomb Counter section. Enable the CHG_ON and
DSG_ON bits by clicking on the bit and commit the changes. Apply a load to the PACK terminals. Load
current must be within the capability of the supply and the components installed or 15 A, whichever is
lower. Observe the Coulomb Counter value change in the GUI display Stack V/T/I section.
12. Make other adjustments as desired, for evaluation.
Refer to other sections of this user guide for additional details.
4
bq76920 Evaluation Module User's Guide SLVU924B–March 2014–Revised April 2014
Submit Documentation Feedback
Copyright © 2014, Texas Instruments Incorporated