TI-89 / TI-92 Plus / Voyage™ 200 PLT Cabri Geometry App 65
4.
Press
†
and select
6:Macro
Construction
.
5.
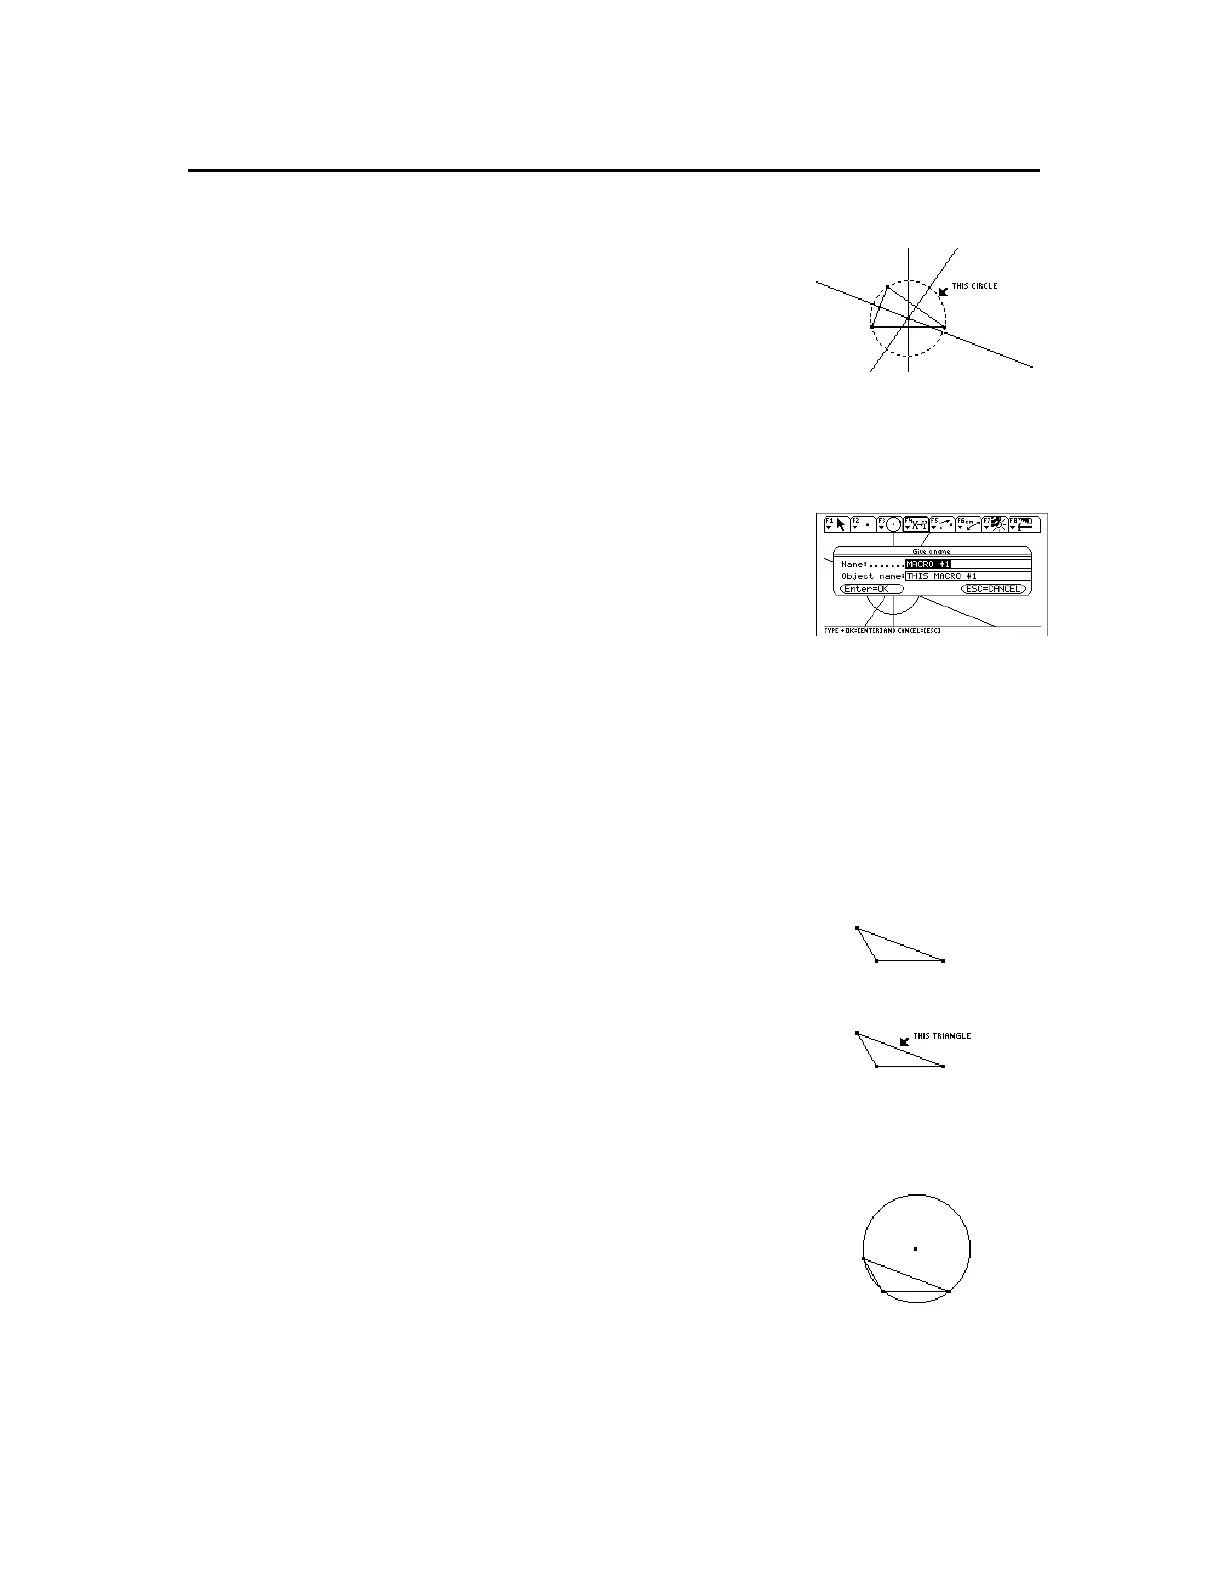
Select
3:Final Objects
then select the
circle as the final object.
6.
(Optional) You can change the
appearance of your construction by
using the
Hide/Show
,
Thick
, and
Dotted
tools in the
Display
toolbar
menu.
Select the final object.
7.
Press
†
and select
6:Macro
Construction
.
8.
Select
4:Define Macro
then type a
name for the macro.
The
Name
you enter will help you
identify the macro later. The
Object
name
you enter will appear in cursor
messages when appropriate. Both
names can be up to 25 characters.
Name the macro.
Note:
After the
Name Macro
dialog has been completed, the
Save
Macro
dialog displays. You must provide a valid name to save your
macro as a separate file. If you do not want to save the macro to a
separate file, the macro is saved with your construction. In this
case, you will not be able to open the macro from the
File
toolbar
menu.
9.
Construct the initial object (any
triangle).
Construct an object.
10.
Press
†
and select
6:Macro
Construction
then select
1:Execute
Macro
.
11.
Select the macro that you previously
defined then select the triangle to
execute the macro.
Select the object.
This macro determines the center
and radius of the circle and
constructs a circle thorough all
vertices of the triangle.
Execute the macro.
Creating Macros
(continued)
Example: Creating
and Executing a
Macro
(Continued)
Note:
Defined macros
appear in a pop-up menu.
Highlight the desired macro,
and press
¸
to select it.
 Loading...