Installation
10 INS 034-9
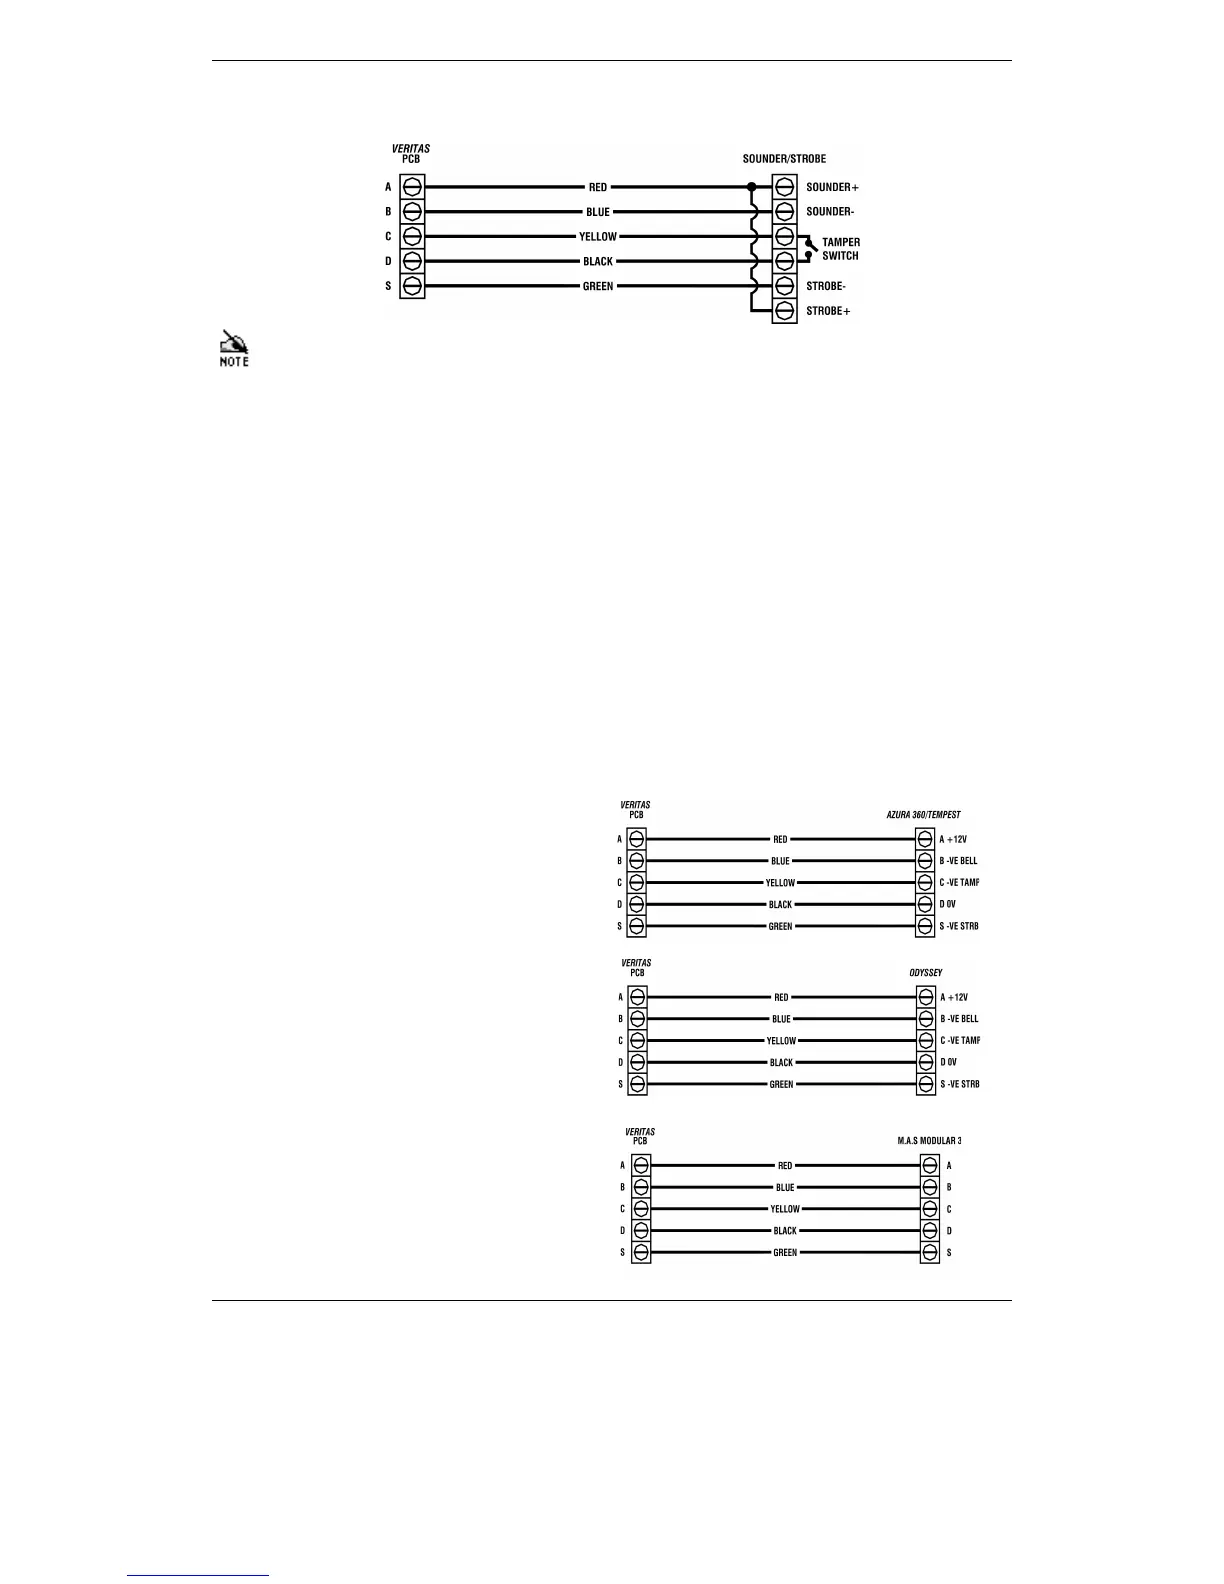
Figure 2 - Typical SAB Connections
1)
An external sounder is often referred to as a 'bell' or 'bell-box' even when it is
actually an electronic siren.
2)
The control panel is supplied with a link fitted across the Bell Tamper to
simulate a closed circuit. This link would usually be removed during installation.
3)
If the strobe is a separate unit take the strobe positive supply from 'A' as well.
4)
A self-activating bell/sounder (SAB) has a built-in battery. After connecting this
battery the sounder will usually sound until its cover is fitted and it is supplied
with power from the control panel.
5)
Terminal B may be programmed as switched negative removed rather than
switched negative applied to activate sounder (section 3.2.2, page 21). This is
useful for SCBs where B would then be used to provide the permanent
negative supply.
2.4.2.1 Popular SAB Wiring Diagrams
The following diagrams illustrate how to connect the control panel to the most
popular makes of SAB:
Figure 3 - Common SAB Connections
Figure 3a - Texecom
Azura/Tempest
Figure 3b - Texecom
Odyssey
Series
Figure 3c - MAS Modular 3
 Loading...