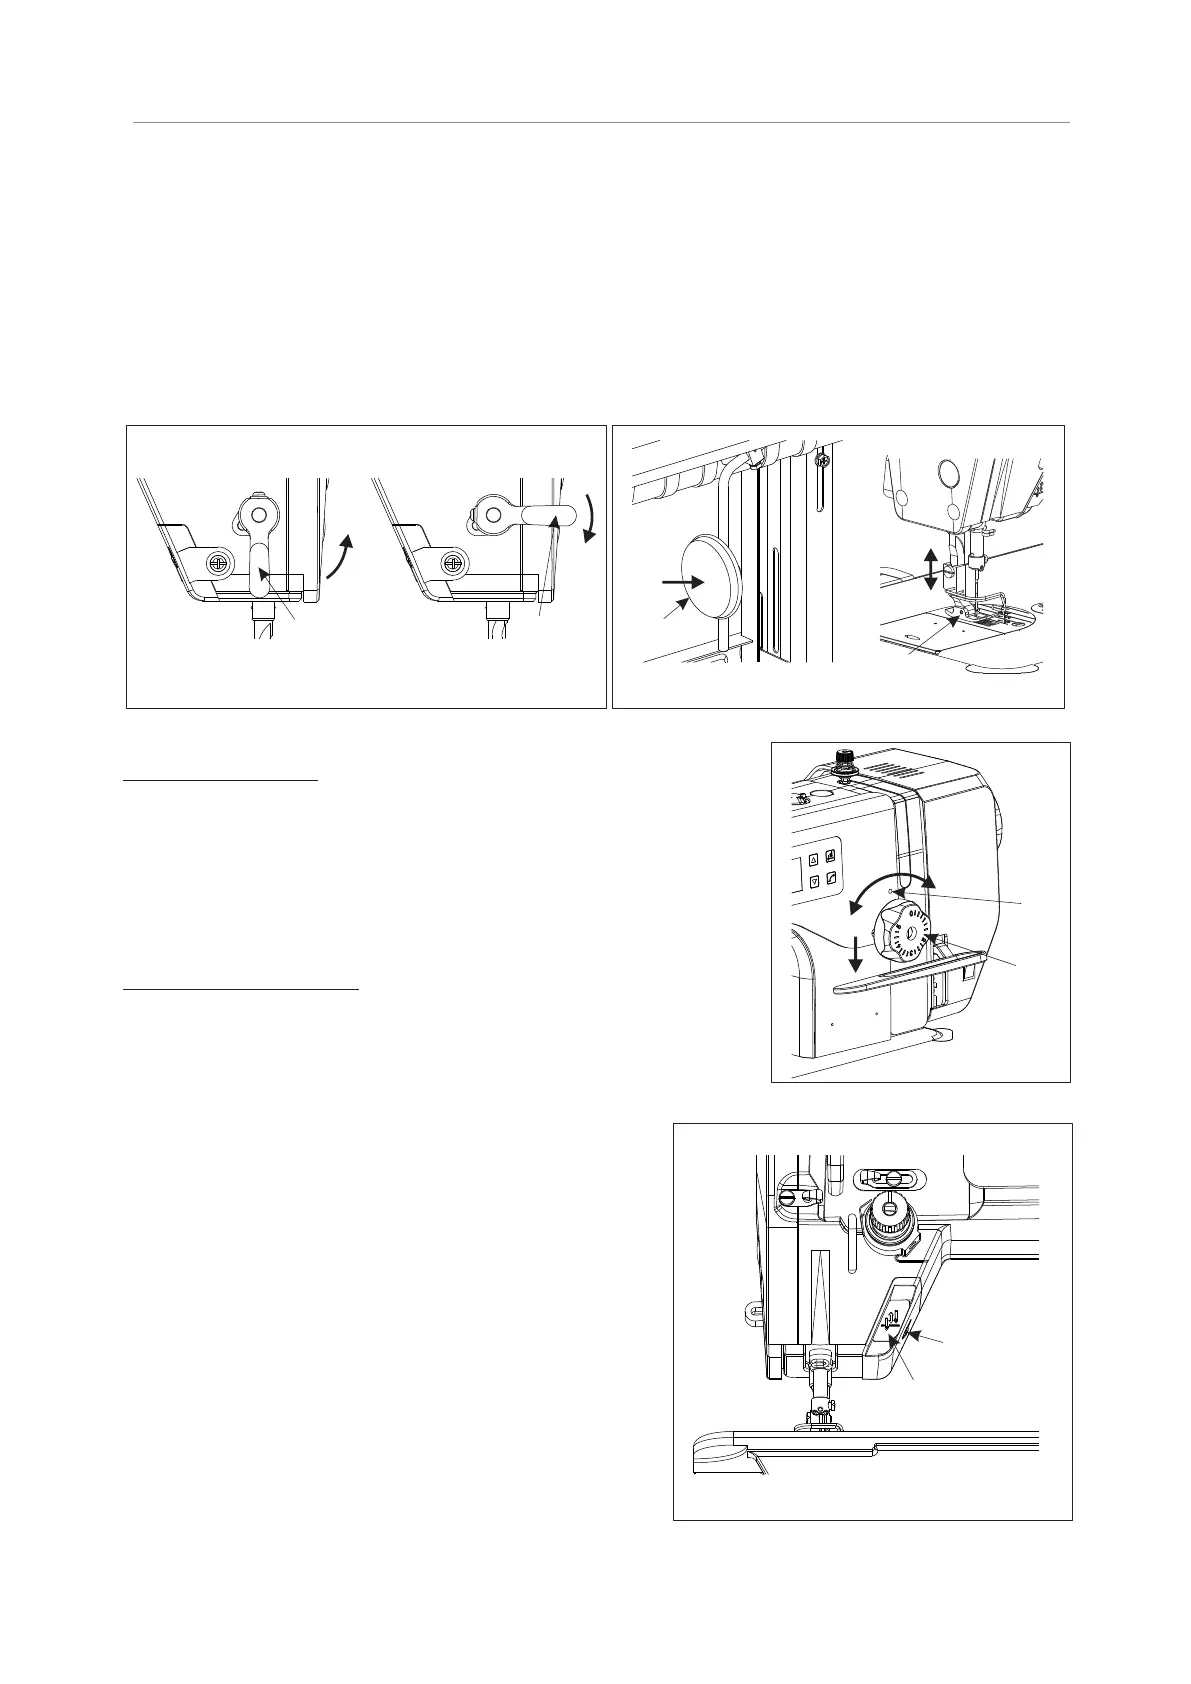
10. Lifting the presser foot
1. Lift presser foot controlled by hands
1) Shut down the machine, turn presser foot lever ① in direction A to uplift the presser foot (for about 5.5 mm).
2) When presser foot lever ① is turned in direction B, presser foot will be returned to its original position.
2. Lift presser foot controlled by knees
1) The presser foot ③ can be raised by pressing the knee lifter plate ②. (Height of presser lifting is relate to the
degree of knees pressing)
Note: Standard and maximal lifting height of presser foot are respectively about 10mm and 13mm when pressing
knees fully.
2) The lifting presser foot ③ lower as soon as losing the knee lifter plate ② released.
Fig.15
②
③
Fig.14
①
A
B
①
11. Adjusting stitch length and the use of back feeding lever
Adjusting stitch length
- Press needle gauge knob ① and rotate it according to arrows, do not release
it until the number you require aim at A direction right above machine head.
- Loose needle gauge knob ①.
Caution:
1. Scale mark digits are expressed on the knob in millimeter.
2. Press the reverse feeding wrench ② towards B direction and rotate needle
gauge knob ① when changing the scale of it from largest to smallest.
The use of back stitch lever
1. Press the reverse feeding wrench ① towards B direction.
2. Press towards B direction can realize back feeding.
3. Recover to forth feeding when release hands.
Fig.16
B
①
A
12. Hand-touch backstitch device
1. Use of reinforce sewing
Press the reinforce sewing button ① one time, the sewing
machine reinforce forth with half stitch, press all the time, it
continues sewing with forth reinforce.
Caution: in addition to continue back reinforce sewing, the
reinforce sewing button can be as stop button ① during any
sewing condition.(before trimming)
2. Use of the light push-button
The illuminating lamp goes on at full brightness once the machine
is powered on. Push illuminating lamp control button ② to reduce
in sequence the brightness till turn off.
Fig.17
①
②
7
TEXI Tronic 1 NEO - Operation manual

 Loading...