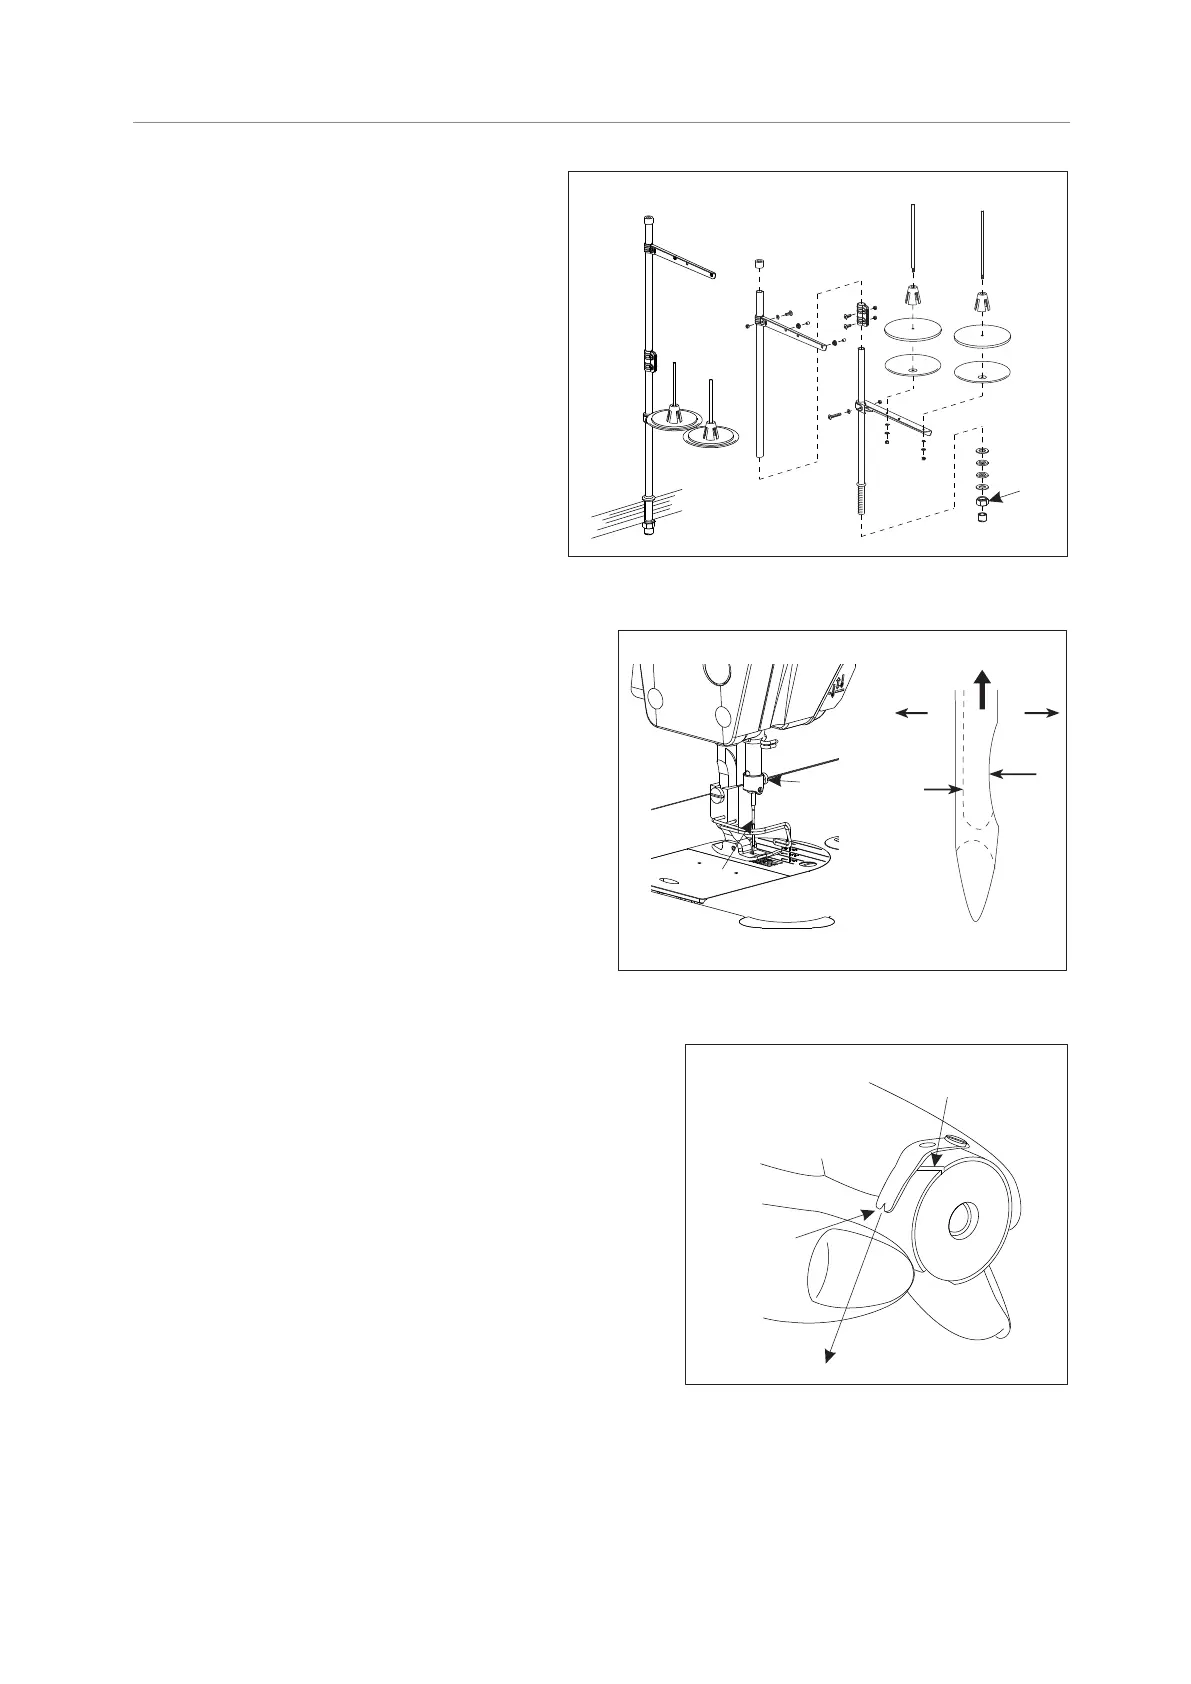
4. Mounting the thread stand
1. As shown in right-hand figure, mount the thread
stand component onto the mounting hole for
thread stand on the sewing machine table.
2. Screw down retaining nut ① for lower segment
of thread stand lever to fix the thread stand.
①
Fig.7
5. Mounting the needle
1. Turn the upper wheel to allow the needle to reach its
maximum height.
2. Unscrew needle carrying screw ②, hold needle ① by
hand, and align the indentation A of needle to right
direction B.
3. Insert the needle into the bottom of needle hole in
direction of arrow till it reaches the end point.
4. Screw down the needle carrying screw ②.
5. Take care to ensure that the elongated slot C on the
needle is aligned to the left direction D.
Caution:
1. To prevent the unexpected startup of sewing machine,
switch off power supply before the operation is
conducted.
2. Needles are available in different sizes. Please select
appropriate needle as per the thickness of threads and
the sewing materials.
Fig.8
①
②
A
B
C
D
6. Mounting the bobbin
1. Hold the rotating hook by hand, and fit the bobbin into
the rotating hook.
2. Thread the thread through the thread groove A in the
rotating hook, and draw out the thread in direction C.
In this way, the thread is led out of hole B through the
tension spring.
3. When bobbin thread is drawn, the bobbin shall turn
clockwise in direction of arrow.
A
B
C
Fig.9
4
TEXI Tronic 1 NEO - Operation manual

 Loading...