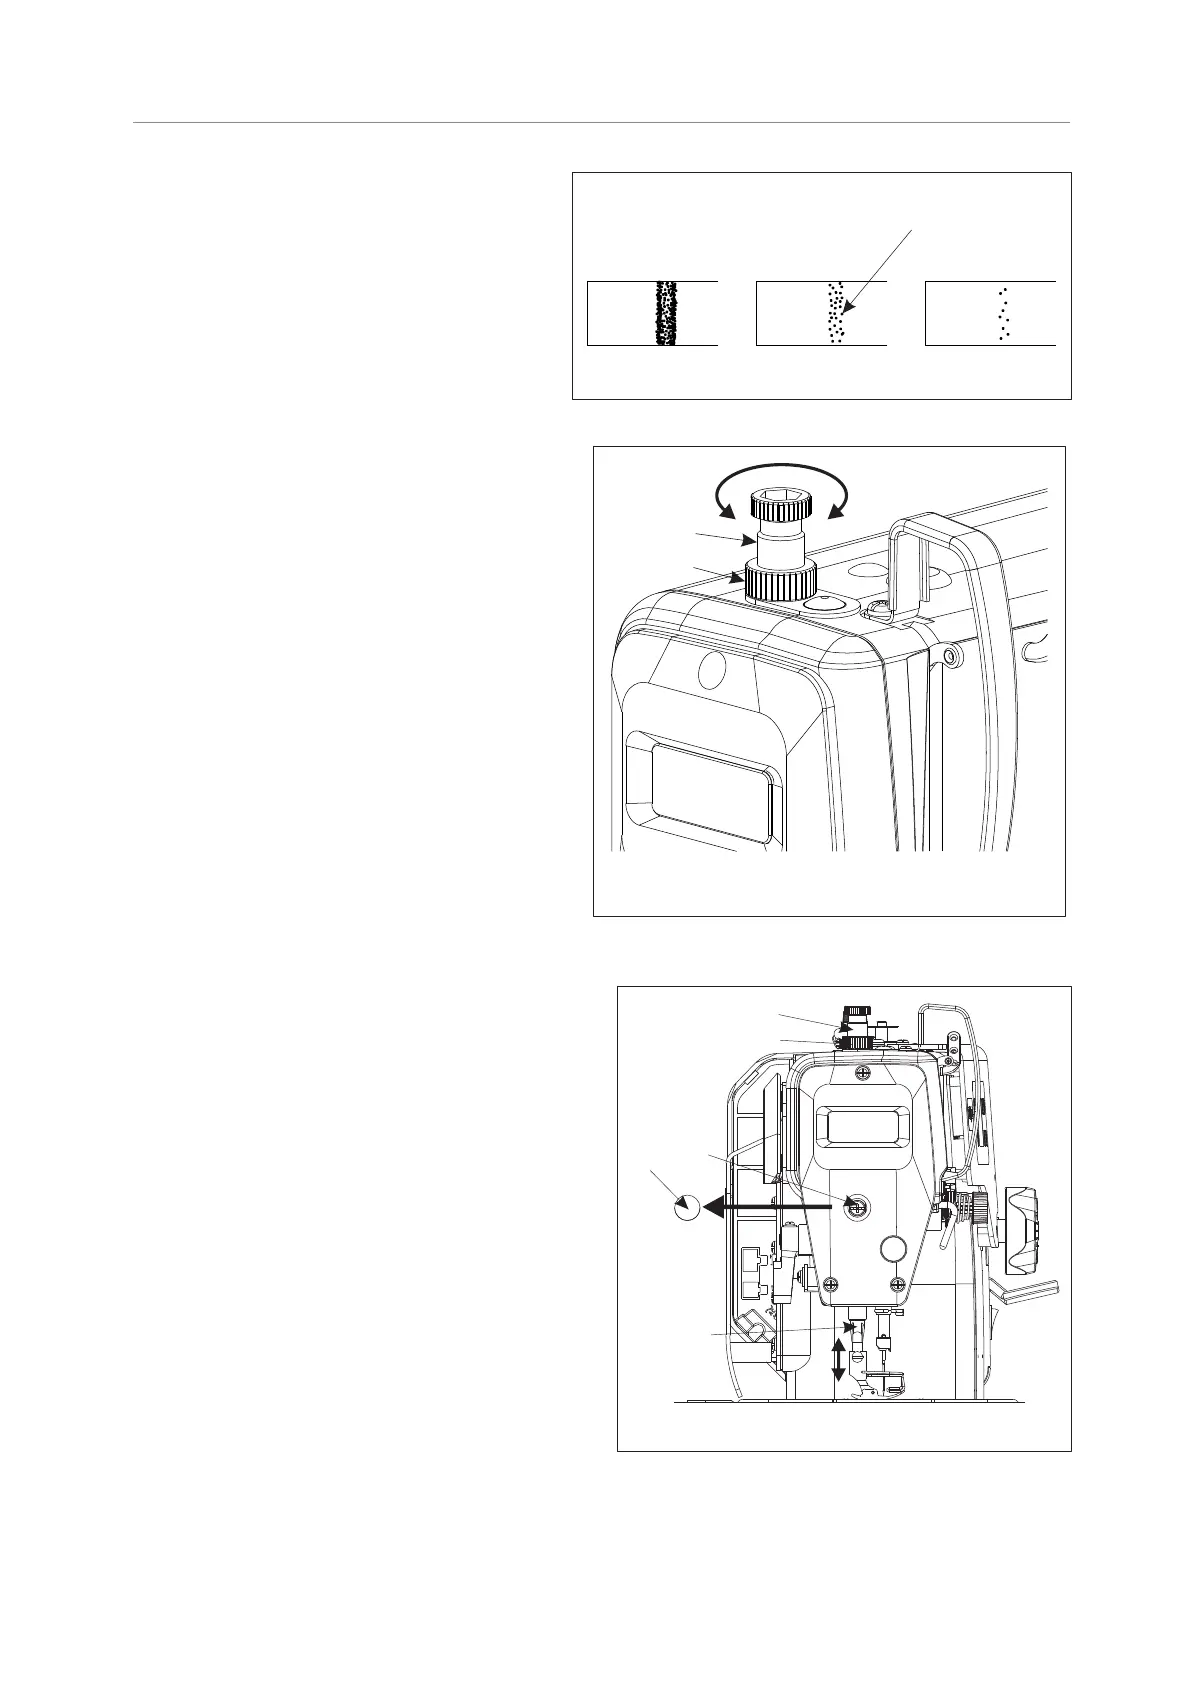
3. Guide sample of oil mass adequacy
1) The guide sample shown in the right-hand
figure(see Fig. 24) may be finely adjusted
(increased or reduced) as per different sewing
processes; however, excessive increase or
reduction shall be avoided. Too little oil mass may
lead to rotating hook heating, and over
much oil mass may lead to contamination of the
sewing materials.
2) Test the oil mass 3 times using special oil mass
confirmation paper till the oil traces indicated by
the special paper show no changes.
Fig.24
Too much Too littleCorrect
Spattered oil
16. Adjusting presser foot pressure
1. Unscrew pressure adjusting nut ②.
2. Presser foot pressure is increased if pressure
adjusting screw ① is turned clockwise (namely in
direction A); the pressure is reduced if the screw is
turned counterclockwise (namely in direction B).
3. Screw down pressure adjusting nut ② when
adjustment is over.
Caution:
1. To prevent the unexpected startup of sewing machine,
switch off the power supply before the operation is
conducted.
2. For ordinary materials, the standard height of pressure
adjusting screw ① ranges from 32 to 34mm (4.5
kilogram force) approximately.
Fig.25
B
①
A
②
17. Adjusting the height and angle of presser foot
1. Loosen pressure adjusting nut ② and screw ①, free the
pressure of presser foot.
2. Open rubber plug ③ in panel.
3. Loosen screw ④ in compression rod guide frame, move
mobile compression rod ⑤ from up and down to adjust
the height and angle of presser foot.(height of presser
foot is the distance from needle plate surface to the
bottom of it, the standard height of lifting presser foot by
hand is 5.5mm)
4. Tighten the screw ④ in compression rod guide frame
and assembly the rubber plug ③ after adjusting.
5. Adjust pressure of presser foot through pressure
adjusting screw ①, tighten the nut ② after adjustment.
Caution:
1. To prevent the unexpected startup of sewing machine,
switch off the power supply before the operation is
conducted.
2. After adjustment, check that the needle moves down into
the center of the groove in the presser foot.
Fig.26
②
⑤
①
③
④
10
TEXI Tronic 1 NEO - Operation manual

 Loading...