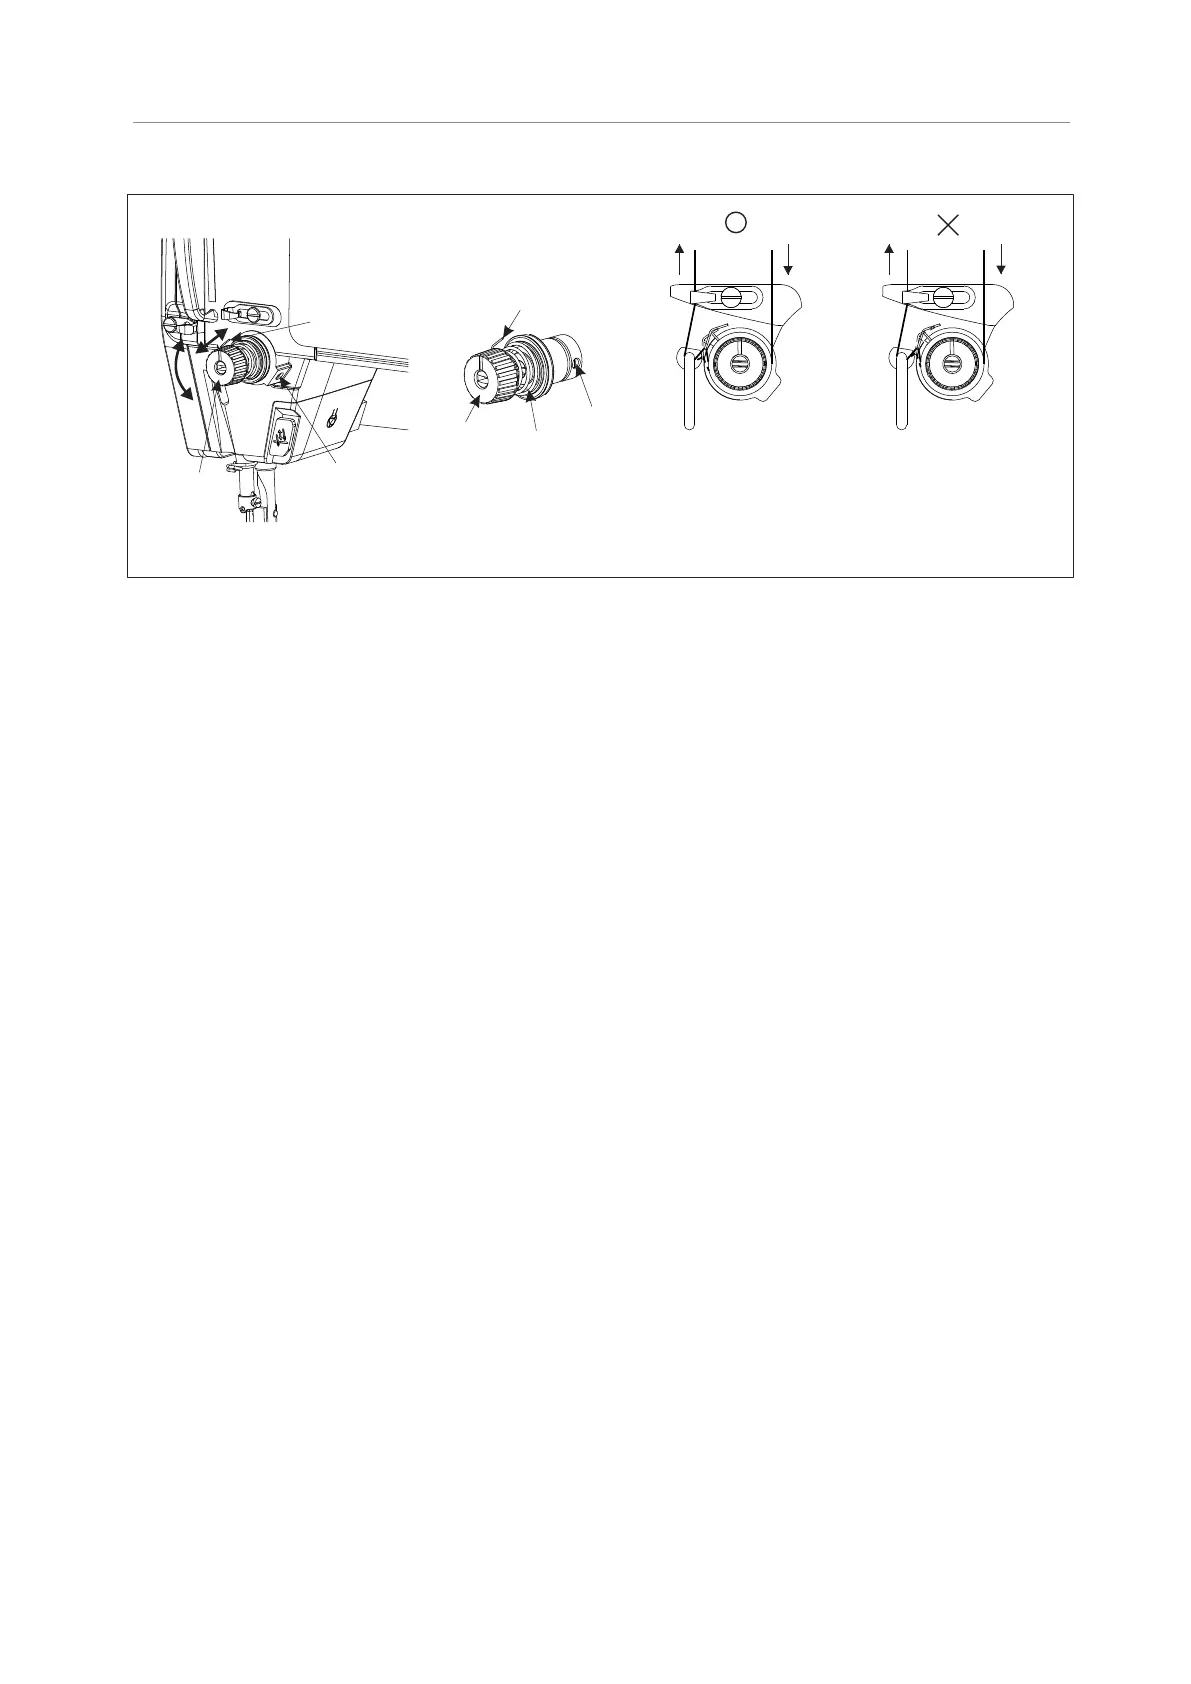
22. Adjusting the take-up spring
Fig.31
B
A
※The tension of take-up spring
is too high, so needle thread is
drawn out of place B in process
of the action.
※The take-up spring keeps
on functioning till the end
B
A
④
⑤
①
③
①
②
③
A
B
1. Adjusting the tension of take-up spring
1) Unscrew screw ②, and take out thread clamp ⑤(assembly).
2) Unscrew screw ④ in thread clamp ⑤.
3) Rotating the screw ③ in the thread clamp ⑤ to adjust, The tension of the thread take-up spring will become larger
when turning towards the clockwise(A), otherwise smaller when towarding anti-clockwise (B).
4) Screw down screw ④ when adjustment is over, fit thread clamp ⑤(assembly) into the machine,and screw down
screw ②.
Judgment basis for adjustment adequacy of take-up spring: Confirm that the tension of take-up spring is properly
adjusted, draw out the needle thread in direction B. If place B of needle thread is drawn before take-up spring
reaches its lowest position, reduce the tension of take-up spring.
2. Adjustment of the Stroke to the Thread take-up Spring
1) Lower the presser foot by using the lifting lever.
2) Loosen the set screw ②.
3) Rotating the screw ③ in the clamp to adjust, the stroke to the Thread take-up Spring ① will increase when turning
toward the clockwise (A), otherwise decrease when toward anti-clockwise (B). (The standard stroke, under the
state of presser foot was put down is around 6~7mm higher than the slow hook)
4) Securely tighten the screw ②.
Caution:
1. To prevent the unexpected startup of sewing machine, switch off the power supply before the operation is
conducted.
2. The take-up spring is already adjusted properly before the machine leaves the factory as a rule, and it requires
readjustment only for sewing of special materials or usage of special stitch threads.
23. Adjust the synchronization of the needle and hook
1. Unscrewing the two positioning screw ① of hook.
2. Rotating the hand wheel to make needle bar ② lift from the lowest place, when using needle DBX1 and DPX5, the
mark B on needle bar ② should match to the bottom of lower needle bar ② bushing, when using needle DAX1, the
mark D on needle bar ② should match to the bottom of lower needle bar ② bushing.
3. Moving the hook to match the hook point ③ with center of needle ④. Meantime, make the space between the hook
point ③ and needle ④ 0~0.05mm.
4. Tightening two positioning screw ① of hook.
Caution:
1. To prevent the unexpected startup of sewing machine, switch off the power supply before the operation is
conducted.
2. If the clearance between notch on needle and thread hooking tip of rotating hook is too small, rotating hook tip may
be worn; if the clearance is excessive, skipped stitch may take place.
3. It may lead to needle breakage if over-rotating the eccentric wheel towards A direction.
13
TEXI Tronic 1 NEO - Operation manual

 Loading...