Refrigeration Service Operations
100
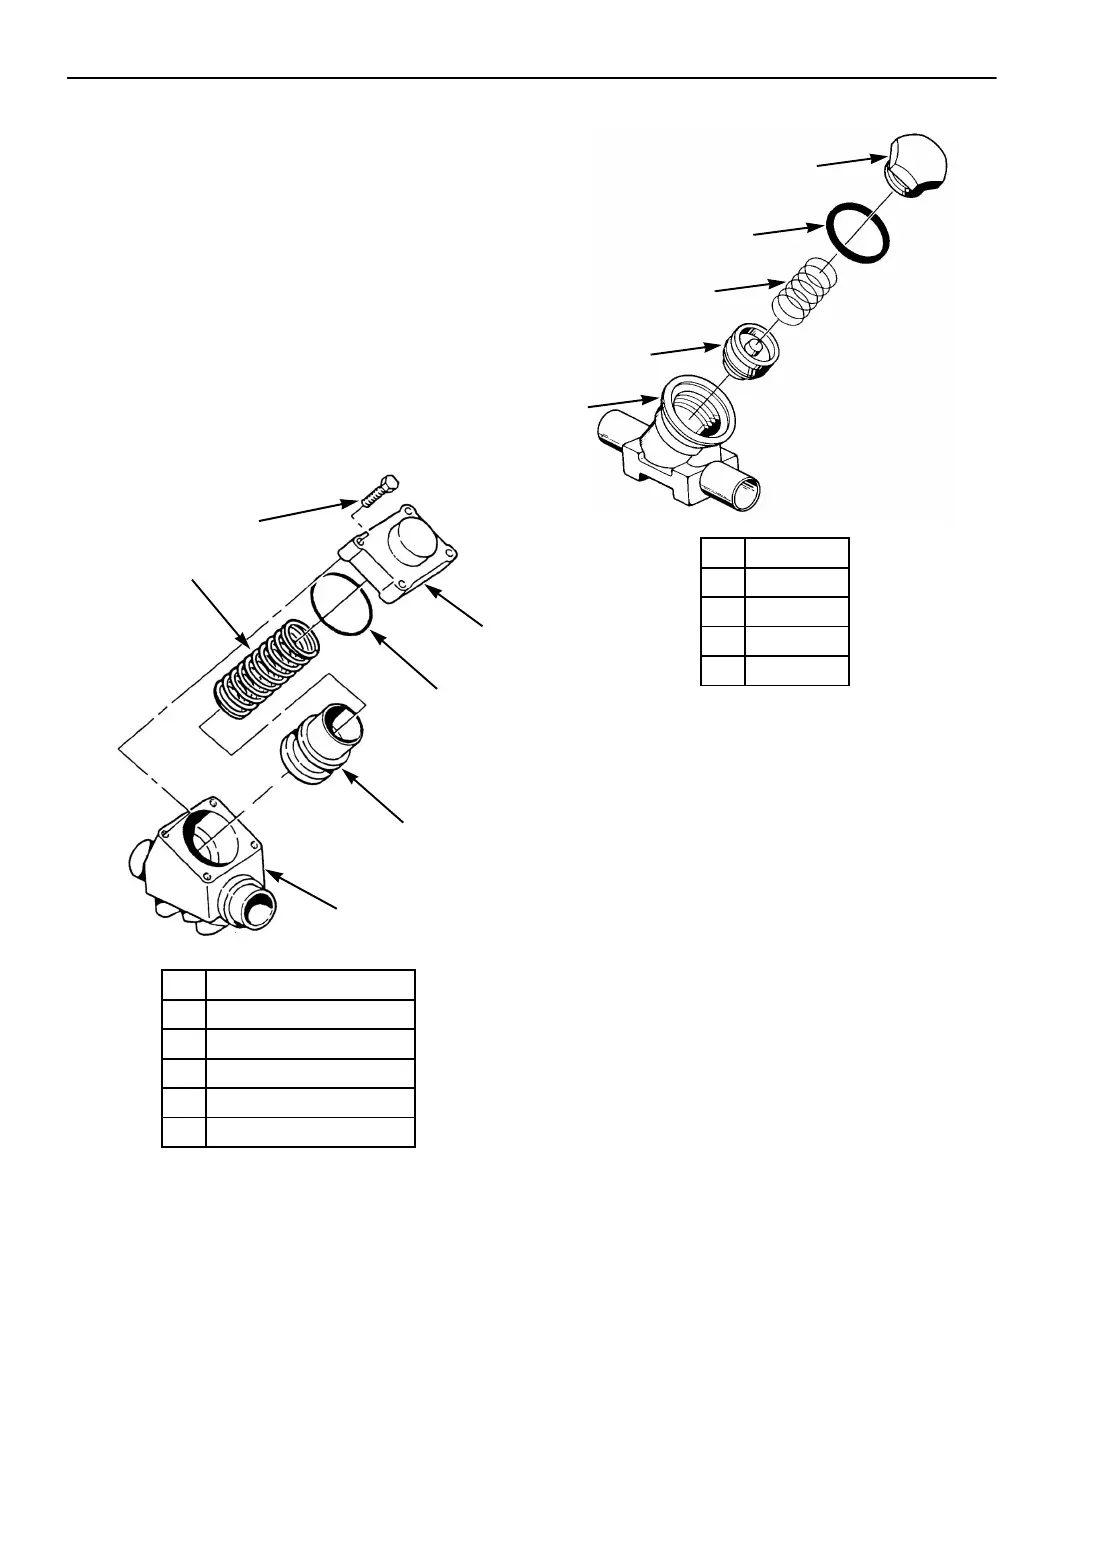
Check Valve Repair (SLCV,
SLCV2, SLCV3, LRCV, and
PVC)
Removal
1. Pump down the low side and equalize pressure
to slightly positive.
2. Remove the evaporator access panels.
3. Remove the cap nut, or the four cap mounting
screws and the cap, from the check valve and
remove the spring and seat.
Installation
1. Inspect the inside of the check valve body for
damage or foreign particles that might adhere
to the seat and damage the new seat. If the
body is damaged, replace the check valve.
2. Install the new seat and spring. Place a new
gasket on the cap and tighten the cap.
3. Pressurize the low side and test for leaks.
4. If no leaks are found, evacuate the system.
5. Install the evaporator access panels.
6. Open the refrigeration valves and run the unit.
Check the refrigerant charge and compressor
oil.
1. Cap Mounting Screw
2. Cap
3. Gasket
4. Spring
5. Seat
6. Body
Figure 68: Suction Line Check Valve
1
4
2
3
5
6
AGA172
1. Cap
2. Gasket
3. Spring
4. Seat
5. Body
Figure 69: Check Valve with Cap Nut
AGA173
1
2
3
4
5
 Loading...