Do you have a question about the Thermo King T-1090 SPECTRUM and is the answer not in the manual?
Explains hazard warning symbols and terms used in the manual.
Outlines general practices for avoiding injury and hazards.
Details risks like confined spaces, hot coolant, and control understanding.
Warns about automatic unit starts and pre-operation checks.
Emphasizes risks of electrical shock during unit servicing.
Covers low voltage risks and hazards from refrigerant gases.
Details PPE for refrigerant/oil and first aid procedures.
Provides first aid for coolant/acid and steps for electrical shock.
Outlines precautions for welding to protect unit electronics.
Advises observing all safety nameplates placed on the unit.
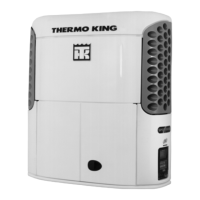
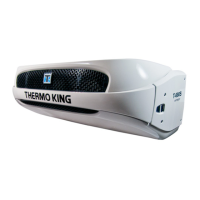
Provides an overview of the T-1090 SPECTRUM unit and its capabilities.
Lists key features and components of the unit.
Lists available optional features for the unit.
Details the diesel engine specifications for the unit.
Discusses ELC maintenance intervals and types.
Explains the function of the centrifugal clutch.
Details the compressor specifications for the unit.
Explains the function and communication of the HMI controller.
Describes the fuel-saving start/stop system.
Explains the purpose and method of defrosting evaporator coils.
Describes unit's wireless communication and fleet monitoring.
Details the electric standby option for units.
Lists standard features for units with SmartPower Electric Standby.
Explains various safety devices that protect the unit.
Identifies key components located in the engine compartment.
Lists and describes major unit components.
Illustrates and labels components in the engine compartment.
Shows front views of S-2 and S-3 remote evaporators.
Describes the truck premium display and its connection.
Explains the information presented on the display.
Provides details on the standard display, zones, and arrows.
Describes the function of the dedicated "hard" keys on the panel.
Explains the multi-purpose "soft" keys and their dynamic functions.
Details the procedure for powering the unit on and off.
Describes how to select a language if multiple are available.
Shows the display during language programming.
Explains using keys to select and confirm language.
Details the process of selecting a language from the menu.
Shows the default display after unit startup or language selection.
Shows the message displayed when the unit powers down.
Shows the display when the unit is off.
Explains the standard display's content and icons.
Details how to adjust the temperature setpoint for a zone.
Explains how to confirm or reject setpoint changes.
Shows the display confirming a new setpoint.
Shows the standard display after a setpoint change.
Explains the procedure for starting the diesel engine.
Displays the screen shown during engine starting.
Details how to start the electric motor for standby operation.
Displays the screen shown during electric motor starting.
Explains how the unit switches between diesel and electric power.
Shows the prompt for switching to electric standby power.
Displays the screen during programming for electric standby.
Shows the prompt for switching to diesel mode.
Displays the screen during programming for diesel mode.
Details how to manually start a defrost cycle.
Shows the screen for selecting a zone for defrost.
Displays the screen indicating a defrost cycle has started.
Shows the display during a defrost cycle.
Explains how a defrost cycle can be terminated.
Describes how to enable high speed lockout for noise sensitive areas.
Shows the key used to toggle high speed lockout.
Displays the screen during high speed lockout programming.
Shows the display indicating high speed lockout status.
Explains how to access unit gauges using the GAUGES key.
Shows the GAUGES key.
Explains navigation and locking gauges.
Lists various unit gauges that can be viewed.
Explains how to view unit sensor readings.
Explains navigation and locking sensor readings.
Lists various temperature sensors and their readings.
Explains how to access and navigate the main menu.
Shows the MENU key for accessing the main menu.
Displays the Pretrip submenu selection.
Lists and describes various options available in the Main Menu.
Explains how to select an alternate language.
Shows the SELECT key for language selection.
Explains using keys to select and confirm language.
Shows the display during language programming.
Shows the standard display after language change.
Explains how to access languages from the standard display.
Shows the language menu for selection.
Introduces the different types of alarms.
Describes Log Alarms and their indication.
Describes Check Alarms and their indication.
Details Shutdown Alarms and their indicators.
Describes Prevent Alarms and how the unit attempts to resolve them.
Explains how alarm codes are displayed during a Pretrip Test.
Describes how alarms change status when switching power modes.
Explains the appearance of the Alarm Icon.
Details how to clear various alarm codes.
Explains using the Alarm Menu to display and clear alarms.
Shows the SELECT key for accessing the Alarm Menu.
Displays the screen when no alarms are present.
Shows an example of an alarm code and its meaning.
Shows the NEXT key for viewing subsequent alarms.
Shows the HELP key for alarm information.
Provides important notes regarding alarm behavior and clearing.
Lists alarm codes, their descriptions, and operator actions.
Continues the list of alarm codes and operator actions.
Continues the list of alarm codes and operator actions.
Continues the list of alarm codes and operator actions.
Explains how to access the datalogger menu.
Shows the MENU key for accessing datalogger functions.
Shows the SELECT key for the datalogger menu.
Explains how to send a "Start of Trip" marker.
Explains how to access hourmeter information.
Shows the hourmeter display.
Lists and defines various hourmeters.
Explains how to select different operating modes.
Explains how to enable and disable keypad lockout.
Explains how to activate and use Sleep Mode.
Shows the MENU key for accessing mode functions.
Shows the SELECT key for the mode menu.
Explains how to scroll through mode options.
Details how to switch between CYCLE-SENTRY and Continuous modes.
Shows the screen for changing the CYCLE-SENTRY mode.
Shows the SELECT key to change the mode.
Displays the screen during mode change programming.
Shows the confirmation of a mode change.
Shows the mode menu when in continuous mode.
Explains how to select Fahrenheit or Celsius units.
Shows the MENU key for temperature unit selection.
Shows the SELECT key for the temperature unit screen.
Shows the SELECT key to display the temperature unit screen.
Details how to select Fahrenheit or Celsius display units.
Explains how to enable keypad lockout.
Shows the SELECT key for keypad lockout.
Shows the confirmation screen for keypad lockout.
Shows the standard display with the keypad locked.
Explains how to activate and use Sleep Mode.
Shows the MENU key for sleep mode functions.
Shows the SELECT key for the sleep mode prompt.
Shows the SELECT key to choose the sleep mode menu.
Shows the menu for starting sleep mode.
Shows how to enter sleep mode immediately.
Displays the unit status when in sleep mode.
Shows the YES key for sleep mode menu.
Shows how to confirm the wake-up day.
Shows how to confirm the wake-up hour.
Shows how to confirm the wake-up minute.
Shows how to confirm running a Pretrip Test on wake-up.
Shows the unit in sleep mode.
Explains the purpose and types of Pretrip Tests.
Lists conditions for running Pretrip Tests.
Lists conditions that prevent Pretrip Tests from running.
Details the order of tests performed during a Pretrip Test.
Provides factors to consider when performing a Pretrip Test.
Outlines the steps for initiating and performing a Pretrip Test.
Shows the MENU key for accessing the Pretrip Menu.
Shows the SELECT key for the Pretrip Menu.
Displays the screen during a running Pretrip Test.
Shows the prompt if alarms are not cleared before a Pretrip Test.
Shows the display during the Pretrip Test.
Shows the unit performing a Cool Test during Pretrip.
Displays Pretrip Test results and possible alarm codes.
Allows manual selection of diesel or electric mode.
Explains how to adjust the HMI display brightness.
Shows the SELECT key for the brightness menu.
Explains using keys to select display brightness.
Shows the display during brightness adjustment.
Explains how to view the system time and date.
Shows the MENU key for time functions.
Shows the SELECT key for the time menu.
Displays the current system time and date.
Provides guidance on loading cargo and performing inspections.
Details tasks for inspecting the loaded cargo.
Recommends periodic inspections during transit.
Continues enroute inspection guidelines and troubleshooting.
Lists detailed specifications for the unit's engine.
Details approved engine coolant types and compatibility.
Lists electrical system specifications.
Details fuse types, sizes, and functions.
Lists specifications for electric standby systems.
Provides data on electric motor and overload relay settings.
Details standby power cord and plug specifications.
Outlines the importance and schedule of unit maintenance.
Provides a detailed schedule for unit inspections and servicing.
Continues maintenance schedule for electrical and refrigeration.
Continues maintenance schedule for unit components and condenser unit.
Details maintenance for the condenser unit.
Continues maintenance schedule for engine, electrical, and refrigeration systems.
Continues maintenance schedule for refrigeration and structural components.
Details maintenance for remote evaporator units.
Shows locations for engine and compressor serial numbers.
Shows the location of the unit's serial number plate.
Shows the location of the evaporator serial number plate.
Mentions the emissions warranty coverage.
| Refrigerant | R-452A |
|---|---|
| Weight | Unit 785 kg, Condenser 100 kg |
| Dimensions | Unit 2120 x 870 x 665 mm, Condenser 1530 x 570 x 260 mm |
| Power Supply | Diesel engine |
| Power Source | Diesel |
| Voltage | 12V DC |
| Refrigeration Capacity | 6700 W |
| Temperature Range | -20°F to 50°F (-29°C to 10°C) |


