EN
14
MOTORISED 720P HD WIFI IP CAMERA
D - CONFIGURATION AND USE
Note: it is possible to connect a camera that is not
present on the network to which the computer is
connected. In step 3 above, enter the camera UID
manually: as it is not on the same network it will not
be detected and lled in automatically.
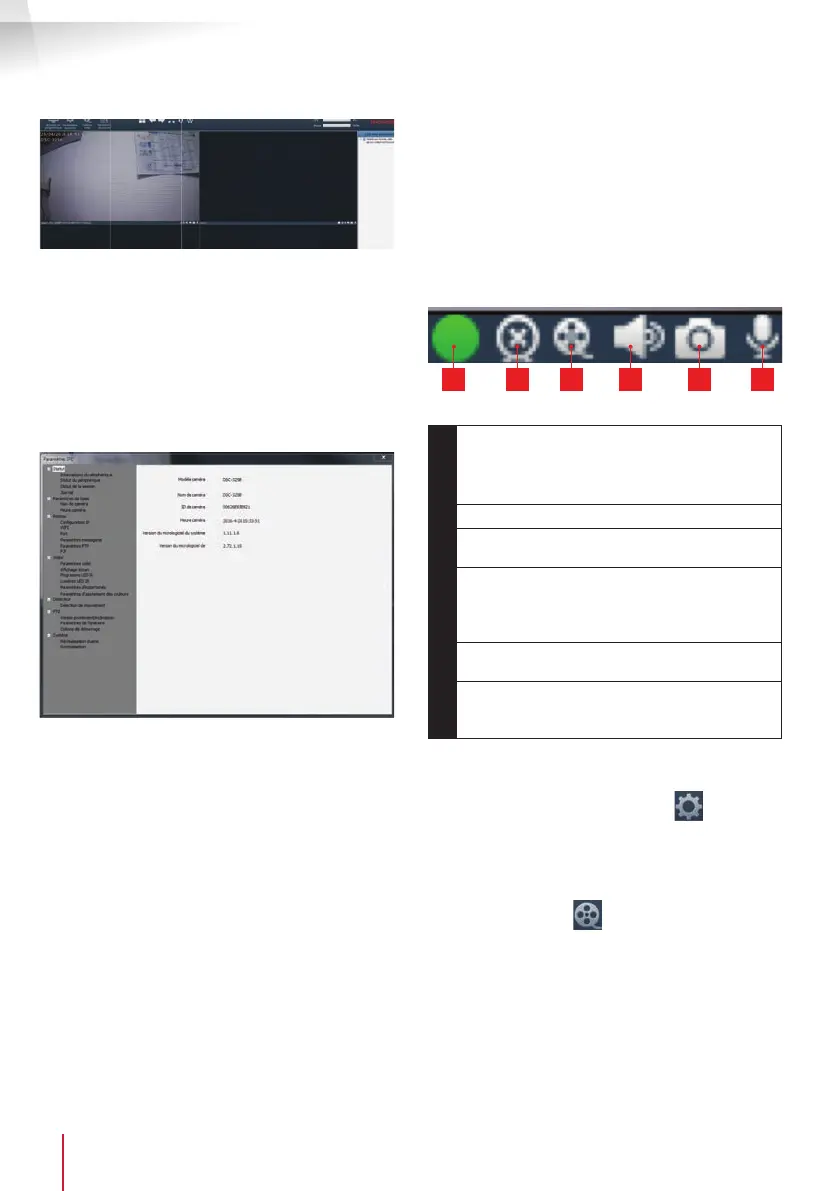
All your camera settings can be accessed remotely
by right-clicking on the camera name in the list
(or on the image that it displays), then clicking on
"Paramètres caméra" [Camera settings]:
• Status menu: shows you the current status of
the camera: rmware version, user name, main
functions activated, last operations performed.
• Basic settings: let you set the camera name
and time, which can be embedded into the
video of the camera.
• Network: gives you access to all the settings
related to network use: IP con guration, WiFi
con guration, wit h the option of switching the
camera from a wired to wireless connection,
ports used, email alert settings, FTP server
access and plug and play access settings.
• Video: gives you access to all the settings
for camera video management: resolution,
number of images per second, night vision
operation, con guration of photos taken by
the camera, contrast, brightness, etc.
• Detector: here you can activate and con gure
the movement detection function and the
actions to be launched if an intrusion is
detected.
• PTZ (compatible cameras only): here you will
nd all of the settings linked to camera motor
management if it is tted.
• System: allows you to reset or restart the
camera.
When a camera displays its image on the screen,
additional commands are displayed in the bottom
right corner:
1 2 3 4 5 6
1
This icon shows the presence of records on
the computer used (white when idle, green
when programmed/on detection/manual
records are created)
2
Broadcast stopped and image closed
3
Start a recording on the disk of the computer
used*
4
Activation/deactivation of the camera
microphone (cameras tted with the
microphone only, your computer must provide
the speakers)
5
Take a photo and store it on the disk of the
computer used*
6
Activation/deactivation of the camera speaker
(cameras tted with the speaker only, your
computer must provide a microphone)
* For the save and capture functions to be
accessible, the disk to use must be set beforehand.
Click on the System settings icon
to tell the
software where to save the photos and videos on
the computer hard drive.
To view videos saved on the computer, client on the
Video playback icon
:
 Loading...