- 5 -
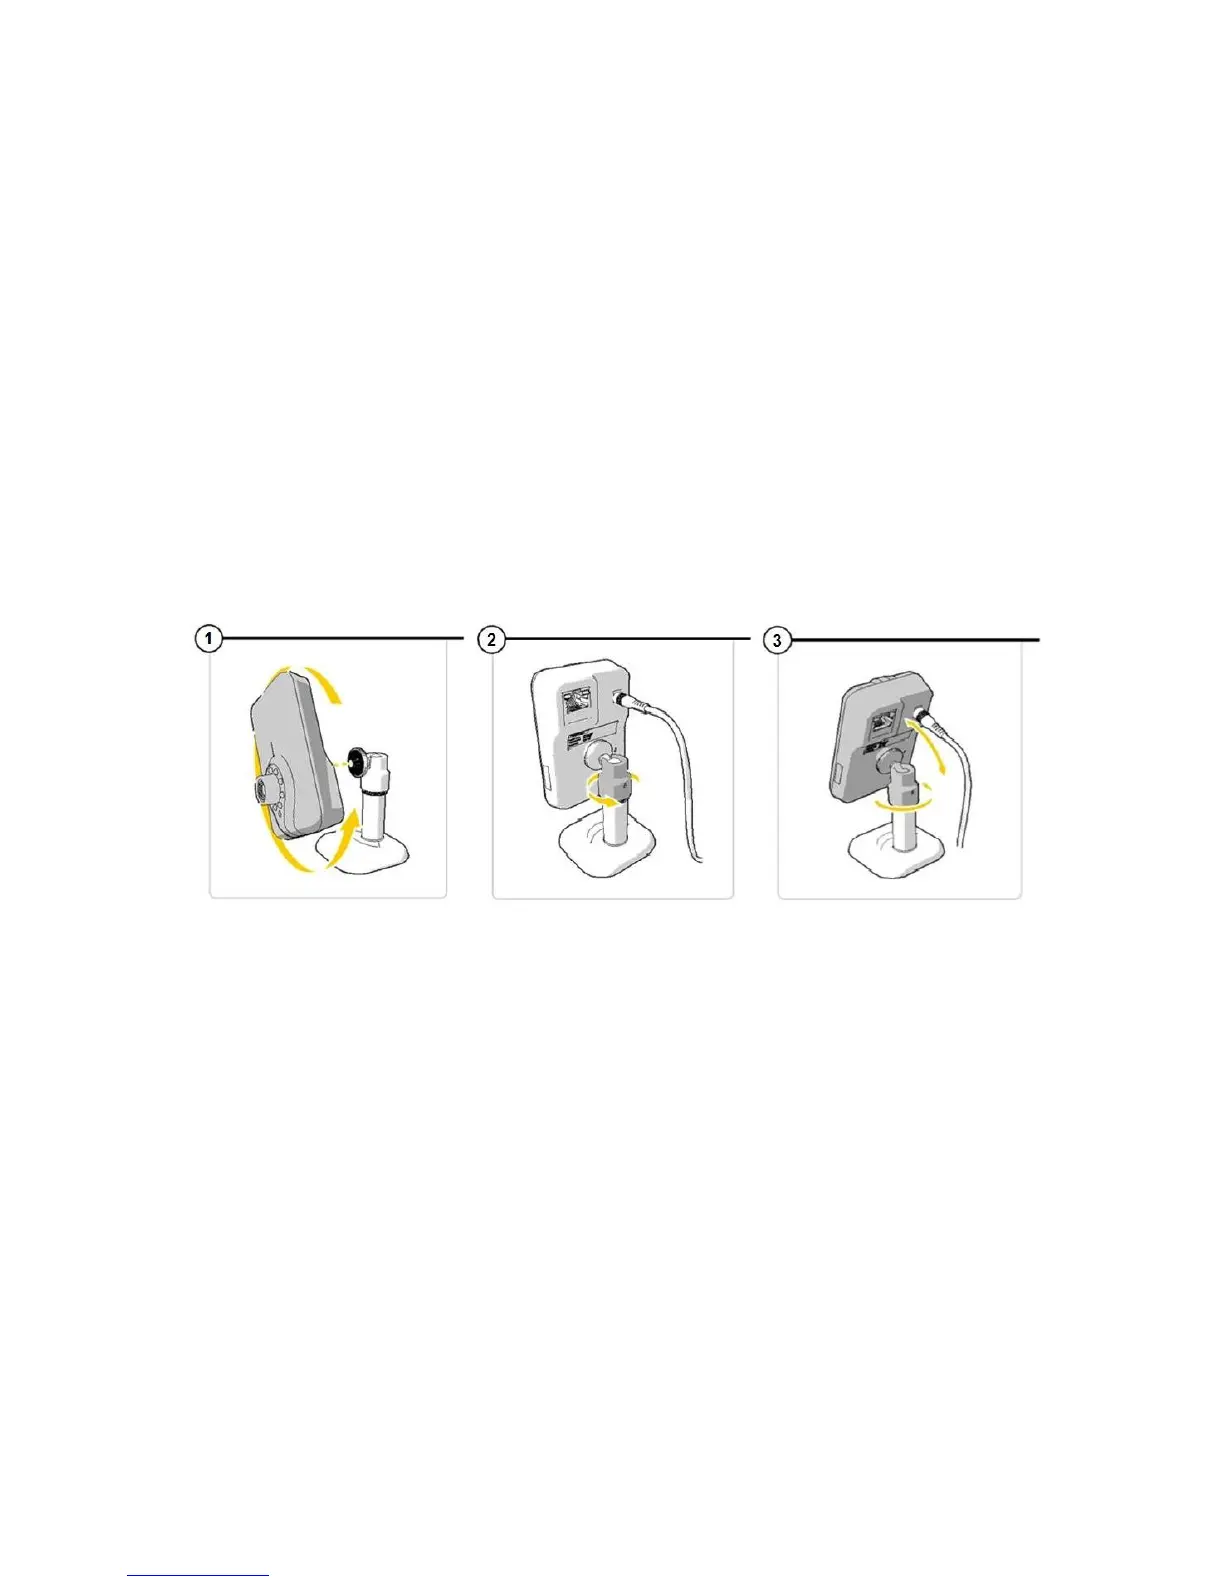
1. To mount the camera on the stand, twist the camera into the
screw on the stand. (See image 1).
2. Use the screw-plate on the back of the camera to tighten the grip
and hold the camera in place.
3. To twist the camera on an angle or landscape, the stand has a
rotating casing where the ball joint is. Twist this to loosen the ball
(See image 2).
This will then let you move the camera up and down or landscape or
portrait.
4. Tighten the casing where the ball joint is to hold securely in place
(See image 3).
Connecting the camera
Connect the power adapter to the back of the camera then plug
into a power outlet. (See image 1)
Connect one end of the supplied Ethernet cable to the network
port on the camera. (See image 2).
Connect the other end of the Ethernet cable to the router.
The green LED light on the back of the camera and on the front of the
camera will light up and flash when the camera has successfully
connected to a network. You can now operate your IP Camera using
your smartphone or PC.