- 6 -
To mount the camera to a surface using the screws such as a
wall, please see below:
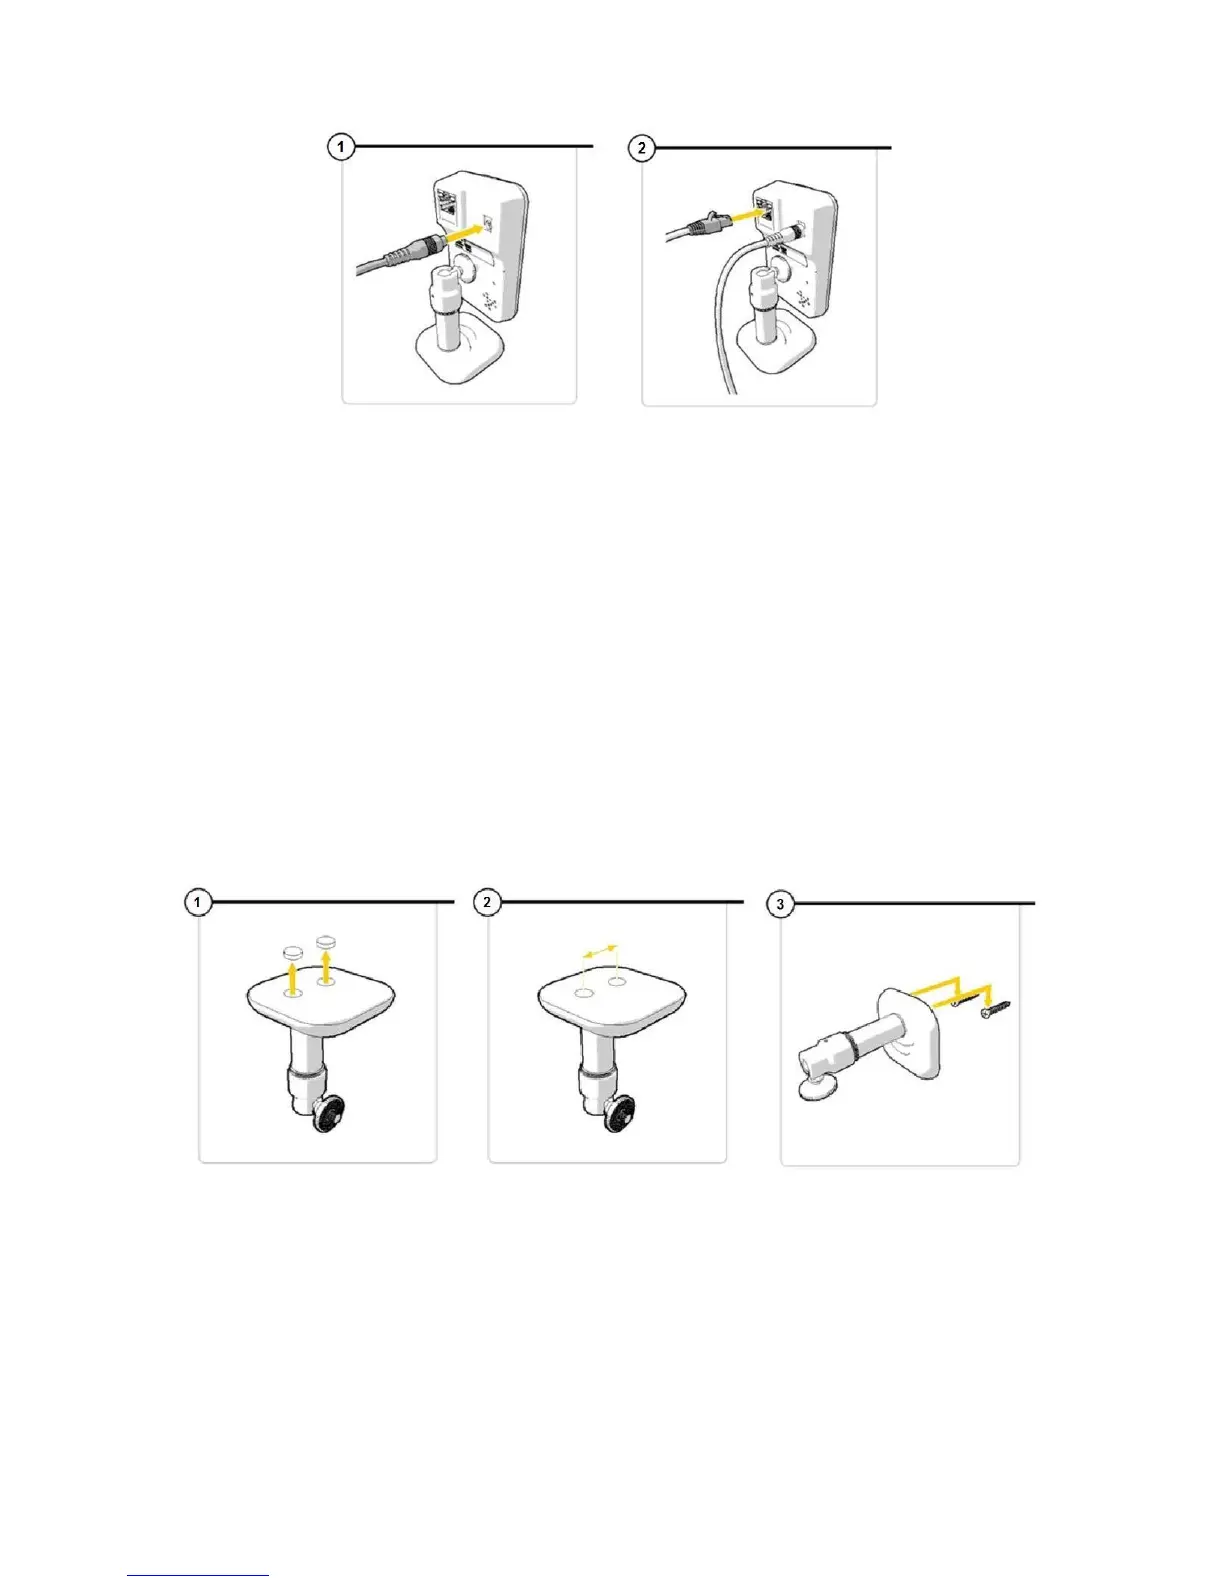
Mounting the camera to the wall
Remove the rubber case at the bottom of the stand to expose
two holes. (See image 1)
Measure the distance from the holes to ensure that the camera
will fit nicely to the screws. (See image 2)
Drill the screws into the wall. The base of the camera should now
fit and slide into this. (See image 3)
Please note:
Only do this once you have set-up the camera
If the surface is too hard for the screws (stone/ concrete),
you will need to drill holes and use the screw plugs which
are included.