PK-232 MBX – OPERATING MANUAL RADIO INSTALLATION
4/91 3-1 25
CHAPTER 3 – RADIO INSTALLATION
3.1 Overview
This chapter describes how to connect the PK-232 to your radio receiver or transceiver. To
receive digital transmissions you must connect the receiver audio and Ground to your PK-
232. To transmit you will have to add connections to the microphone or low-level transmit
audio and to the Push-To-Talk (PTT) circuit of your transceiver.
The most convenient way to connect your transceiver is through a rear panel ACCESSORY
Connector (if your transceiver has one). You may also use the Microphone connector if you
prefer. MAKE SURE THAT YOU REMOVE POWER FROM THE PK-232 AND YOUR RADIO BE-
FORE MAKING ANY CONNECTIONS.
3.1.1 Equipment Required
You will need the following for complete transmit/receive connections:
o Your PK-232 Data Controller, computer or Computer Terminal and software as dis-
cussed in Chapter 2 of this manual;
o Timewave-supplied shielded cable for each radio you wish to connect;
o your radio and its power supply;
o microphone or accessory-plug connector(s) required by your radio;
o soldering iron and solder if the radio connectors require it;
o wire cutters and strippers and/or a small pocket knife.
3.2 Receive-Only Radio Connections
If you are a Short Wave Listener (SWL) or only interested in receiving signals, the connec-
tions to the PK-232 are simple. Even if you are planning on transmitting and receiving, you
may initially want to just receive to become familiar with the PK-232. Taking a little time to
tune in and "read the mail" is an excellent way to get acquainted with the various modes be-
fore going on the air.
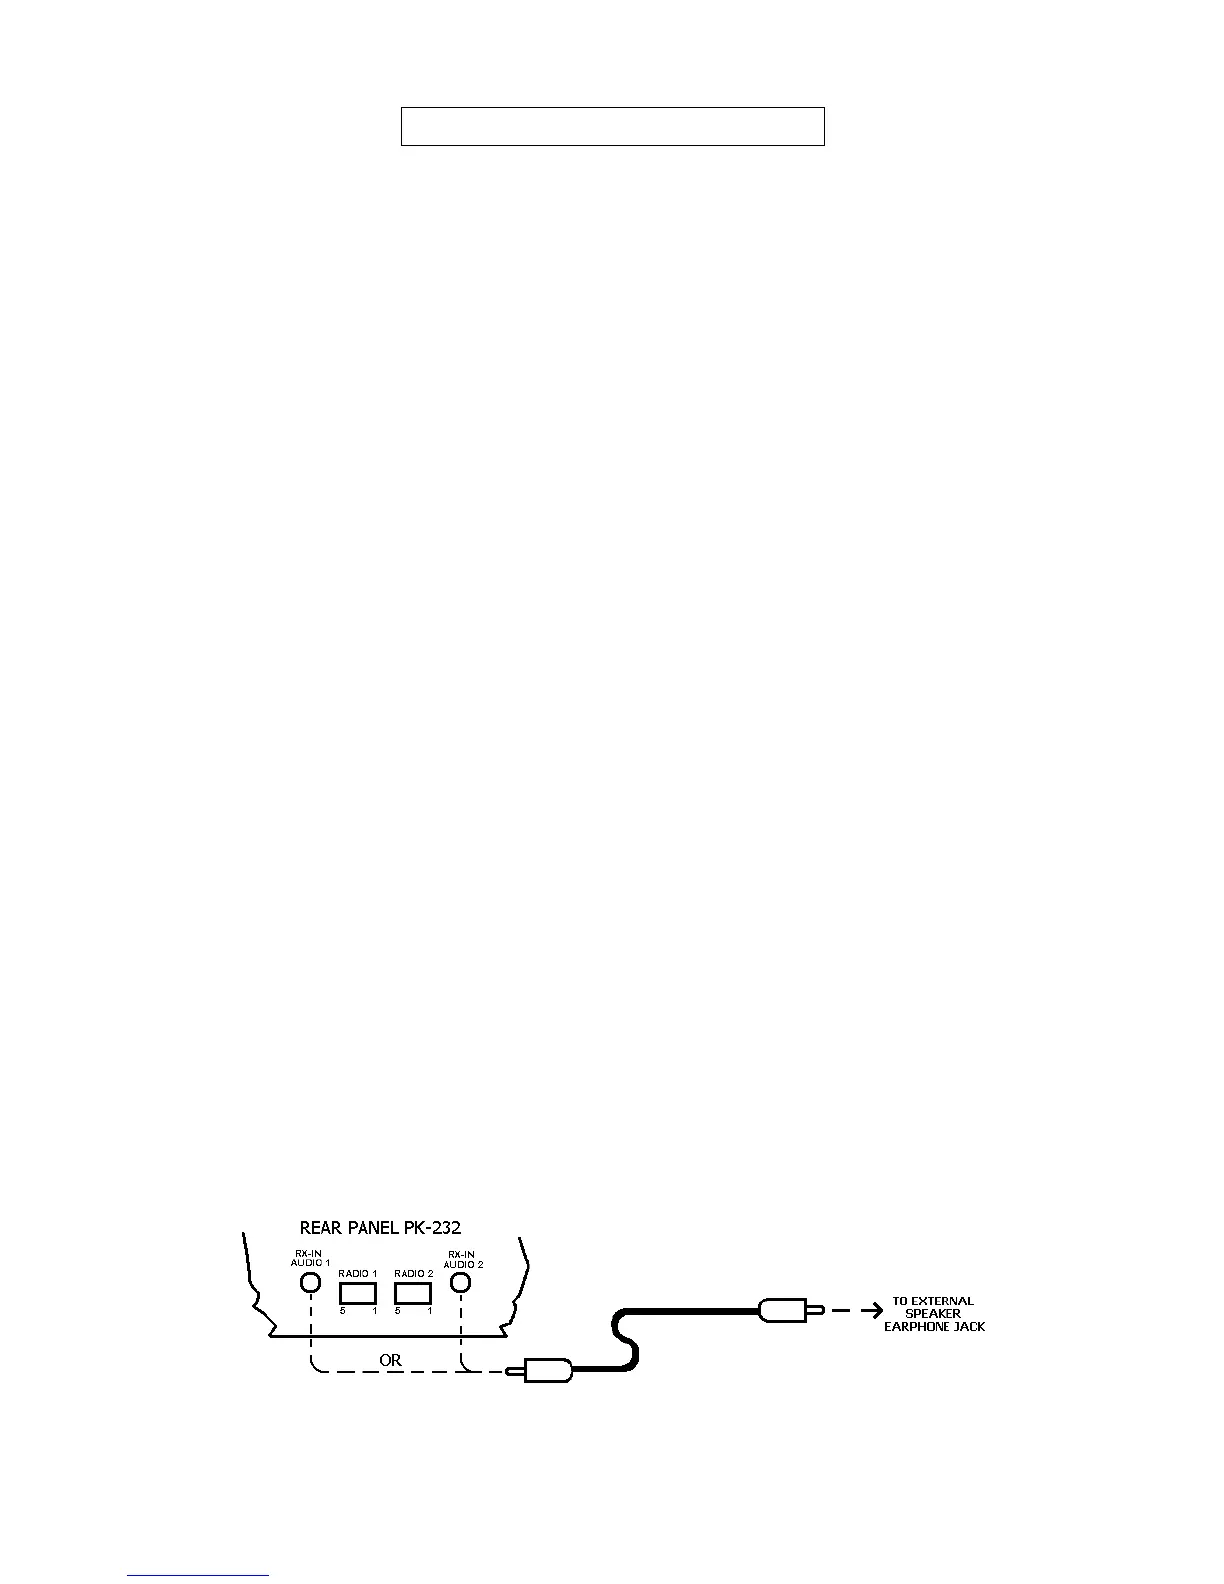
For receive operation, only the audio from the receiver or transceiver (and Ground) needs to
be connected to the PK-232. This can be accomplished with the included 3.5 mm audio ca-
bles. Plug one end of the audio cable into RX-IN AUDIO 1 or AUDIO 2 jack on the rear of
the PK-232 as shown in figure 3-1 below. The other end of this cable should be connected
to the External Speaker/Earphone jack on the radio you will be using.
NOTE: Some Short Wave receivers come with low-level outputs designed for use with a
tape recorder. These outputs typically do NOT have enough level to drive the
PK-232.
Figure 3-1 Receive audio connection to the PK-232.