Cleanup
Maintaining a clean gun is important to ensure
trouble-free operation. Flush the gun after
each use and store in a dry location. Do not
leave the gun or any of its parts in water or
solvents.
Special cleanup instructions for
use with ammable solvents:
• Always ush spray gun preferably outside
and at least one hose length from spray
pump.
• If collecting ushed solvents in a one
gallon metal container, place it into an
empty ve gallon container, then ush
solvents.
• Area must be free of ammable vapors.
• Follow all cleanup instructions.
tention
The sprayer, hose, gun and
gun lter should be cleaned
thoroughly after daily use.
Failure to do so permits material
to cake, seriously aecting the
performance of the unit.
Always spray at the lowest
possible pressure when the
tip and tip guard have been
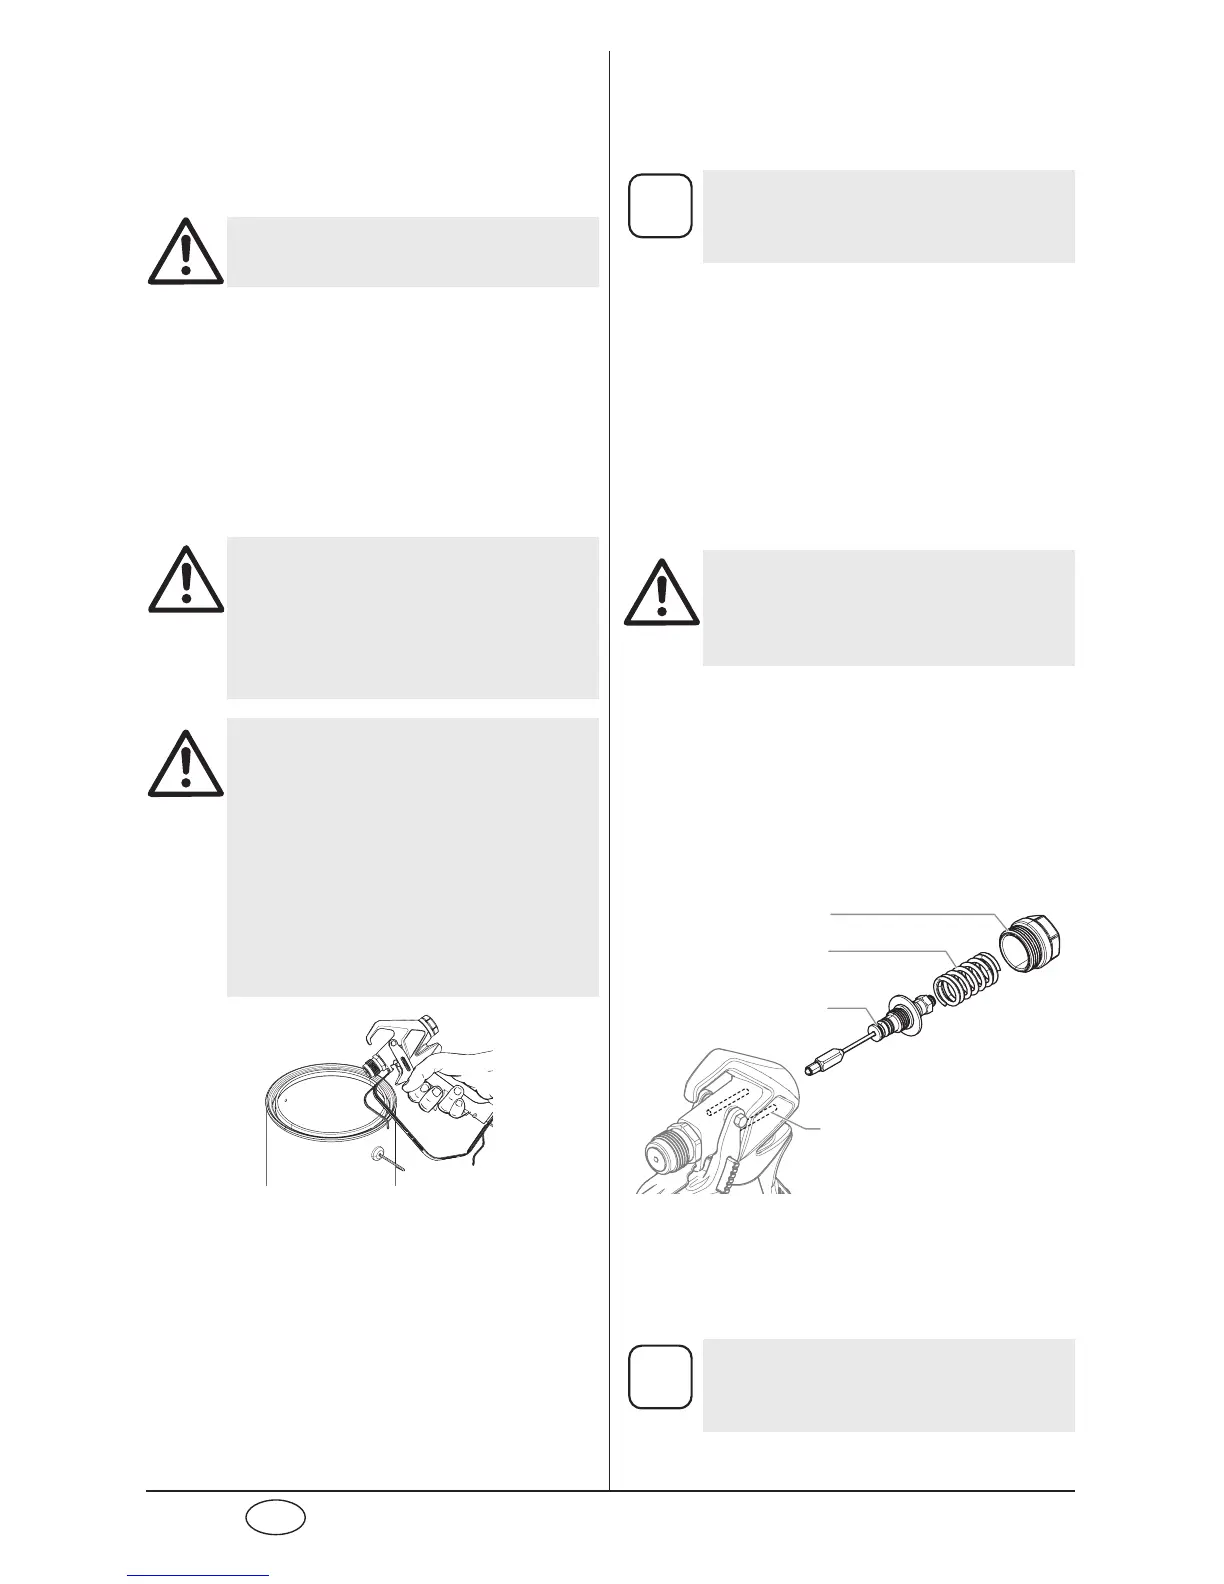
removed. To clean the airless gun,
hose and spray device, use only
water or a suitable solvent. Static
electricity buildup may result in a
re or explosion in the presence
of ammable vapors. Hold
the gun rmly against a metal
container while ushing.
Maintenance
Follow all safety precautions as described in
the Safety Precautions section of this manual
before proceeding.
Refer to the Parts List section
in this manual for part
identication.
Replacing/Servicing the Seal Assembly
If your spray gun leaks or spits at the tip when
you release the trigger, replace the ball valve
located on the packing seal assembly and
reverse the seat located in the diuser.
To replace the ball, order kit P/N 0538221 and
follow the instructions included with the kit.
The entire packing seal assembly can also
be replaced (less often than the ball valve).
Follow the instructions below.
Never attempt to perform
maintenance on the spray gun
without rst performing the
“Pressure Relief Procedure.”
1. Perform the “Pressure Relief Procedure”
and disconnect the uid hose from the
gun.
2. Remove the end cap (1) and the packing
spring (2) from the rear of the gun head.
3. Using a 3/8” socket, remove the packing
seal assembly (3) from the rear of the gun
head.
2
3
4
4. Soak the removed parts in the
appropriate solvent and wipe clean.
5. Inspect the parts for wear or damage and
use new parts during reassembly of the
gun, when necessary.
i
Lubricate all packings and
moving parts before reassembly
with a lithium-based grease.