4 STROKES
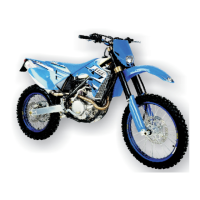
Separate the sponge element (3) from the plastic cage (4).
Carefully wash the sponge element with a special cleaning solution
and let it air dry thoroughly. If necessary, squeeze the sponge gently
but never wring it. Clean the plastic cage and the filter case and check
that the sleeve that connects the throttle body or the carburettor to the
filter case is intact and positioned correctly.
Reassemble the sponge and the cage and reassemble the air filter,
positioning it correctly on the support surface. Make sure none of the
sponge edges are lifted or are non-adherent to the support surface.
Tighten the butterfly screw (2) again.
Reposition the battery holder (1), if available, and reassemble the seat.
WARNING
- DO NOT CLEAN THE SPONGE ELEMENT WITH PETROL OR OIL THAT MAY
CORRODE IT. FOR PROPER MAINTENANCE USE SPECIFIC PRODUCTS AVAIL-
ABLE ON THE MARKET TO CLEAN AND LUBRICATE.
- NEVER START THE MOTORCYCLE WITHOUT THE AIR FILTER. DUST AND DIRT
MAY CAUSE DAMAGE AND SERIOUS WEAR.
- MAKE SURE THAT THE SEAL BETWEEN THE RUBBER SLEEVE AND FILTER
CASE IS PERFECT. MOREOVER, MAKE SURE THAT THE SPONGE ELEMENT
HAS BEEN CORRECTLY ASSEMBLED ON THE PLASTIC CAGE. ANY LEAKS
CAN BRING SAND OR DIRT INTO THE ENGINE.
CHECKING MANUAL DECOMPRESSOR ADJUSTMENT
(ALL 530F) (A)
Bring the engine shaft to the UDP with closed valves and use the manual
decompression lever. There must be 5 mm of play at the end of the lever.
The end of play corresponds to the point where the lever hardens as it
starts to open the right-hand discharge valve. Adjust play if necessary.
In order to do so, move the protective cap (1), loosen the counter-nut,
and tighten or loosen the adjustment screw. Tighten the counter-nut
and put the protective cap back in its place.
WARNING
LACK OF PLAY IN THE DECOMPRESSION LEVER MAY DAMAGE THE ENGINE.
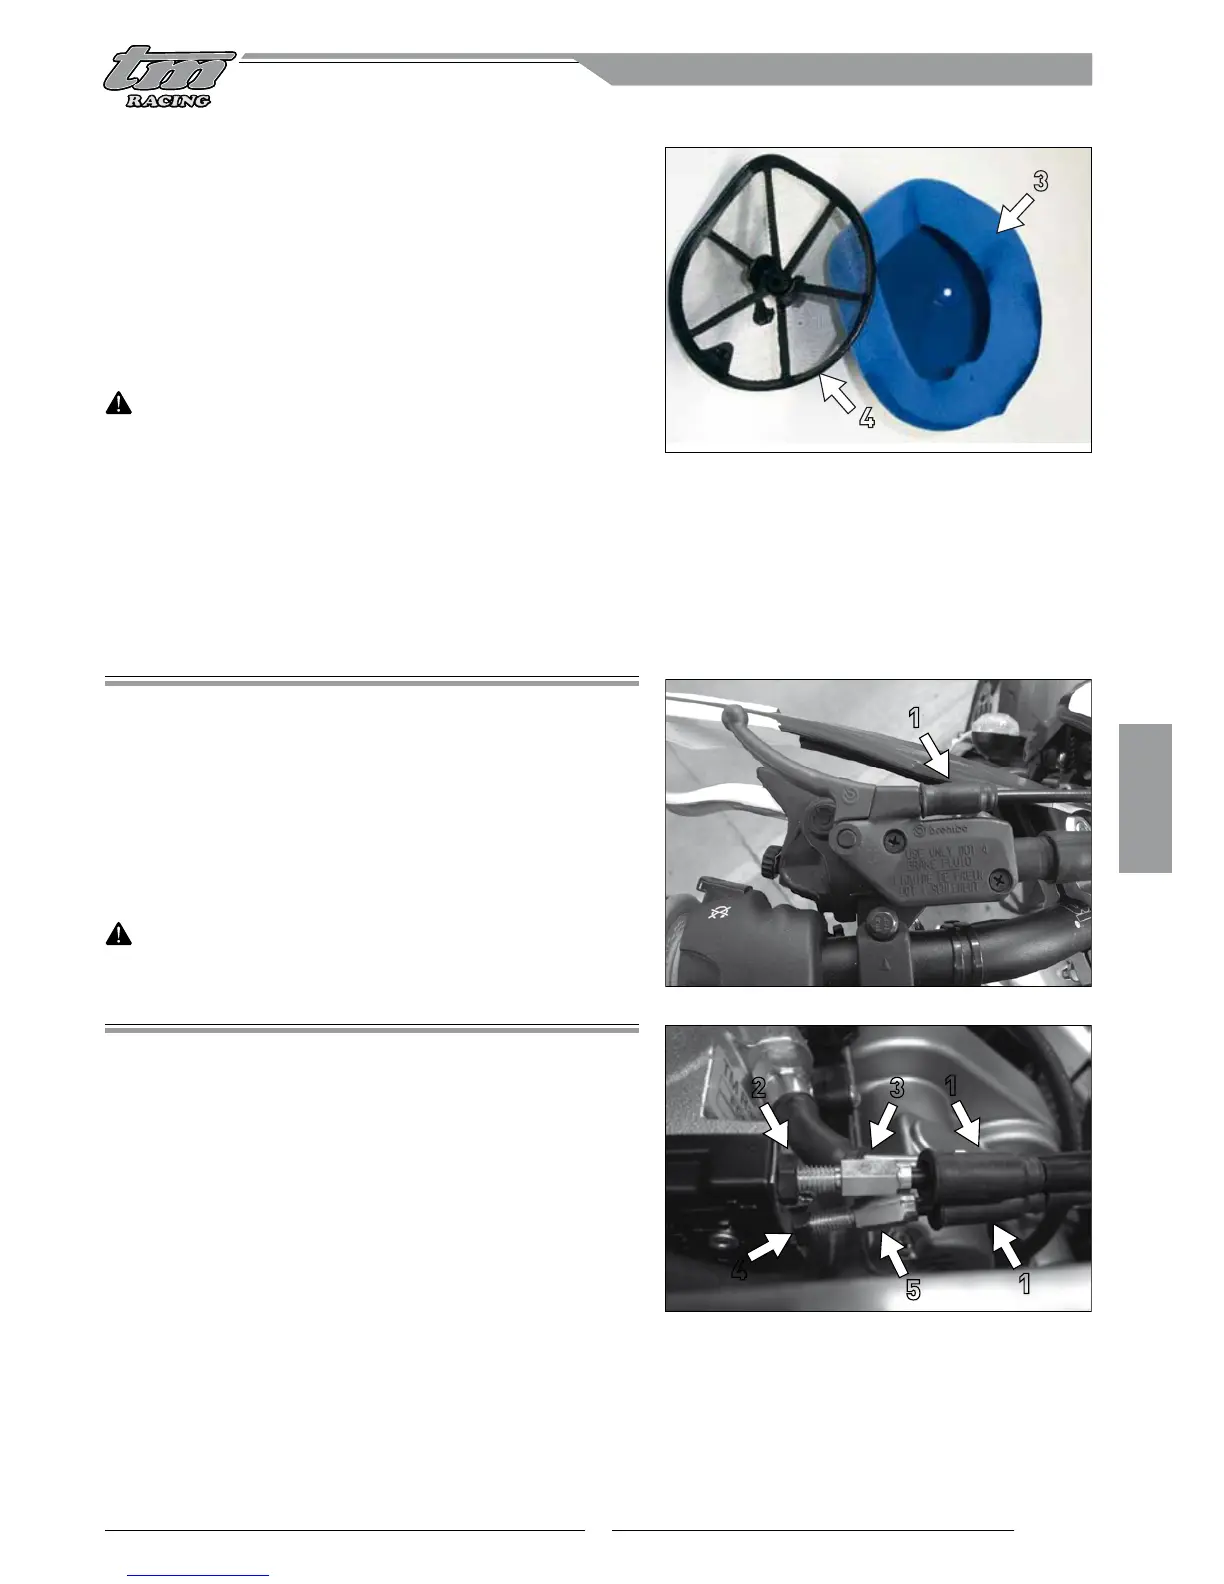
ADJUSTING THROTTLE CONTROL CABLES
THROTTLE BODY (ALL 250Fi - 450Fi EN/MX/SMR/SMM/SMX)
The throttle grip should be adjusted according to the preference of the
rider. However, it must always have at least 4-5 mm of play. To adjust
the play, disassemble the seat and the tank with the conveyors. Move
the protective caps (1). Adjust the opening cable (upper) and then the
closing cable (lower). Refer to the information provided on the sheaths.
OPENING CABLE
Loosen the counter-nut (2) and tighten or loosen the adjuster (3) until you
obtain the play required. Tighten the adjuster to increase play. Loosen
the adjuster to reduce play. Tighten the counter-nut and make sure the
grip rotates smoothly. Keep in mind that play is reduced slightly when
the tank is mounted.
3
4
4.3 ENGINE MAINTENANCE
1
1
32
4
5
1
 Loading...