19
Illustration Procedure
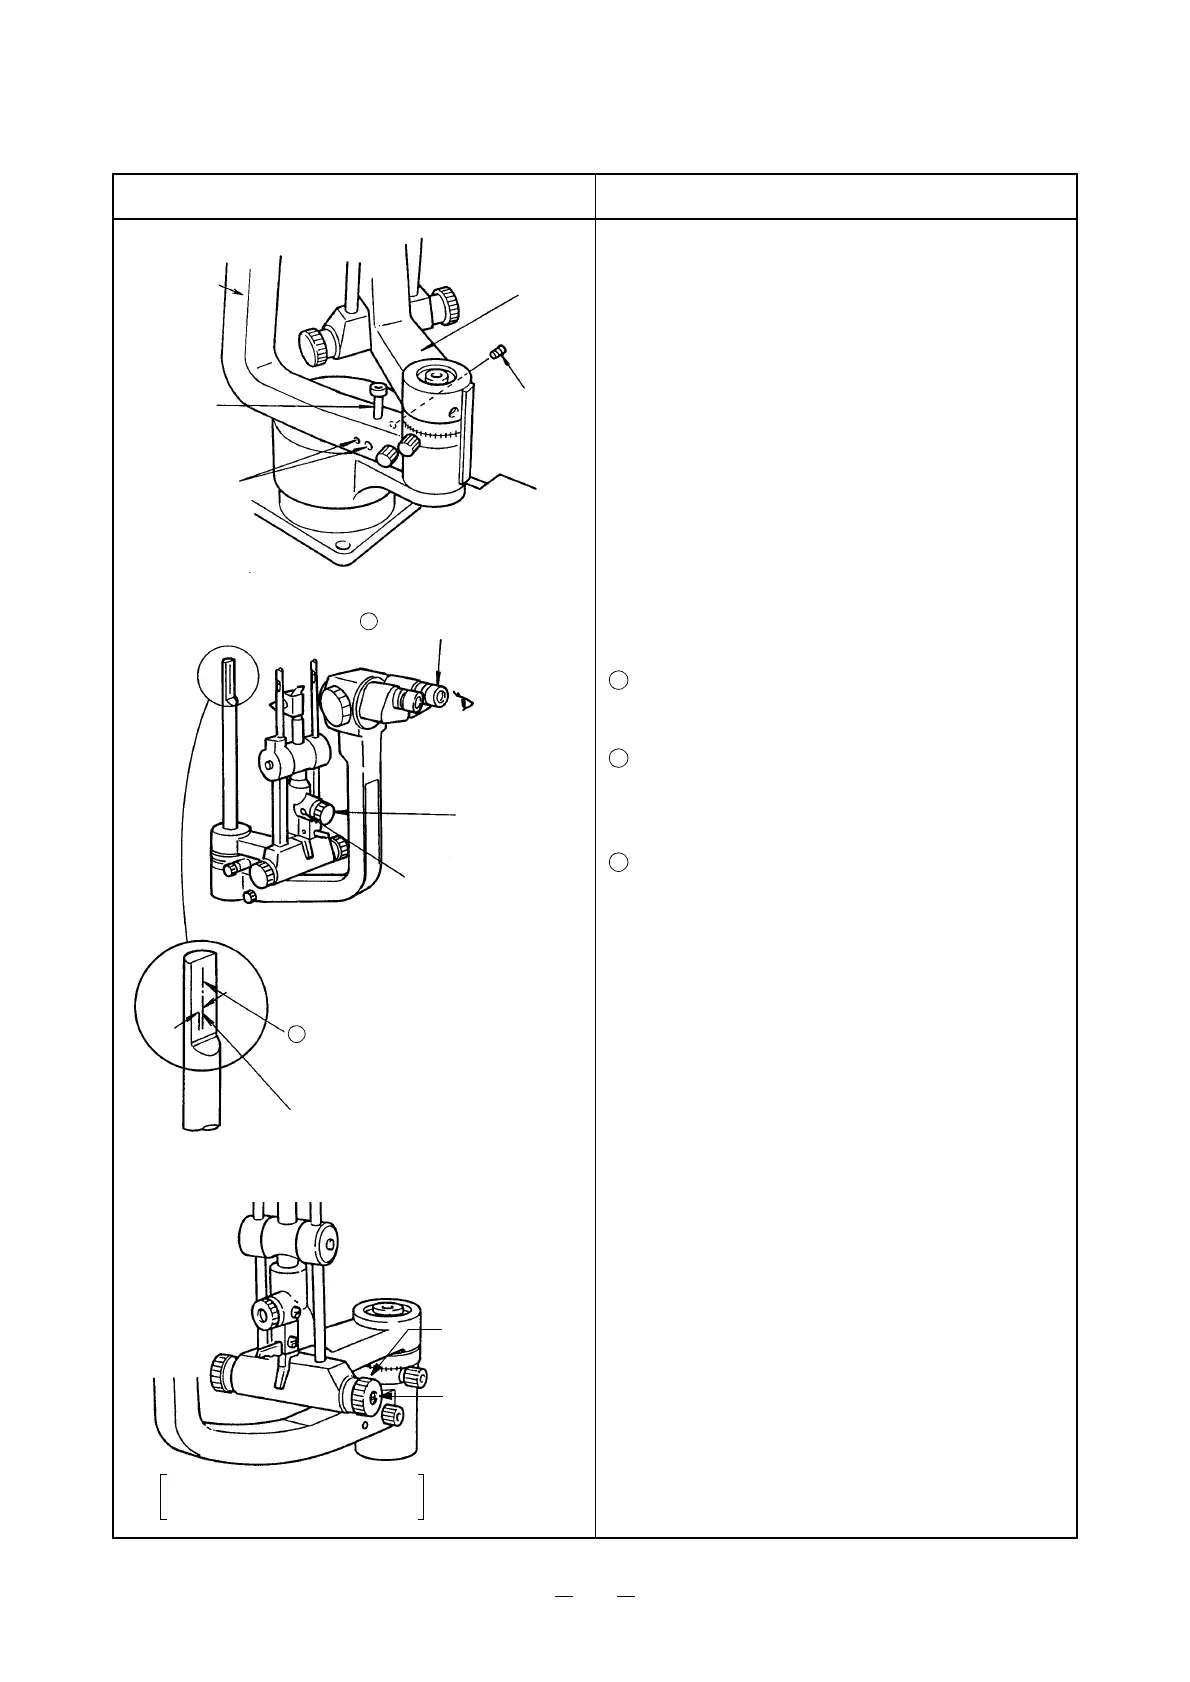
11. Adjustment of click power of small and large
arms
Adjust the click power for the proper weight with
the screws 6SV3×8S (2 pcs.) and 6SU3×6S (1 pc.)
and then tighten them fully.
* When the illumination arm is rotated, the click
stop should be firmly sensed and it should be pos-
sible to prevent the microscope arm from rotat-
ing.
12. Adjustment of inclination of slit image
Put the eyepiece with scale into the microscope
unit and adjust the diopter with the diopter
adjusting ring.
Project the slit image after inserting the focusing
rod for checking balance.
(Project the slit image as narrow as possible to
obtain the maximum length.)
Loosen the eccentric tightening screw
(6SU5×6SUS). Adjust the inclination to be
within 1° with the eccentric screw (44670 3513).
After adjustment, apply the screw lock.
13. Adjustment of slit width adjusting force
When the slit width adjusting knob operation
becomes too light and slit narrows the width by
itself, adjust it by tightening the screw (U4×4S) in
the center of slit width adjusting knob on the right.
Large arm
Click
6SV3×8S
Small arm
6SU3×6S
(2 pcs.)
(1 pc.)
Eyepiece with scale
Eccentric
Eccentric tightening
Within 1°
[Within 0.14mm at the slit length 8mm]
screw
screw
Focusing rod for checking balance
(This rod must have a vertical
marking line in the center.)
1
2
When slit narrows:
100~300g
When slit widens:
200~700g
Slit width
U4×4S
adjusting knob
1
2
3
 Loading...